A
B
Fig. 27
MITER GAGE
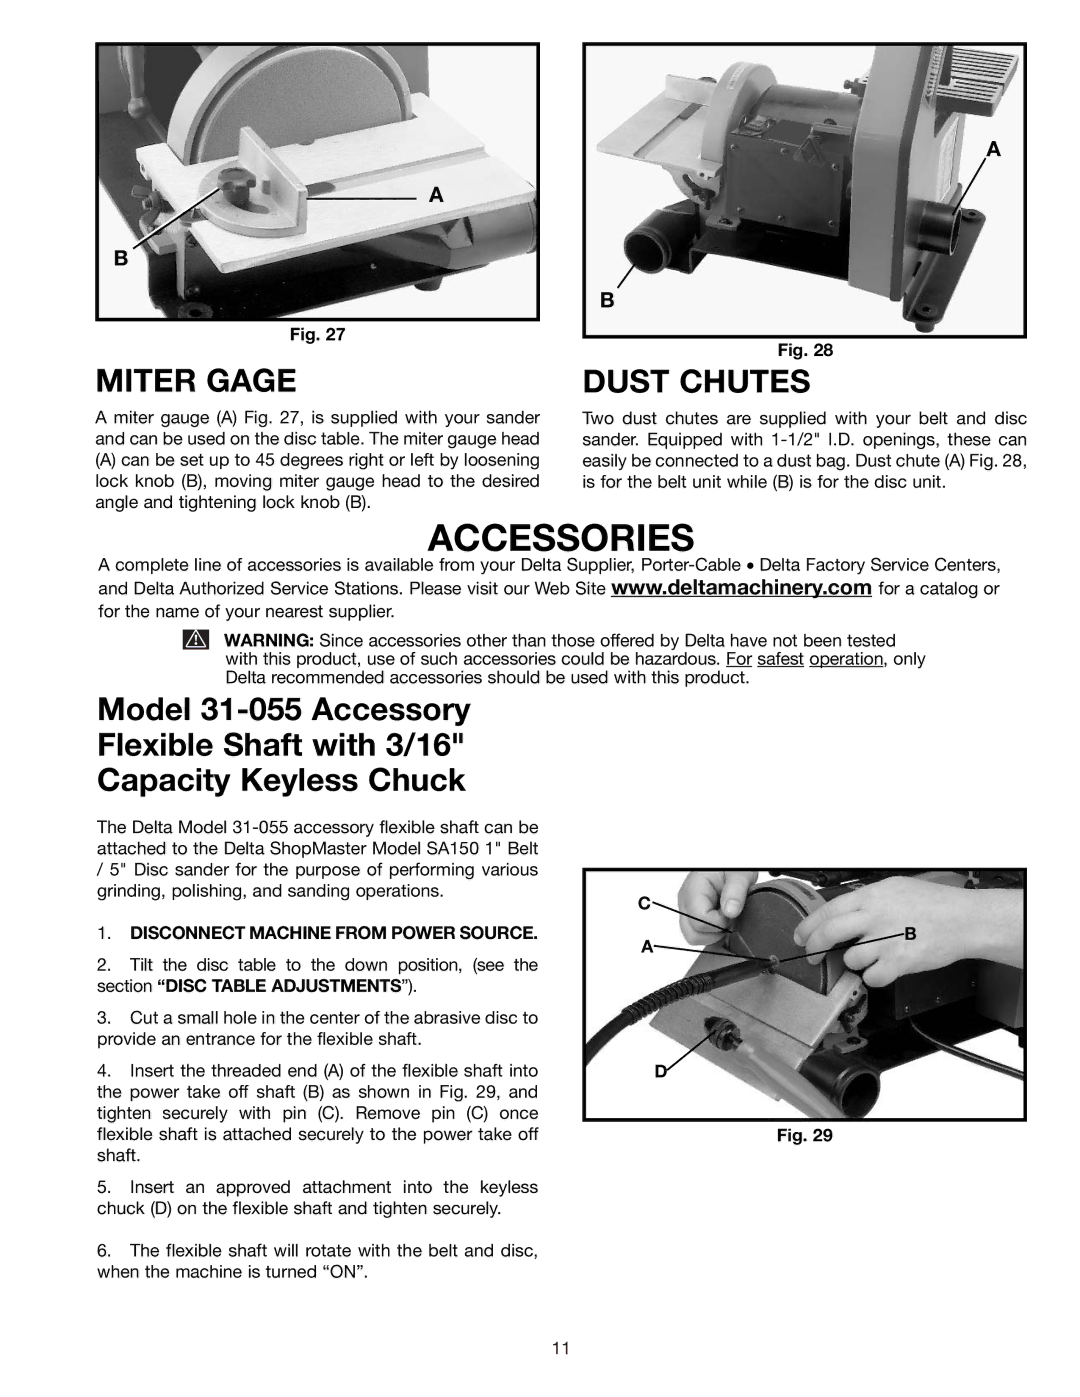
A miter gauge (A) Fig. 27, is supplied with your sander and can be used on the disc table. The miter gauge head
(A)can be set up to 45 degrees right or left by loosening lock knob (B), moving miter gauge head to the desired angle and tightening lock knob (B).
A
B
Fig. 28
DUST CHUTES
Two dust chutes are supplied with your belt and disc sander. Equipped with
ACCESSORIES
A complete line of accessories is available from your Delta Supplier,
WARNING: Since accessories other than those offered by Delta have not been tested with this product, use of such accessories could be hazardous. For safest operation, only Delta recommended accessories should be used with this product.
Model
The Delta Model
/5" Disc sander for the purpose of performing various grinding, polishing, and sanding operations.
1.DISCONNECT MACHINE FROM POWER SOURCE.
2.Tilt the disc table to the down position, (see the section “DISC TABLE ADJUSTMENTS”).
3.Cut a small hole in the center of the abrasive disc to provide an entrance for the flexible shaft.
4.Insert the threaded end (A) of the flexible shaft into the power take off shaft (B) as shown in Fig. 29, and tighten securely with pin (C). Remove pin (C) once flexible shaft is attached securely to the power take off shaft.
5.Insert an approved attachment into the keyless chuck (D) on the flexible shaft and tighten securely.
6.The flexible shaft will rotate with the belt and disc, when the machine is turned “ON”.
C
B
A![]()
D
Fig. 29
11
