INSTALLATION
Continued
Lava Rock and Ember Material
1.For all models, place lava rock along sides and front of firebox bottom in areas that are visible. It is not necessary to use all lava rock provided.
NOTICE: Do not put lava rock on or under burner. Placing lava rock on burner could cause performance problems.
2.Pull ember material apart into pieces no larger than a dime. Place loosely and directly onto exposed section of front burner and along space between burner and grate prongs. These will cre- ate glowing ember appearance as flame touches ember material. Do not block air slots by using too much ember material in one area. It is not necessary to use all ember material provided.
3.When lava rock and ember material are in place, close and latch glass door and secure louvers in place.
![]() WARNING: The glass door must be securely in place before operating fireplace. Do not oper- ate fireplace if glass is missing or broken.
WARNING: The glass door must be securely in place before operating fireplace. Do not oper- ate fireplace if glass is missing or broken.
DECORATIVE FACING
Any noncombustible material may be used as fac- ing (glass, tile, brick, etc.) as long as the proper clearances are observed (see Clearances to Com- bustibles, page 4). Louvered openings must not be obstructed and upper and lower panels must remain accessible for service. Use only
FACE EXTENSION FOR MODEL CD32M ONLY
Model CD32M comes equipped with a front face extension. The front face extension would add 3 1/2" to the width and 3/4" to the height of the fireplace face.
To install face extension:
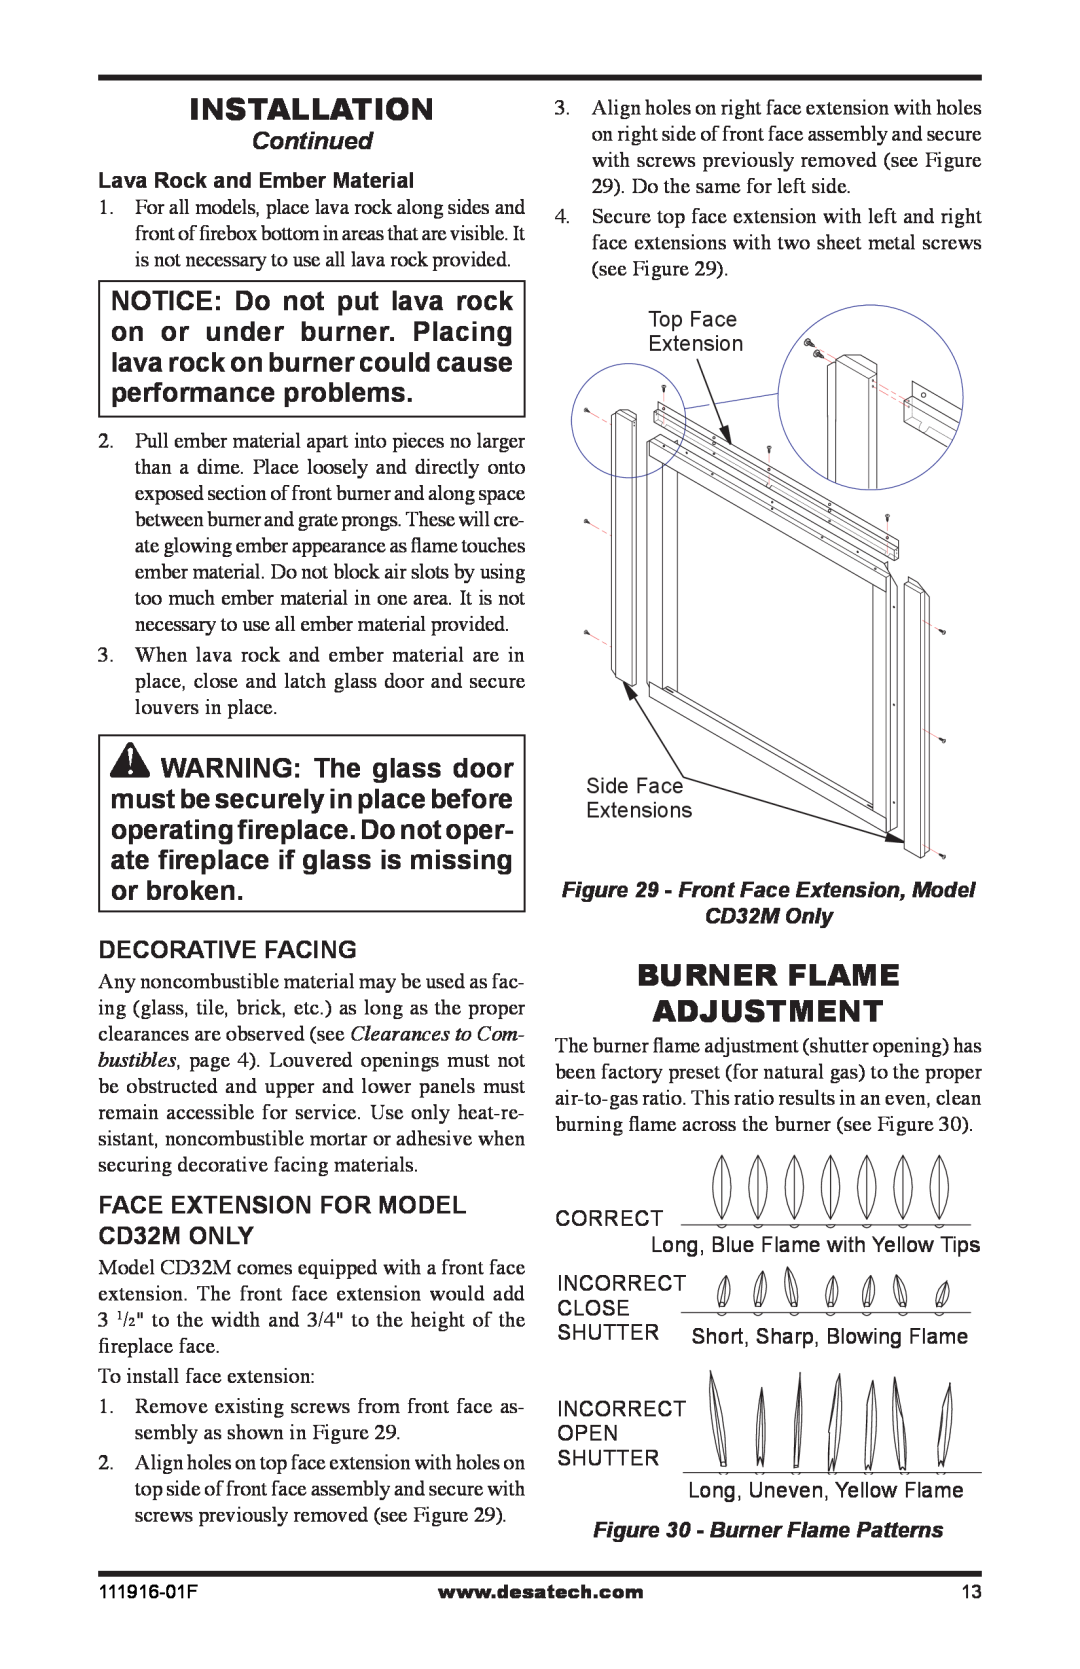
1.Remove existing screws from front face as- sembly as shown in Figure 29.
2.Align holes on top face extension with holes on top side of front face assembly and secure with screws previously removed (see Figure 29).
3.Align holes on right face extension with holes on right side of front face assembly and secure with screws previously removed (see Figure 29). Do the same for left side.
4.Secure top face extension with left and right face extensions with two sheet metal screws (see Figure 29).
Top Face
Extension
Side Face
Extensions
Figure 29 - Front Face Extension, Model
CD32M Only
BURNER FLAME
ADJUSTMENT
The burner flame adjustment (shutter opening) has been factory preset (for natural gas) to the proper
CORRECT
Long, Blue Flame with Yellow Tips
INCORRECT CLOSE
SHUTTER Short, Sharp, Blowing Flame
INCORRECT OPEN SHUTTER
Long, Uneven, Yellow Flame
Figure 30 - Burner Flame Patterns
www.desatech.com | 13 |