OPERATING HEATER

Continued

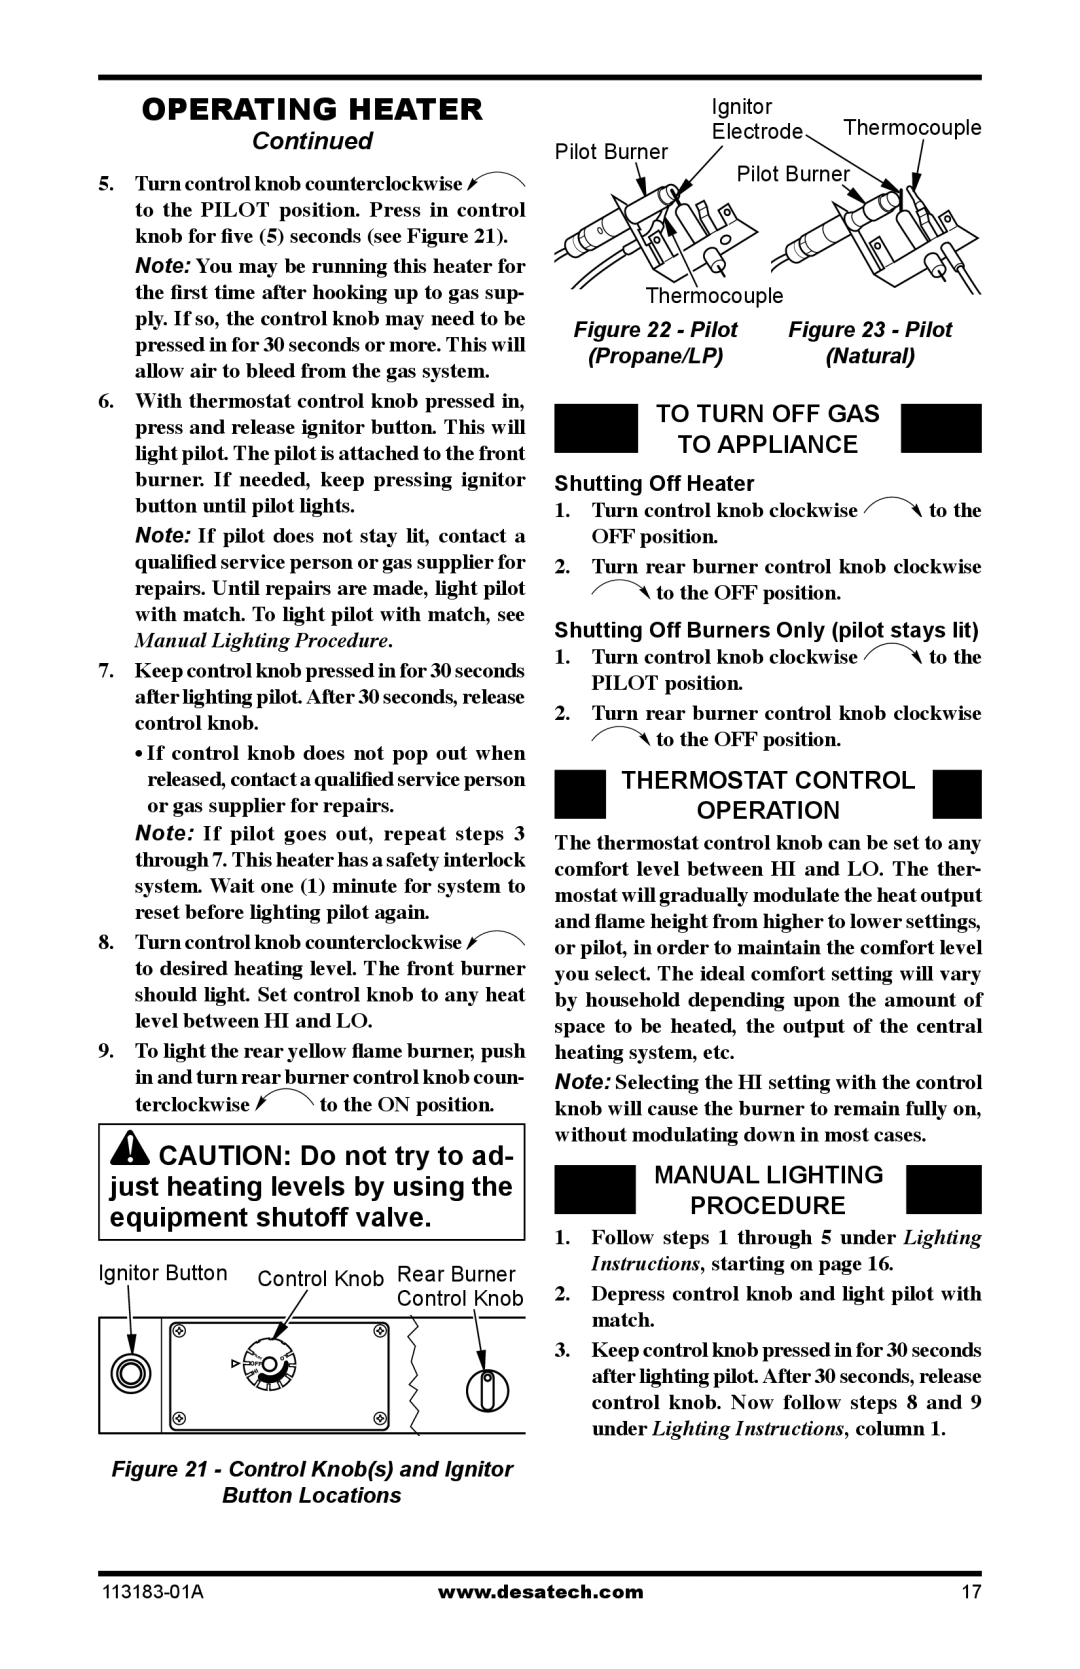
5.Turn control knob counterclockwise to the PILOT position. Press in control knob for five (5) seconds (see Figure 21).

Note: You may be running this heater for the first time after hooking up to gas sup- ply. If so, the control knob may need to be pressed in for 30 seconds or more. This will allow air to bleed from the gas system.

6.With thermostat control knob pressed in, press and release ignitor button. This will light pilot. The pilot is attached to the front burner. If needed, keep pressing ignitor button until pilot lights.

Note: If pilot does not stay lit, contact a qualified service person or gas supplier for repairs. Until repairs are made, light pilot with match. To light pilot with match, see Manual Lighting Procedure.

7.Keep control knob pressed in for 30 seconds after lighting pilot. After 30 seconds, release control knob.

If control knob does not pop out when released, contact a qualified service person or gas supplier for repairs.

Note: If pilot goes out, repeat steps 3 through 7. This heater has a safety interlock system. Wait one (1) minute for system to reset before lighting pilot again.

8.Turn control knob counterclockwise to desired heating level. The front burner should light. Set control knob to any heat level between HI and LO.

9.To light the rear yellow flame burner, push in and turn rear burner control knob coun-

terclockwise to the ON position.

CAUTION: Do not try to ad- just heating levels by using the equipment shutoff valve.

Ignitor Button Control Knob Rear Burner Control Knob

Figure 21 - Control Knob(s) and Ignitor

Button Locations


Ignitor


Thermocouple


Electrode

Pilot Burner


Pilot Burner


Thermocouple


Figure 22 - Pilot

Figure 23 - Pilot


(Propane/LP)


(Natural)


TO TURN OFF GAS


TO APPLIANCE


Shutting Off Heater


to the

1.

Turn control knob clockwise


OFF position.


2.Turn rear burner control knob clockwise to the OFF position.

Shutting Off Burners Only (pilot stays lit)

1.

Turn control knob clockwise

to the


PILOT position.


2.Turn rear burner control knob clockwise to the OFF position.

THERMOSTAT CONTROL

OPERATION

The thermostat control knob can be set to any comfort level between HI and LO. The ther- mostat will gradually modulate the heat output and flame height from higher to lower settings, or pilot, in order to maintain the comfort level you select. The ideal comfort setting will vary by household depending upon the amount of space to be heated, the output of the central heating system, etc. Note: Selecting the HI setting with the control knob will cause the burner to remain fully on, without modulating down in most cases.

MANUAL LIGHTING

PROCEDURE

1.Follow steps 1 through 5 under Lighting Instructions, starting on page 16.

2.Depress control knob and light pilot with match.

3.Keep control knob pressed in for 30 seconds after lighting pilot. After 30 seconds, release control knob. Now follow steps 8 and 9

under Lighting Instructions, column 1.

113183-01A

www.desatech.com

17

Page 17
Image 17
Desa CDR3924PT installation manual To Turn OFF GAS To Appliance, Thermostat Control Operation, Manual Lighting Procedure

CDR3924PT specifications

Desa CDR3924PT is an advanced digital control thermostat designed for precise temperature management in residential and commercial settings. Its sleek design and intuitive interface make it a popular choice among homeowners and professionals alike, contributing to enhanced comfort and energy efficiency in various environments.

One of the standout features of the CDR3924PT is its programmable functionality. Users can set different temperature schedules for weekdays and weekends, allowing for tailored climate control to match occupancy patterns. This flexibility can lead to significant energy savings, as the thermostat can automatically adjust heating and cooling based on user preferences and habits.

The unit is equipped with a high-resolution LCD display, offering clear visibility of current temperature settings and system status. Additionally, it provides real-time feedback on energy consumption, allowing users to monitor and adjust usage to optimize efficiency. The intuitive touch controls simplify navigation through the various settings, ensuring that users can easily customize their environment.

Integration with smart home technology is another key characteristic of the CDR3924PT. It is compatible with various home automation systems, enabling users to control their heating and cooling remotely via smartphone apps. This connectivity ensures that users can adjust settings from anywhere, giving them the ability to prepare their home environment before arriving or to fine-tune adjustments on the go.

The CDR3924PT utilizes advanced sensor technology to maintain accurate temperature control. It continuously measures ambient conditions, making real-time adjustments to ensure consistent comfort levels. The thermostat’s adaptive learning capabilities also allow it to learn user preferences over time, further enhancing its ability to maintain optimal conditions with minimal energy consumption.

For safety and convenience, the thermostat features a user-friendly installation process along with compatibility with various HVAC systems. It includes built-in safety protocols that prevent overheating or unwanted system failures, ensuring reliable operation over time.

In summary, the Desa CDR3924PT stands out in the market for its programmable features, smart home integration, and advanced sensor technology, making it a top choice for those seeking efficient and effective temperature management solutions. Whether for residential use or commercial applications, its reliable performance and user-friendly design make it a vital component in modern climate control systems.