OPERATING |
|
|
| TO TURN OFF GAS TO APPLIANCE |
| ||
|
|
|
| ||||
|
|
|
|
|
|
| |
HEATER |
|
|
|
|
| ||
Shutting Off Heater |
|
|
| ||||
Continued | 1. | Turn control knob clockwise | Clockwise | to the OFF position. | |||
|
|
|
|
|
|
| |
| Shutting Off Burner Only (pilot stays lit) | ||||||
| 1. | Turn control knob clockwise | Clockwise | to the PILOT position. | |||
MANUAL LIGHTING PROCEDURE
1. Remove front panel (see Figure 10, page 12).
2. Follow steps 1 through 5 under Lighting Instructions, pages 16 and 17.
3. With control knob pressed in, strike match. Hold match to pilot until pilot lights.
4. Keep control knob pressed in for 10 seconds after pilot is lit. After 10 seconds, release control knob.
5. Replace front panel.
INSPECTING | Check pilot flame pattern and burner flame pattern often. | |
| ||
BURNER | PILOT FLAME PATTERN |
|
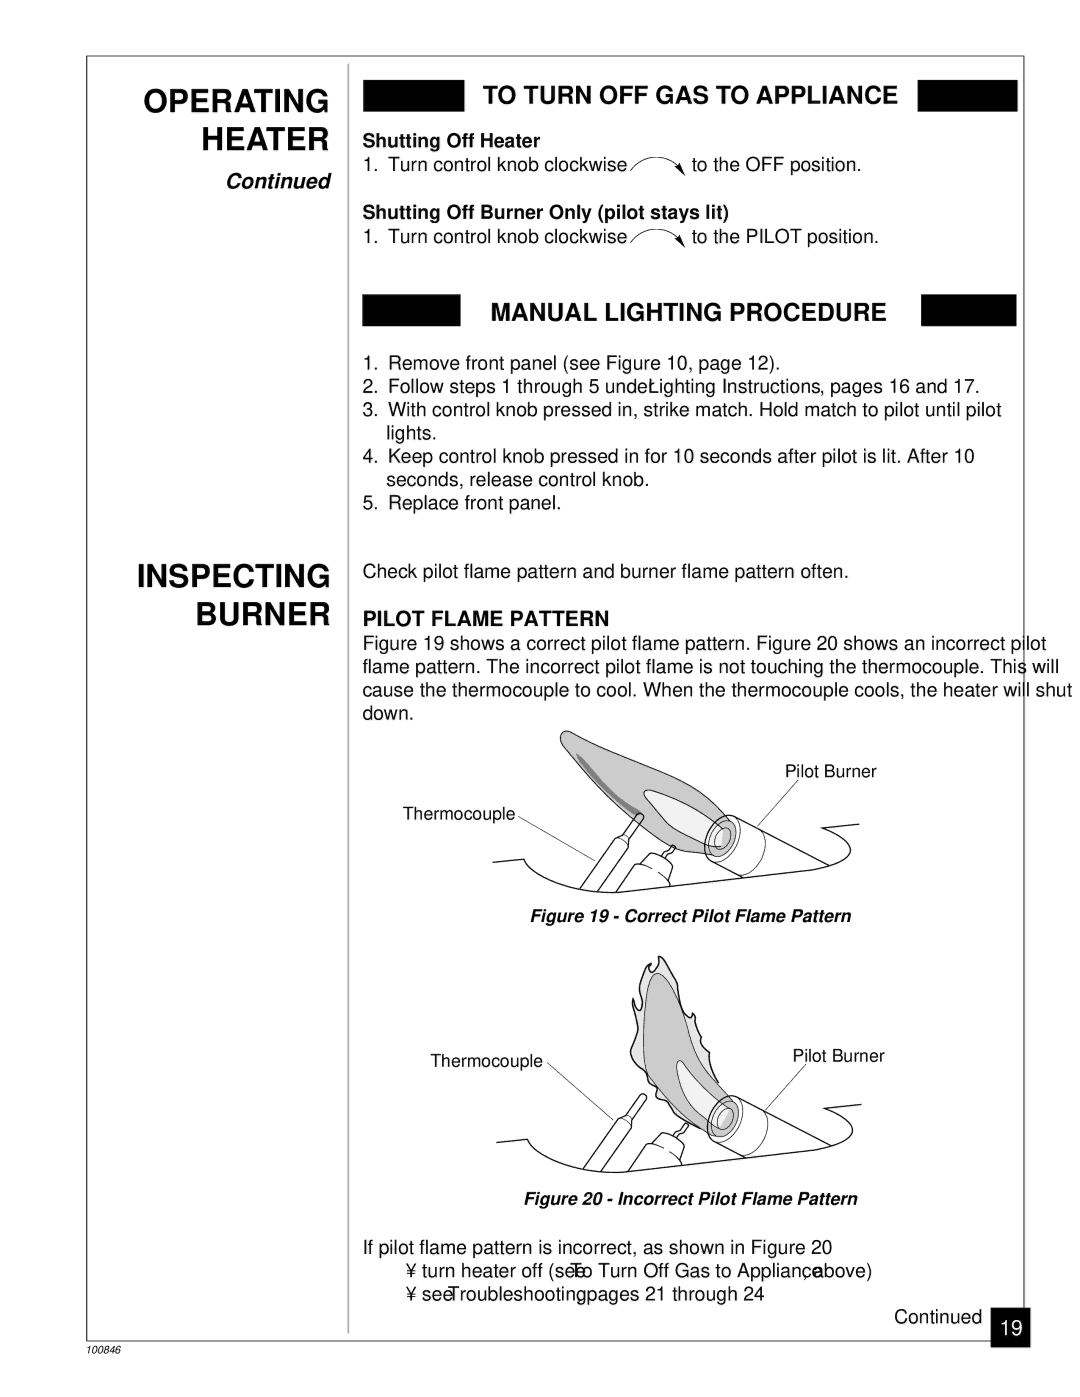
| Figure 19 shows a correct pilot flame pattern. Figure 20 shows an incorrect pilot | |
| flame pattern. The incorrect pilot flame is not touching the thermocouple. This will | |
| cause the thermocouple to cool. When the thermocouple cools, the heater will shut | |
| down. |
|
|
| Pilot Burner |
| Thermocouple |
|
| GOOD PILOT/LP | GRH/OV 007 |
| Figure 19 - Correct Pilot Flame Pattern | |
Thermocouple | Pilot Burner |
|
BAD PILOT/LP | GRH/OV 008 |
Figure 20 - Incorrect Pilot Flame Pattern
If pilot flame pattern is incorrect, as shown in Figure 20
•turn heater off (see To Turn Off Gas to Appliance, above)
•see Troubleshooting, pages 21 through 24
Continued | 19 |
|
100846
