LFP33NR
UNVENTED NATURAL GAS FIREPLACE
INSTALLATION
Continued
OPTIONAL WIRELESS HAND- HELD REMOTE CONTROL ACCESSORY RM4
Installing Remote Receiver Unit
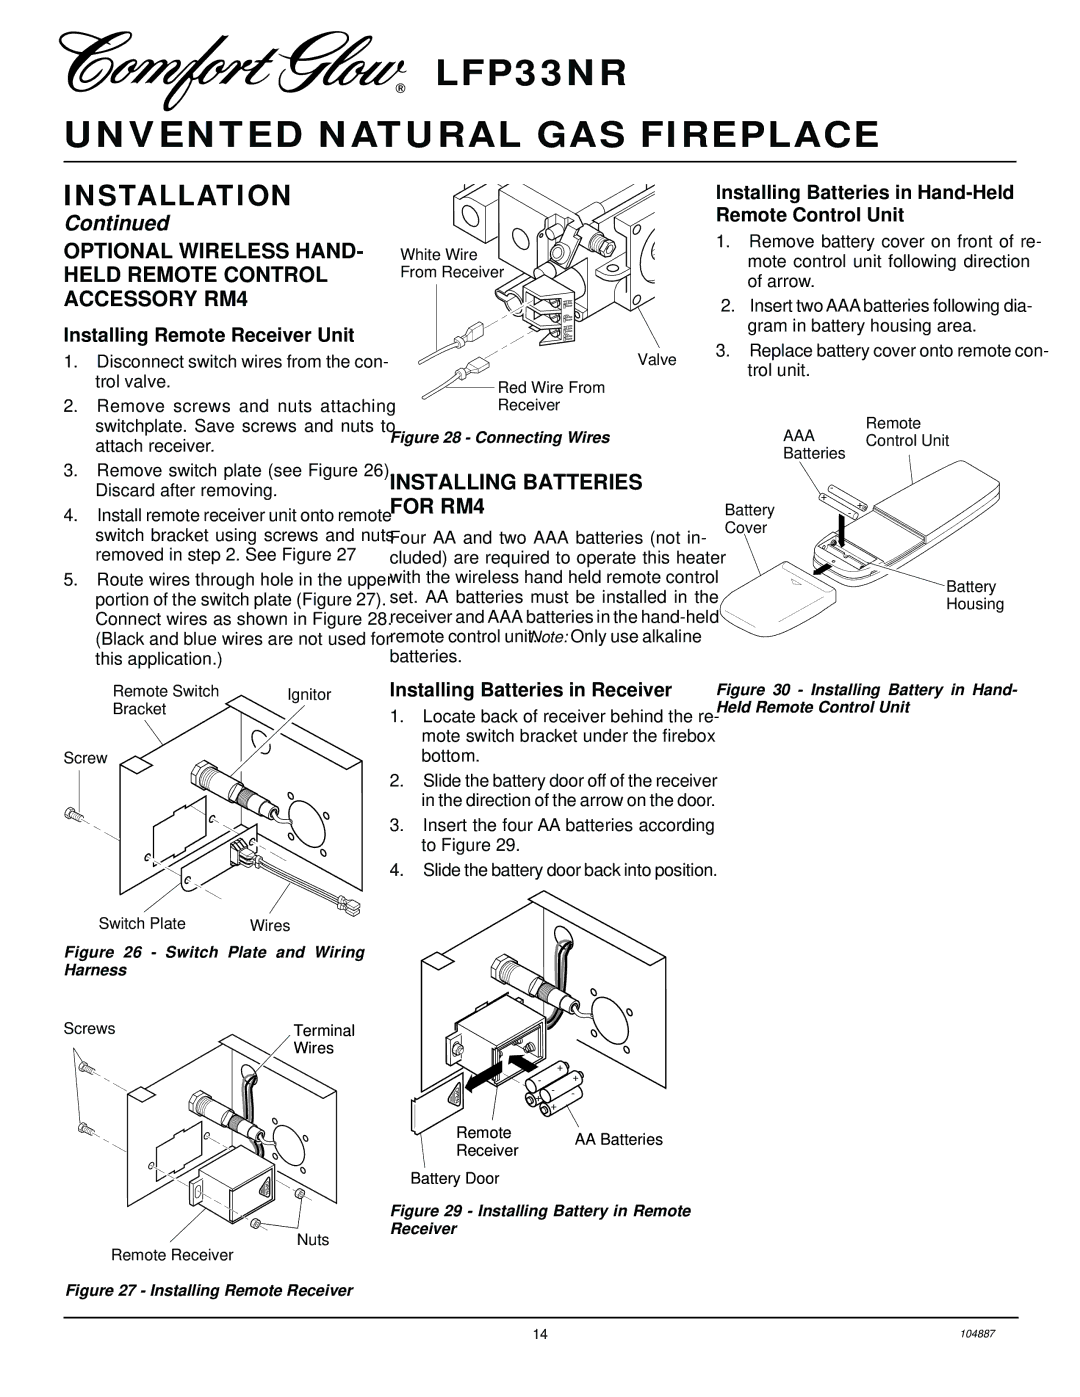
1.Disconnect switch wires from the con- trol valve.
2.Remove screws and nuts attaching switchplate. Save screws and nuts to attach receiver.
White Wire
From Receiver
![]() Red Wire From Receiver
Red Wire From Receiver
Figure 28 - Connecting Wires
Installing Batteries in Hand-Held Remote Control Unit
| 1. | Remove battery cover on front of re- |
|
| mote control unit following direction |
|
| of arrow. |
| 2. | Insert two AAA batteries following dia- |
|
| gram in battery housing area. |
Valve | 3. | Replace battery cover onto remote con- |
| trol unit. | |
|
|
AAA | Remote | |
Control Unit | ||
Batteries | ||
|
3.Remove switch plate (see Figure 26). Discard after removing.
4.Install remote receiver unit onto remote switch bracket using screws and nuts removed in step 2. See Figure 27
5.Route wires through hole in the upper portion of the switch plate (Figure 27). Connect wires as shown in Figure 28. (Black and blue wires are not used for this application.)
Remote Switch | Ignitor |
Bracket |
|
Screw
INSTALLING BATTERIES FOR RM4
Four AA and two AAA batteries (not in- cluded) are required to operate this heater with the wireless hand held remote control set. AA batteries must be installed in the receiver and AAA batteries in the
Installing Batteries in Receiver
1.Locate back of receiver behind the re- mote switch bracket under the firebox bottom.
2.Slide the battery door off of the receiver in the direction of the arrow on the door.
3.Insert the four AA batteries according to Figure 29.
4.Slide the battery door back into position.
-
+
Battery - +![]()
Cover
Battery
Housing
Figure 30 - Installing Battery in Hand- Held Remote Control Unit
Switch Plate | Wires |
|
|
|
Figure 26 - Switch Plate and Wiring |
|
|
| |
Harness |
|
|
|
|
Screws | Terminal |
|
|
|
| Wires |
|
|
|
|
|
|
| + |
|
| - |
| + |
|
| - |
| |
|
| + | - | |
|
|
| ||
|
| + |
| |
|
|
|
| |
| Remote |
|
| AA Batteries |
| Receiver |
|
| |
|
|
|
| |
| Battery Door |
|
|
|
| Figure 29 - Installing Battery in Remote | |||
| Receiver |
|
|
|
Remote Receiver | Nuts |
|
|
|
|
|
|
| |
Figure 27 - Installing Remote Receiver
14 | 104887 |