Manuals
/
Desa
/
Household Appliance
/
Home Security System
Desa
SH-5597
manual
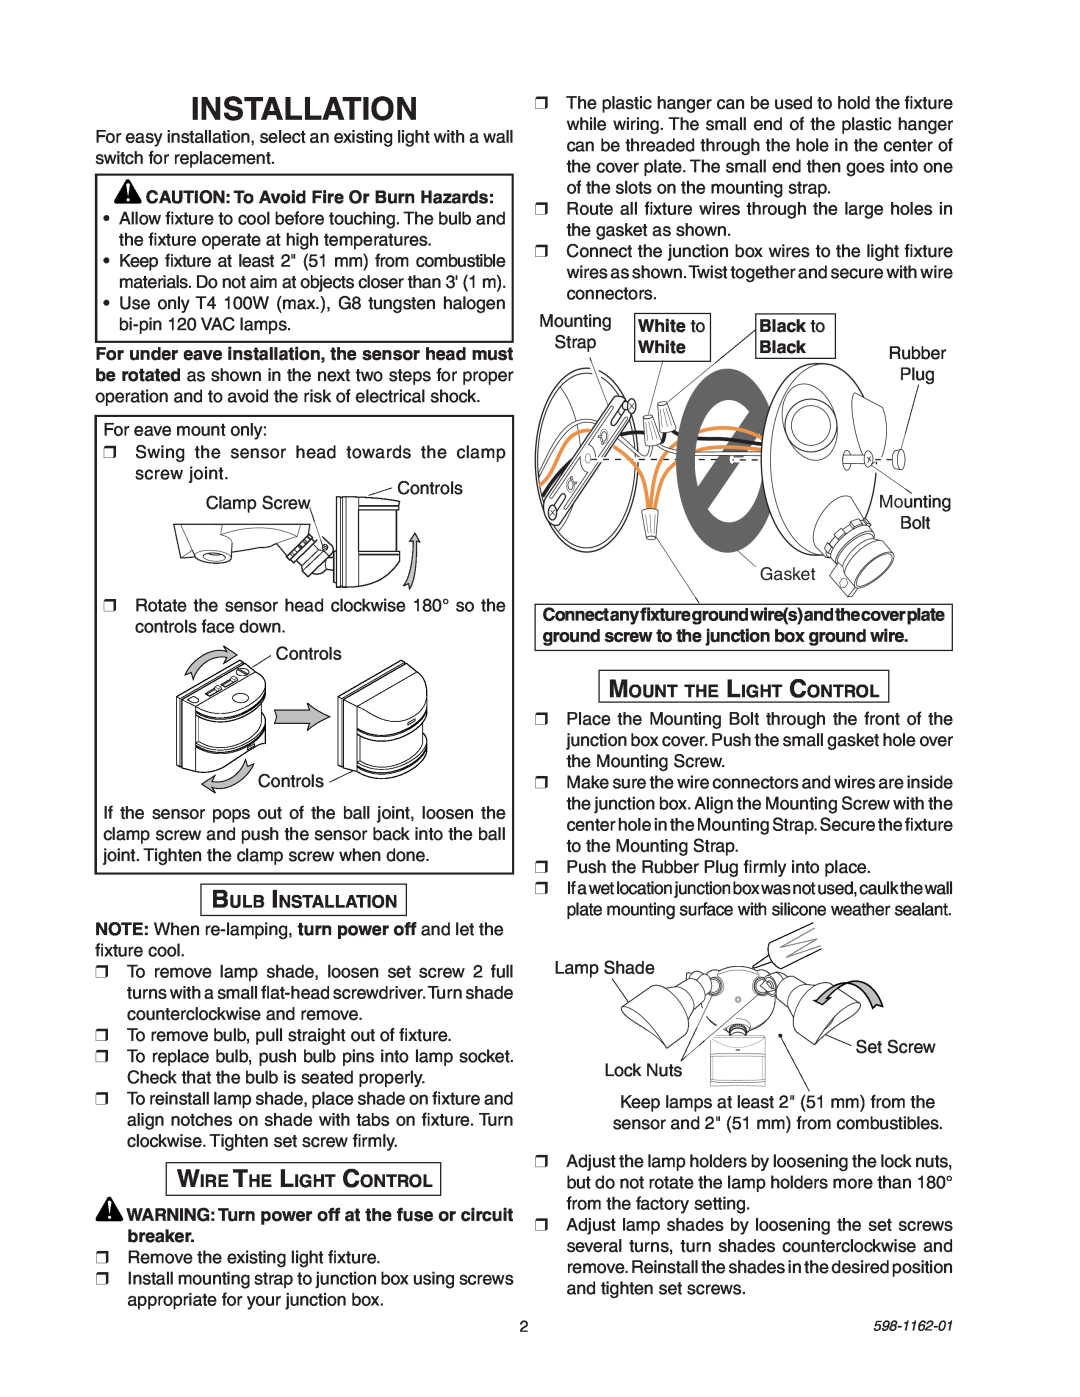
Installation, CAUTION To Avoid Fire Or Burn Hazards, White to White, Black to
Models:
SH-5597
1
2
8
8
Download
8 pages
43.18 Kb
1
2
3
4
5
6
7
8
Page 2
Image 2
Page 1
Page 3
Page 2
Image 2
Page 1
Page 3
Contents
Move ON-TIMESwitch to
Features
DUALBRITE TIMER
Flip light switch off
WIRE THE LIGHT CONTROL
INSTALLATION
BULB INSTALLATION
CAUTION To Avoid Fire Or Burn Hazards
Turn on the circuit breaker and light switch
TEST AND ADJUSTMENT
SPECIFICATIONS
Bottom of Sensor
No Service Parts Available for this Product
TROUBLESHOOTING GUIDE
TECHNICAL SERVICE
TEN YEAR LIMITED WARRANTY
Modelo SH-5597
Detector de Movimiento y Control de Luz
FUNCIONAMIENTO
Características
dio o quemazón
INSTALACION
CUIDADO Para evitar los peligros de incen
lámina de
Parte de abajo del detector
PRUEBA Y AJUSTE
ESPECIFICACIONES
Angulo de
No enviar los productos
GUIA DE INVESTIGACION DE AVERIAS
SERVICIO TÉCNICO
GARANTÍA LIMITADA A 10 AÑOS
Top
Page
Image
Contents