INSTALLATION
Log Placement For P324/VP324 Models Log Placement for P325(B)/VP325(B) Models
13
INSTALLATION
Continued
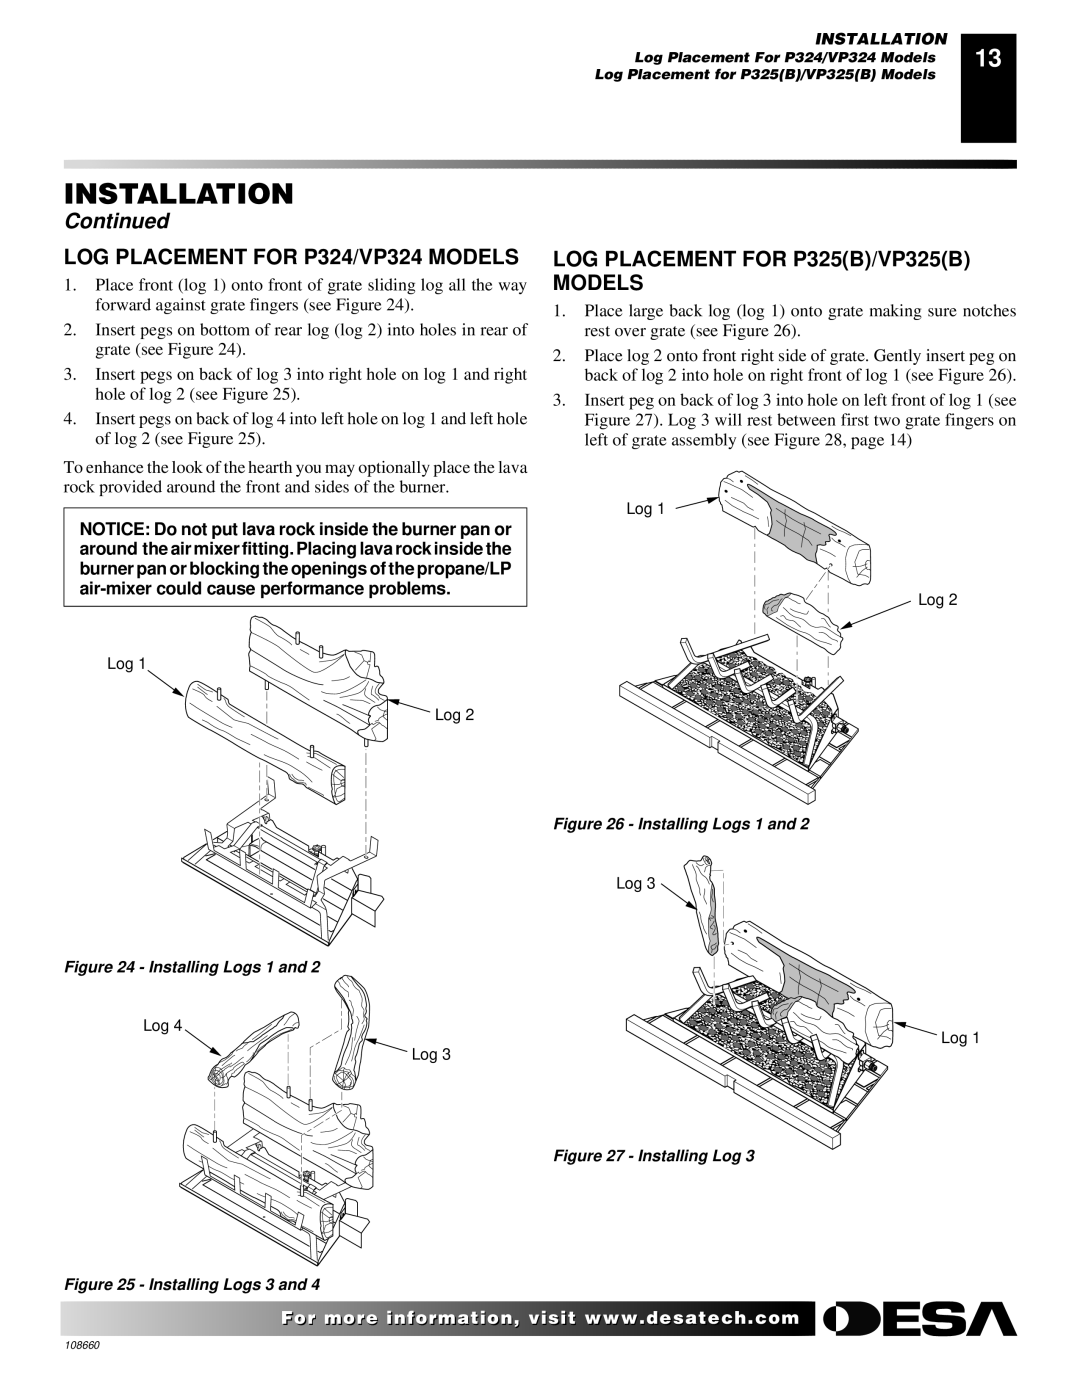
LOG PLACEMENT FOR P324/VP324 MODELS
1.Place front (log 1) onto front of grate sliding log all the way forward against grate fingers (see Figure 24).
2.Insert pegs on bottom of rear log (log 2) into holes in rear of grate (see Figure 24).
3.Insert pegs on back of log 3 into right hole on log 1 and right hole of log 2 (see Figure 25).
4.Insert pegs on back of log 4 into left hole on log 1 and left hole of log 2 (see Figure 25).
To enhance the look of the hearth you may optionally place the lava rock provided around the front and sides of the burner.
NOTICE: Do not put lava rock inside the burner pan or around the air mixer fitting. Placing lava rock inside the burner pan or blocking the openings of the propane/LP
Log 1
Log 2
LOG PLACEMENT FOR P325(B)/VP325(B)
MODELS
1.Place large back log (log 1) onto grate making sure notches rest over grate (see Figure 26).
2.Place log 2 onto front right side of grate. Gently insert peg on back of log 2 into hole on right front of log 1 (see Figure 26).
3.Insert peg on back of log 3 into hole on left front of log 1 (see Figure 27). Log 3 will rest between first two grate fingers on left of grate assembly (see Figure 28, page 14)
Log 1
Log 2
Figure 26 - Installing Logs 1 and 2
Log 3
Figure 24 - Installing Logs 1 and 2
Log 4
Log 1
Log 3
Figure 27 - Installing Log 3
Figure 25 - Installing Logs 3 and 4
![]()
![]()
![]()
![]() For more information, visit www.desatech.com
For more information, visit www.desatech.com
108660