FIREPLACE INSTALLATION
Installing Logs, Lava Rock and Glowing Embers (Cont.)
25
FIREPLACE INSTALLATION
Continued
4.Place log #4 (crossover log) onto pins from both logs #2 and #3 as shown in Figure 48.
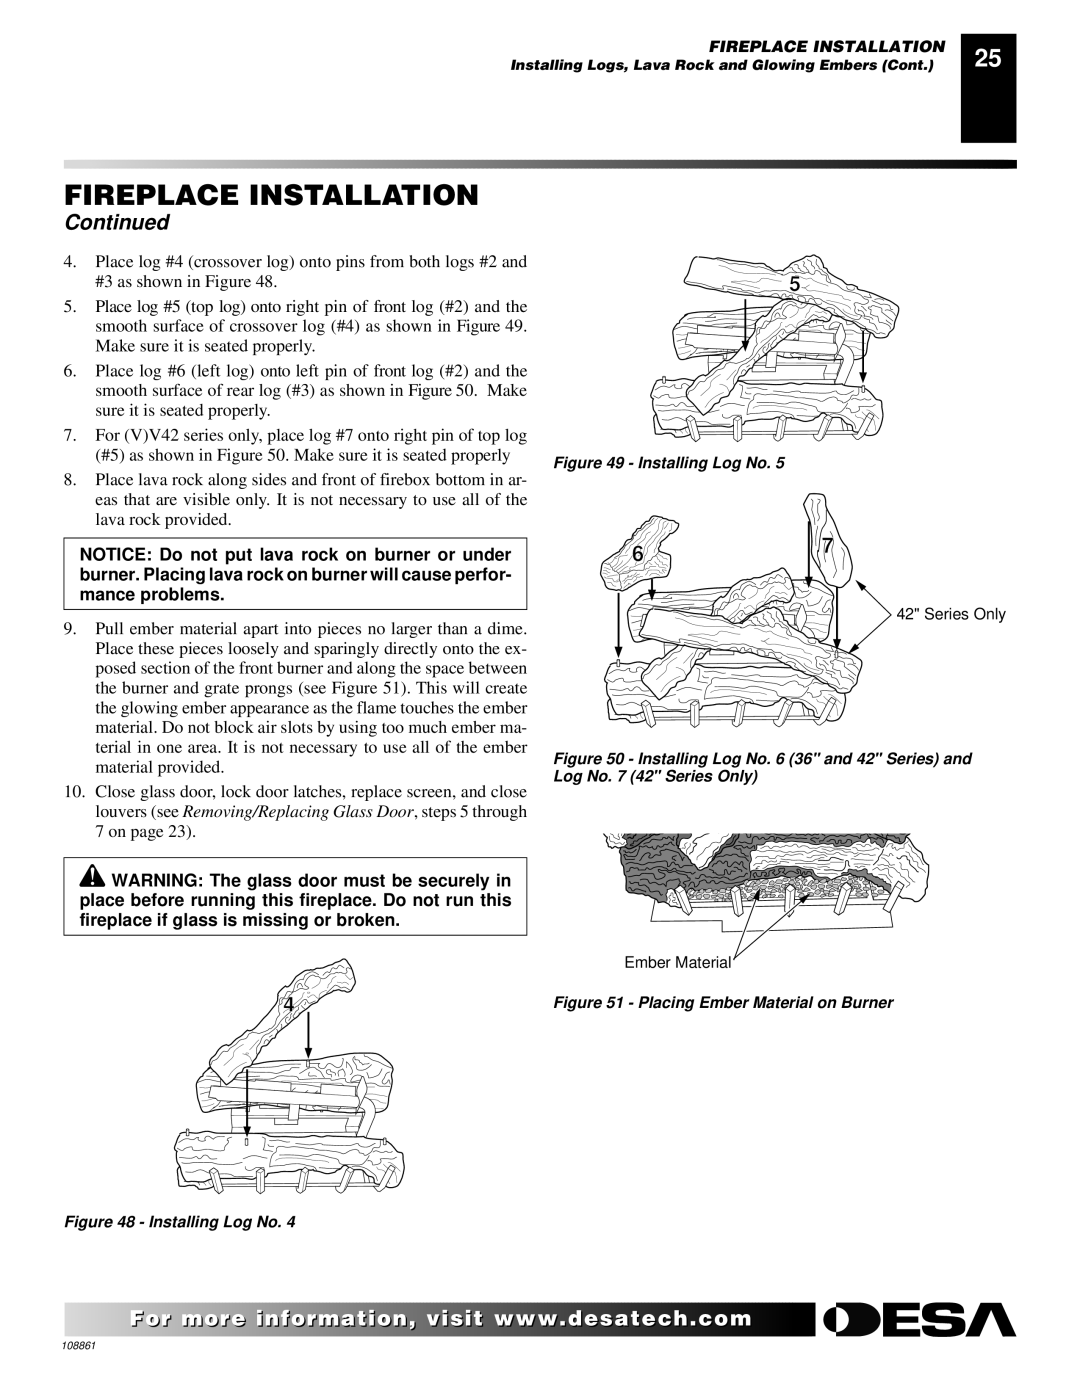
5.Place log #5 (top log) onto right pin of front log (#2) and the smooth surface of crossover log (#4) as shown in Figure 49. Make sure it is seated properly.
6.Place log #6 (left log) onto left pin of front log (#2) and the smooth surface of rear log (#3) as shown in Figure 50. Make sure it is seated properly.
7.For (V)V42 series only, place log #7 onto right pin of top log (#5) as shown in Figure 50. Make sure it is seated properly
5
Figure 49 - Installing Log No. 5
8.Place lava rock along sides and front of firebox bottom in ar- eas that are visible only. It is not necessary to use all of the lava rock provided.
NOTICE: Do not put lava rock on burner or under burner. Placing lava rock on burner will cause perfor- mance problems.
9.Pull ember material apart into pieces no larger than a dime. Place these pieces loosely and sparingly directly onto the ex- posed section of the front burner and along the space between the burner and grate prongs (see Figure 51). This will create the glowing ember appearance as the flame touches the ember material. Do not block air slots by using too much ember ma- terial in one area. It is not necessary to use all of the ember material provided.
10.Close glass door, lock door latches, replace screen, and close louvers (see Removing/Replacing Glass Door, steps 5 through 7 on page 23).
![]() WARNING: The glass door must be securely in place before running this fireplace. Do not run this fireplace if glass is missing or broken.
WARNING: The glass door must be securely in place before running this fireplace. Do not run this fireplace if glass is missing or broken.
6 | 7 |
|
![]() 42" Series Only
42" Series Only
Figure 50 - Installing Log No. 6 (36" and 42" Series) and Log No. 7 (42" Series Only)
Ember Material
4
Figure 48 - Installing Log No. 4
Figure 51 - Placing Ember Material on Burner
For more![]()
![]()
![]() visit www.
visit www.![]()
![]()
![]() .com
.com![]()
![]()
![]()
![]()
![]()
![]()
108861