INSTALLATION
Continued
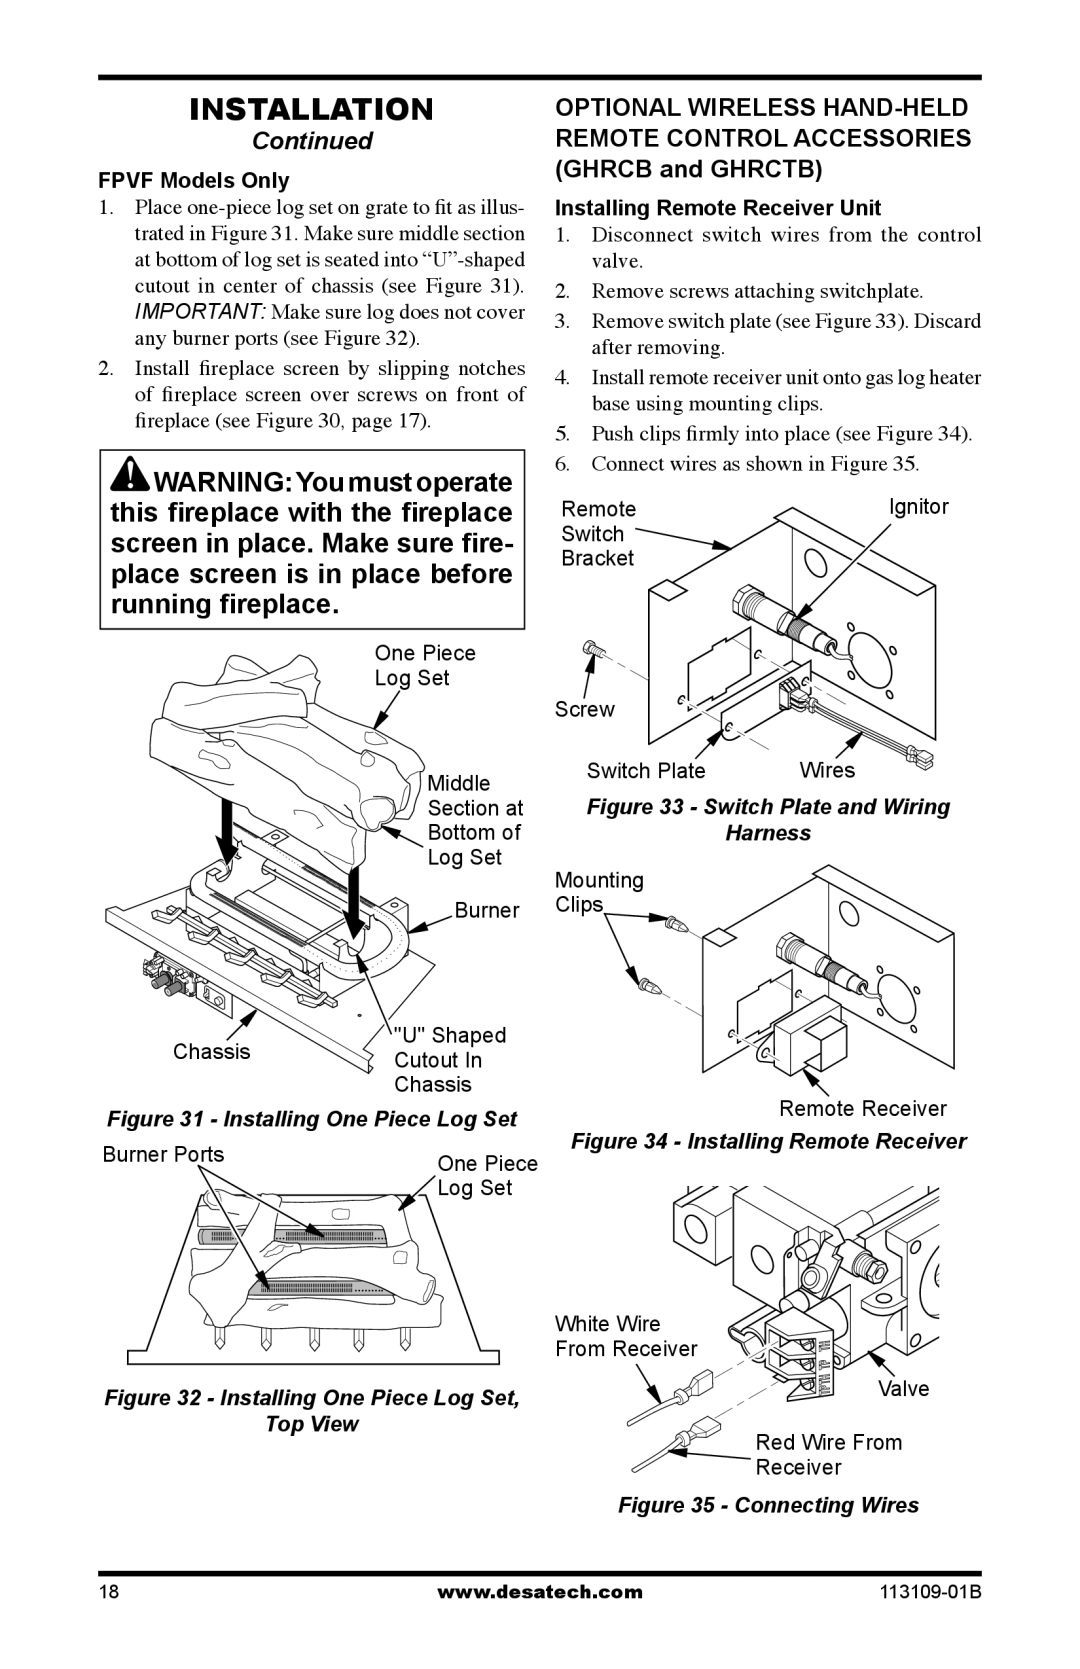
FPVF Models Only
1.Place
2.Install fireplace screen by slipping notches of fireplace screen over screws on front of fireplace (see Figure 30, page 17).
![]() WARNING:You must operate this fireplace with the fireplace screen in place. Make sure fire- place screen is in place before running fireplace.
WARNING:You must operate this fireplace with the fireplace screen in place. Make sure fire- place screen is in place before running fireplace.
One Piece
Log Set
OPTIONAL WIRELESS
Installing Remote Receiver Unit
1.Disconnect switch wires from the control valve.
2.Remove screws attaching switchplate.
3.Remove switch plate (see Figure 33). Discard after removing.
4.Install remote receiver unit onto gas log heater base using mounting clips.
5.Push clips firmly into place (see Figure 34).
6.Connect wires as shown in Figure 35.
Remote | Ignitor |
Switch |
|
Bracket |
|
Screw
Middle
Section at
![]() Bottom of
Bottom of
Log Set
Burner
Chassis | "U" Shaped | |
Cutout In | ||
| ||
| Chassis | |
Figure 31 - Installing One Piece Log Set | ||
Burner Ports | One Piece | |
| ||
| Log Set | |
Figure 32 - Installing One Piece Log Set, Top View
Switch Plate | Wires |
Figure 33 - Switch Plate and Wiring
Harness
Mounting
Clips
Remote Receiver
Figure 34 - Installing Remote Receiver
White Wire
From Receiver
Valve
Red Wire From
![]() Receiver
Receiver
Figure 35 - Connecting Wires
18 | www.desatech.com |