Packaging:
•1 - Digi SP One Ethernet Adapter
•1 - Diagnostic Loop Back Key
•1 - Quick Start Guide
•1 - Release Note
•1 - Installation and Drivers
•1 - 100 ~ 240 V to 12VDC Power Adapter
•1 - 24” Inverted Communication Cable
•1 - 4 pcs Universal Power Plugs
Note: Ethernet cable is not supplied with unit. End user must supply his or her own Ethernet cable.
System and Hardware Requirements:
•Designed to be used with Smartlog X3 systems
50440 - SmartLog X3 w/Dual Foot Plate, Keypad, & Barcode Reader, 120V
50441 - SmartLog X3 w/Dual Foot Plate, Keypad, & Barcode Reader, Euro Specs 50442 - SmartLog X3 w/Dual Foot Plate, Laser Scanner, Euro Specs, CE Approved
•Smartlog 6.03 software, TEAM Enterprise Software or TEAM Basic Software
Mounting and Installation:
NOTE: If existing model 50460 Ethernet adapter is used, model 50461 cannot be used on the same LAN due to driver conflicts. We highly recommend switching over to model 50461 Ethernet adapter.
This technical bulletin is intended for personnel familiar with networking concept and Smartlog X3 systems. Before mounting of the Ethernet adapter to wall or
1. Powering unit and Locating unit on the LAN
Make sure there is an Ethernet cable, LAN jack and power outlet for the Ethernet card to connect to.
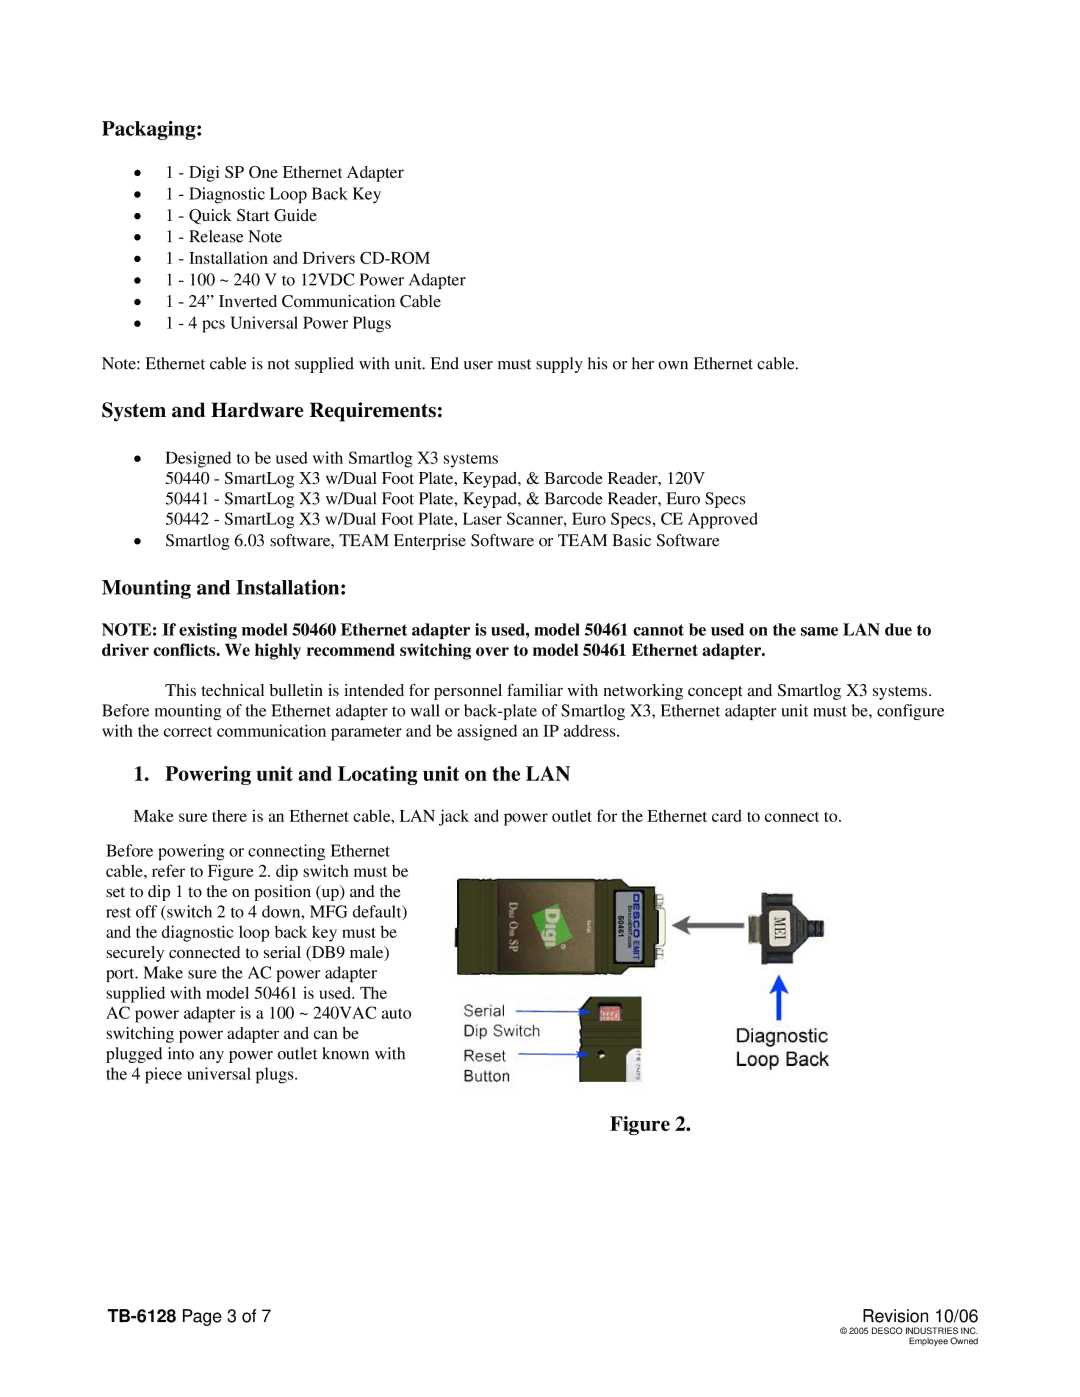
Before powering or connecting Ethernet cable, refer to Figure 2. dip switch must be set to dip 1 to the on position (up) and the rest off (switch 2 to 4 down, MFG default) and the diagnostic loop back key must be securely connected to serial (DB9 male) port. Make sure the AC power adapter supplied with model 50461 is used. The AC power adapter is a 100 ~ 240VAC auto switching power adapter and can be plugged into any power outlet known with the 4 piece universal plugs.
Figure 2.
| Revision 10/06 |
| © 2005 DESCO INDUSTRIES INC. |
| Employee Owned |
