2. Installation and Connections
NOTE: An image may not be displayed correctly when a Video or
This is because the projector will process a video signal as a computer signal at the default setting. In that case, do the following.
*When an image is displayed with the lower and upper black portion of the screen or a dark image is not displayed correctly: Project an image to fill the screen and then press the AUTO ADJ button on the remote control or the AUTO ADJUST button on the projector cabinet.
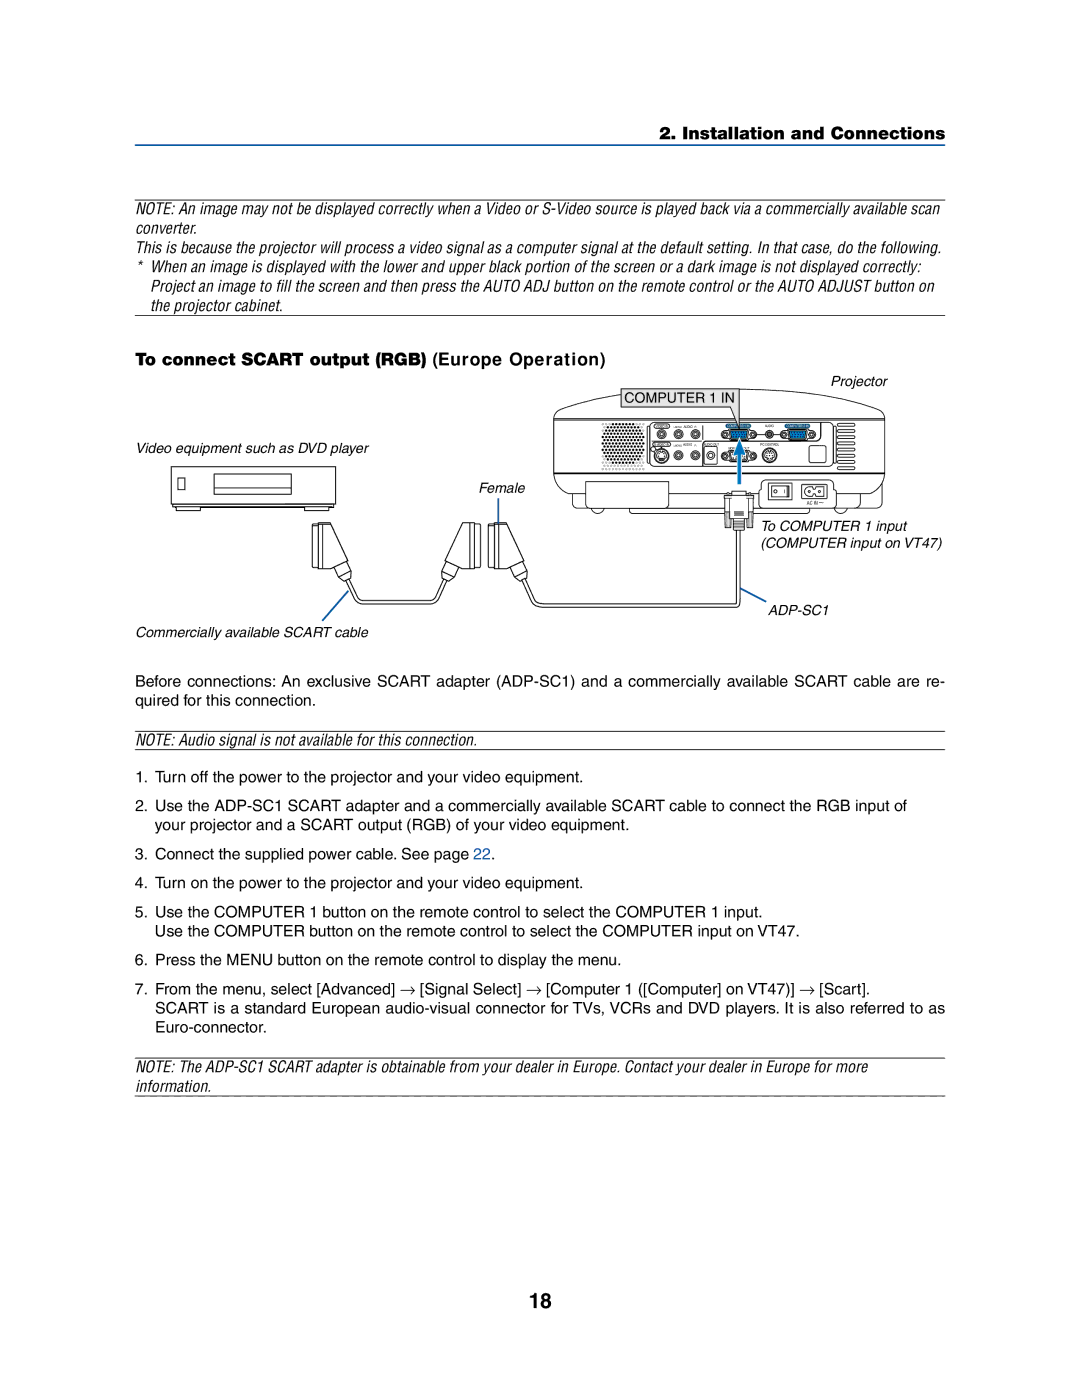
To connect SCART output (RGB) (Europe Operation)
Projector
COMPUTER 1 IN
Video equipment such as DVD player
Female
Commercially available SCART cable
VIDEO IN | L/MONO AUDIO | R |
| COMPUTER 1 IN | AUDIO | COMPUTER 2 IN |
L/MONO AUDIO | R | AUDIO OUT | OUT | PC CONTROL |
|
AC IN ![]()
To COMPUTER 1 input (COMPUTER input on VT47)
Before connections: An exclusive SCART adapter
NOTE: Audio signal is not available for this connection.
1.Turn off the power to the projector and your video equipment.
2.Use the
3.Connect the supplied power cable. See page 22.
4.Turn on the power to the projector and your video equipment.
5.Use the COMPUTER 1 button on the remote control to select the COMPUTER 1 input.
Use the COMPUTER button on the remote control to select the COMPUTER input on VT47.
6.Press the MENU button on the remote control to display the menu.
7.From the menu, select [Advanced] → [Signal Select] → [Computer 1 ([Computer] on VT47)] → [Scart].
SCART is a standard European
NOTE: The
18
