2.Type in a combination of the four SELECT buttons ( GHFE ) and press the ENTER button.
NOTE: A keyword must be four to 10 digits in length.
The [Confirm Keyword] screen will be displayed.
3.Type in the same combination of SELECT buttons ( GHFE ) and press the ENTER button.
The confirmation screen will be displayed.
4.Select “Yes” and press the ENTER button. The Security function has been enabled.
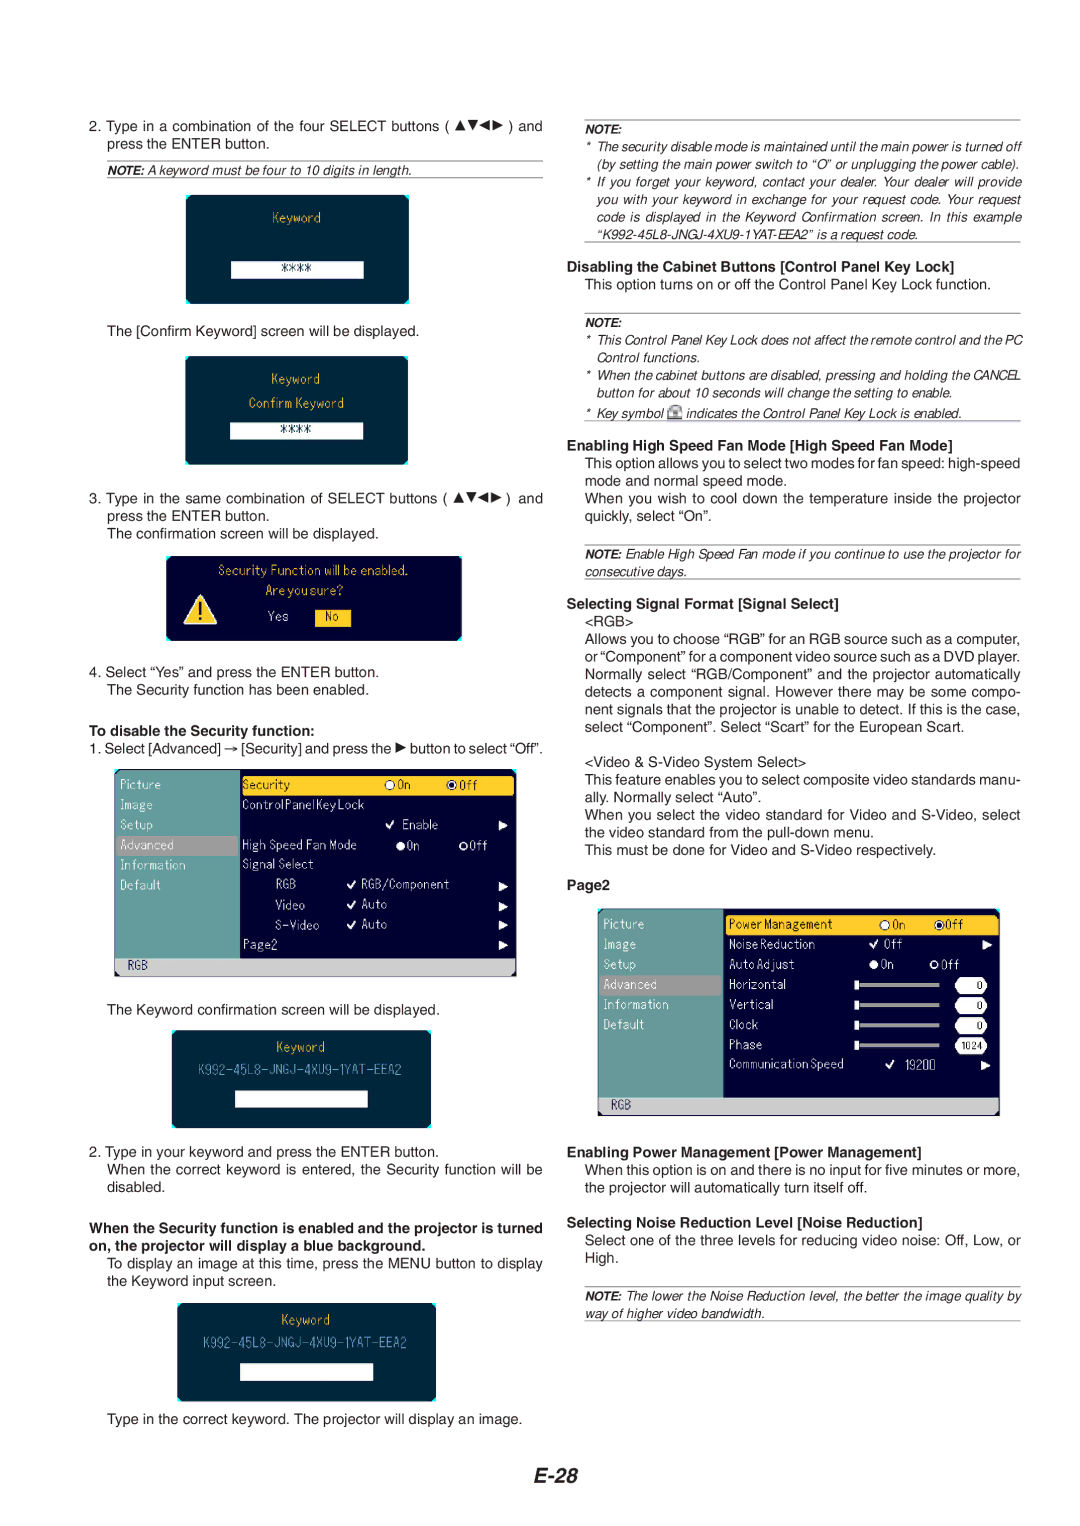
To disable the Security function:
1. Select [Advanced] → [Security] and press the E button to select “Off”.
The Keyword confirmation screen will be displayed.
2.Type in your keyword and press the ENTER button.
When the correct keyword is entered, the Security function will be disabled.
When the Security function is enabled and the projector is turned on, the projector will display a blue background.
To display an image at this time, press the MENU button to display the Keyword input screen.
Type in the correct keyword. The projector will display an image.
NOTE:
*The security disable mode is maintained until the main power is turned off (by setting the main power switch to “O” or unplugging the power cable).
*If you forget your keyword, contact your dealer. Your dealer will provide you with your keyword in exchange for your request code. Your request code is displayed in the Keyword Confirmation screen. In this example
Disabling the Cabinet Buttons [Control Panel Key Lock]
This option turns on or off the Control Panel Key Lock function.
NOTE:
*This Control Panel Key Lock does not affect the remote control and the PC Control functions.
*When the cabinet buttons are disabled, pressing and holding the CANCEL button for about 10 seconds will change the setting to enable.
*Key symbol ![]() indicates the Control Panel Key Lock is enabled.
indicates the Control Panel Key Lock is enabled.
Enabling High Speed Fan Mode [High Speed Fan Mode]
This option allows you to select two modes for fan speed:
When you wish to cool down the temperature inside the projector quickly, select “On”.
NOTE: Enable High Speed Fan mode if you continue to use the projector for consecutive days.
Selecting Signal Format [Signal Select]
<RGB>
Allows you to choose “RGB” for an RGB source such as a computer, or “Component” for a component video source such as a DVD player. Normally select “RGB/Component” and the projector automatically detects a component signal. However there may be some compo- nent signals that the projector is unable to detect. If this is the case, select “Component”. Select “Scart” for the European Scart.
<Video &
This feature enables you to select composite video standards manu- ally. Normally select “Auto”.
When you select the video standard for Video and
This must be done for Video and
Page2
Enabling Power Management [Power Management]
When this option is on and there is no input for five minutes or more, the projector will automatically turn itself off.
Selecting Noise Reduction Level [Noise Reduction]
Select one of the three levels for reducing video noise: Off, Low, or High.
NOTE: The lower the Noise Reduction level, the better the image quality by way of higher video bandwidth.
