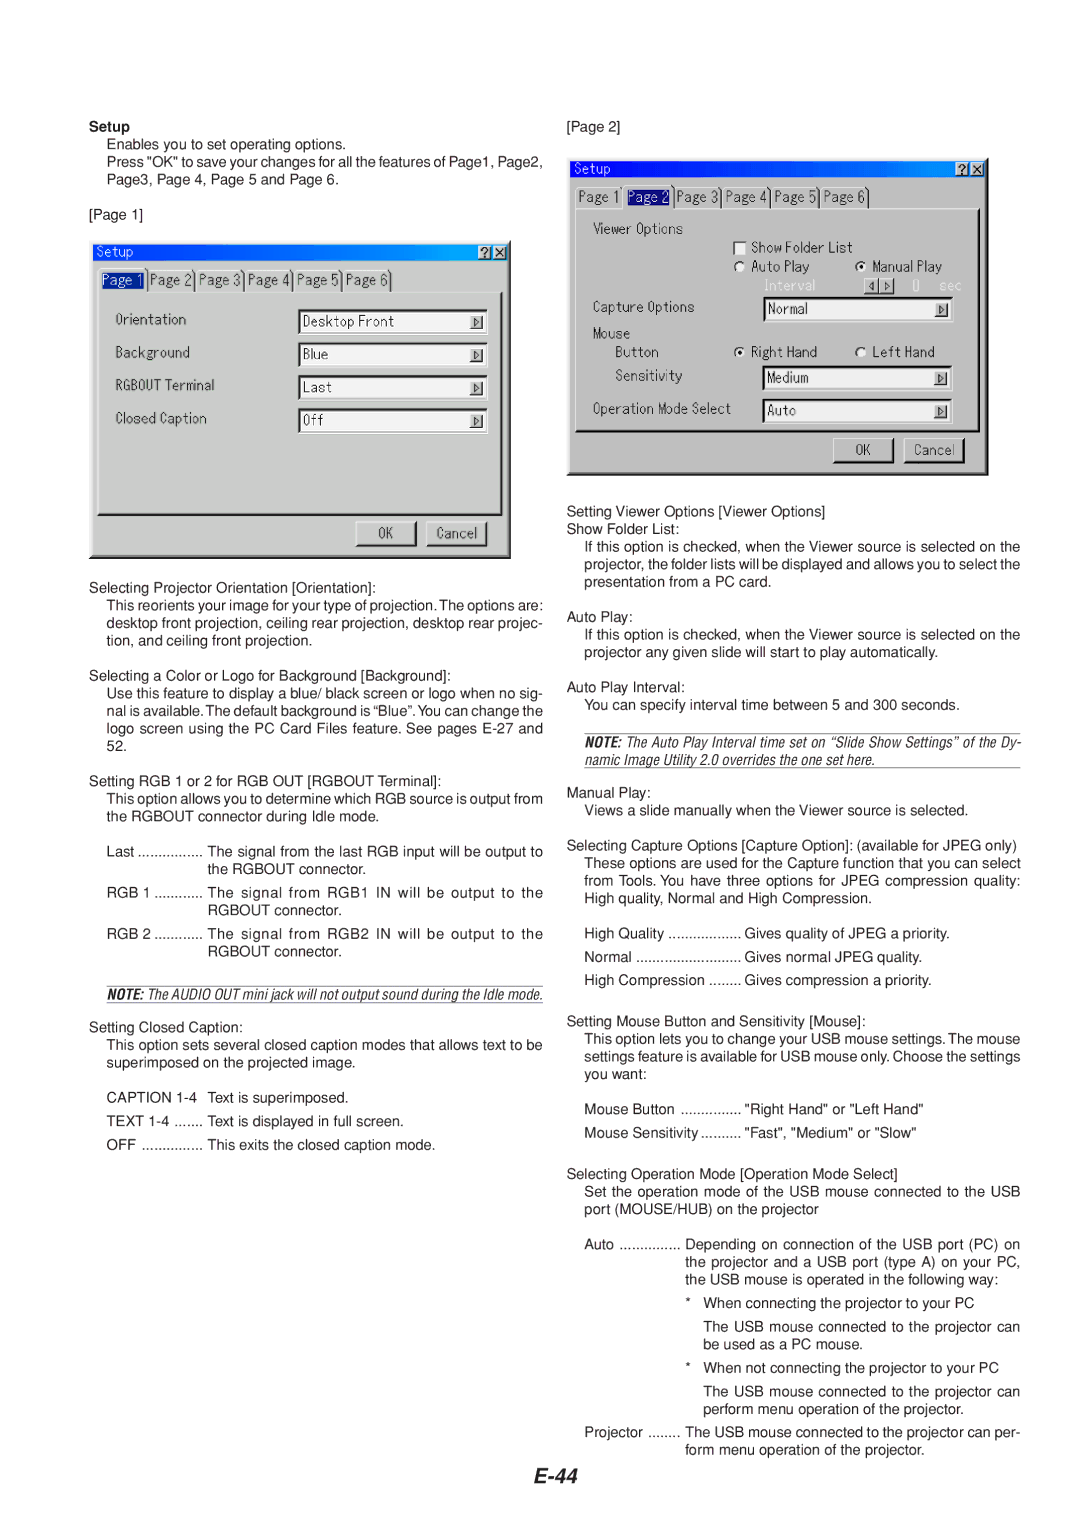
Setup
Enables you to set operating options.
Press "OK" to save your changes for all the features of Page1, Page2, Page3, Page 4, Page 5 and Page 6.
[Page 1]
Selecting Projector Orientation [Orientation]:
This reorients your image for your type of projection. The options are: desktop front projection, ceiling rear projection, desktop rear projec- tion, and ceiling front projection.
Selecting a Color or Logo for Background [Background]:
Use this feature to display a blue/ black screen or logo when no sig- nal is available. The default background is “Blue”.You can change the logo screen using the PC Card Files feature. See pages
Setting RGB 1 or 2 for RGB OUT [RGBOUT Terminal]:
This option allows you to determine which RGB source is output from the RGBOUT connector during Idle mode.
Last | The signal from the last RGB input will be output to |
| the RGBOUT connector. |
RGB 1 | The signal from RGB1 IN will be output to the |
| RGBOUT connector. |
RGB 2 | The signal from RGB2 IN will be output to the |
| RGBOUT connector. |
NOTE: The AUDIO OUT mini jack will not output sound during the Idle mode.
Setting Closed Caption:
This option sets several closed caption modes that allows text to be superimposed on the projected image.
CAPTION
TEXT | Text is displayed in full screen. |
OFF | This exits the closed caption mode. |
[Page 2]
Setting Viewer Options [Viewer Options] Show Folder List:
If this option is checked, when the Viewer source is selected on the projector, the folder lists will be displayed and allows you to select the presentation from a PC card.
Auto Play:
If this option is checked, when the Viewer source is selected on the projector any given slide will start to play automatically.
Auto Play Interval:
You can specify interval time between 5 and 300 seconds.
NOTE: The Auto Play Interval time set on “Slide Show Settings” of the Dy- namic Image Utility 2.0 overrides the one set here.
Manual Play:
Views a slide manually when the Viewer source is selected.
Selecting Capture Options [Capture Option]: (available for JPEG only) These options are used for the Capture function that you can select from Tools. You have three options for JPEG compression quality: High quality, Normal and High Compression.
High Quality | Gives quality of JPEG a priority. |
Normal | Gives normal JPEG quality. |
High Compression | Gives compression a priority. |
Setting Mouse Button and Sensitivity [Mouse]:
This option lets you to change your USB mouse settings. The mouse settings feature is available for USB mouse only. Choose the settings you want:
Mouse Button | "Right Hand" or "Left Hand" |
Mouse Sensitivity | "Fast", "Medium" or "Slow" |
Selecting Operation Mode [Operation Mode Select]
Set the operation mode of the USB mouse connected to the USB port (MOUSE/HUB) on the projector
Auto | Depending on connection of the USB port (PC) on |
| the projector and a USB port (type A) on your PC, |
| the USB mouse is operated in the following way: |
| * When connecting the projector to your PC |
| The USB mouse connected to the projector can |
| be used as a PC mouse. |
| * When not connecting the projector to your PC |
| The USB mouse connected to the projector can |
| perform menu operation of the projector. |
Projector | The USB mouse connected to the projector can per- |
| form menu operation of the projector. |
