Basic Operations

If projector set up is not yet complete, please read ‘Adjustments and Settings Using Menus’ on page 32 and perform the necessary settings.

STAND BY

LAMP TEMP OPERATE

PCVIDEO

1-2


2

V-KEYSTONE H-KEYSTONE VOL.


MENUEXIT

ENTER

1-2

PC

VIDEO


OPERATE

2


W


V-KEYSTONE H-KEYSTONE

SCREEN

DIGITAL


ZOOM


S


FREEZE


VOLUME

FOCUS

QUICK ALIGN.


MENU


EXIT


ENTER


PRESET


HIDE


Note

Messages are displayed in the language set by the user in the “Language” menu. The pre- set language upon purchase is “English”. The user can choose from 8 national languages. (page 39)

However, the input mode ([PC1], [PC2], [PC3], [Y/C], [VIDEO]) and button indications ([FREEZE], [D.ZOOM], [EXIT]) are only dis- played in English irrespective of the display language setting.

Basic Operation Procedures

Once the basic settings are done, follow the procedures below:

1. Power On

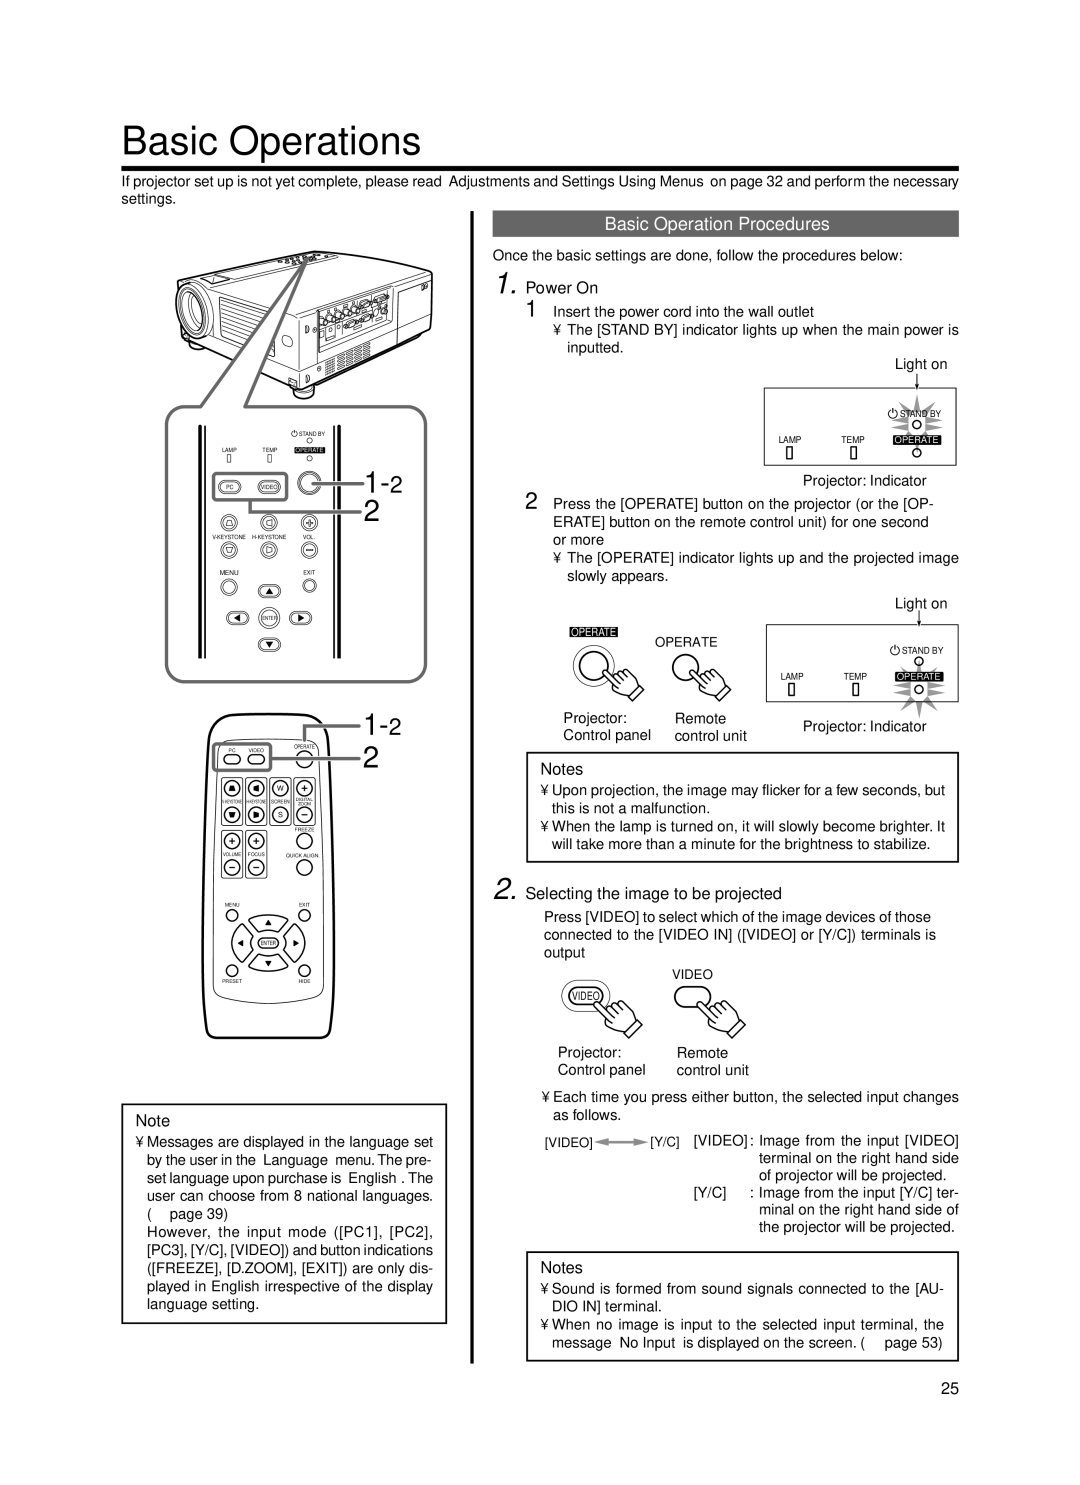
1Insert the power cord into the wall outlet

The [STAND BY] indicator lights up when the main power is inputted.

Light on

STAND BY

LAMP TEMP OPERATE

Projector: Indicator

2Press the [OPERATE] button on the projector (or the [OP- ERATE] button on the remote control unit) for one second or more

The [OPERATE] indicator lights up and the projected image slowly appears.


Light on

OPERATE

OPERATE


STAND BY


LAMP

TEMP

OPERATE

Projector:

Remote

Projector: Indicator

Control panel

control unit


Notes

Upon projection, the image may flicker for a few seconds, but this is not a malfunction.

When the lamp is turned on, it will slowly become brighter. It will take more than a minute for the brightness to stabilize.

2.Selecting the image to be projected

Press [VIDEO] to select which of the image devices of those connected to the [VIDEO IN] ([VIDEO] or [Y/C]) terminals is output

VIDEO

VIDEO

Projector:

Remote

Control panel

control unit

Each time you press either button, the selected input changes as follows.

[VIDEO][Y/C] [VIDEO] : Image from the input [VIDEO] terminal on the right hand side of projector will be projected.

[Y/C] : Image from the input [Y/C] ter- minal on the right hand side of the projector will be projected.

Notes

Sound is formed from sound signals connected to the [AU- DIO IN] terminal.

When no image is input to the selected input terminal, the message “No Input” is displayed on the screen. (page 53)

25

Page 25
Image 25
Dukane 9100HC manual Basic Operations, Basic Operation Procedures, Power On, Selecting the image to be projected

9100HC specifications

The Dukane 9100HC is a cutting-edge ultrasonic welding system designed for high-performance applications in the healthcare and industrial sectors. Built to facilitate reliable and precise joining of thermoplastic materials, this advanced machine integrates several innovative technologies to ensure optimal performance and efficiency.

One of the standout features of the Dukane 9100HC is its enhanced ultrasonic technology. This system utilizes high-frequency ultrasonic waves, which generate localized heat at the interface of the materials being welded. This technology allows for faster welding cycles and minimizes the risk of damaging heat-sensitive components, making it ideal for applications that require delicate handling.

The 9100HC system is equipped with a user-friendly touchscreen interface, providing operators with easy access to important functionalities. This interface includes real-time process monitoring, allowing users to track key parameters such as temperature and amplitude during the welding process. Additionally, the system supports built-in data logging, enabling detailed analysis and quality assurance for critical applications.

Another significant characteristic of the Dukane 9100HC is its advanced energy management system. This system optimizes the energy used during the welding process, enhancing the overall efficiency and reducing operational costs. Moreover, the Dukane 9100HC is designed to accommodate a wide range of welding applications, thanks to its versatile tooling options. This adaptability makes it suitable for both small-scale operations and large manufacturing runs.

The machine's robust construction ensures durability and longevity, even in demanding environments. The compact design facilitates easy integration into existing production lines, while the ability to customize and configure the system according to specific production needs makes it a preferred choice among manufacturers.

Safety is paramount in Dukane’s design philosophy, and the 9100HC is no exception. It incorporates multiple safety features, including emergency stop buttons and protective enclosures, ensuring operator safety and compliance with industry standards.

Overall, the Dukane 9100HC represents a significant advancement in ultrasonic welding technology, delivering reliability, efficiency, and versatility to a wide array of applications within the healthcare and industrial sectors. With its innovative features and user-centric design, the Dukane 9100HC stands out as a premier solution for manufacturers seeking high-quality welding solutions.