33
34
Trigger #1 is powered on when the iscan Vp50pro is powered on. Trigger #1 is powered
off when the iscan Vp50pro is put into standby mode. This can be useful for powering on a
display or motorizing a screen or lift.
Trigger #2 can be programmed to be powered on in the ‘output setup’ menu. This action
can be saved as part of a Display Prole. The ‘Lens’ option facilitates use of an anamorphic
lens.
Installer Note: The trigger ports are outputs and are not designed to directly receive a 12-volt
trigger signal from another device, like an amplier, automation controller or 12-volt power supply.
Care has been taken in the design to ensure that if this was done, no harm should come to the video
processor – but it is strongly recommend that other devices are checked to ensure that the trigger
ports on the Vp50pro are not being “back-fed”.
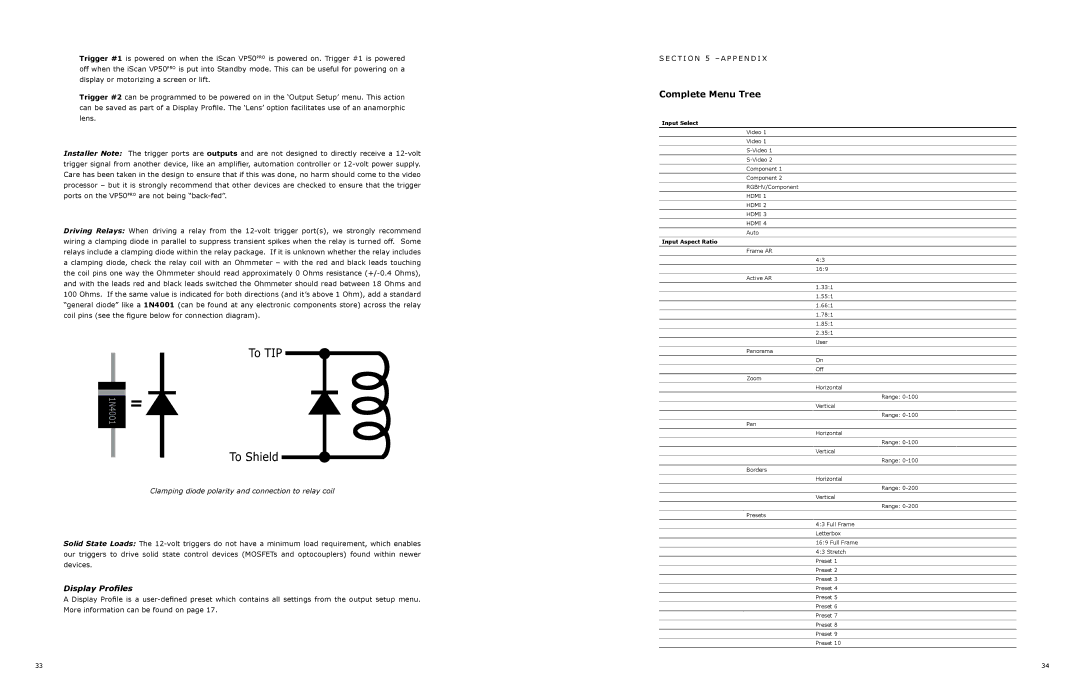
Driving Relays: When driving a relay from the 12-volt trigger port(s), we strongly recommend
wiring a clamping diode in parallel to suppress transient spikes when the relay is turned off. some
relays include a clamping diode within the relay package. if it is unknown whether the relay includes
a clamping diode, check the relay coil with an ohmmeter – with the red and black leads touching
the coil pins one way the Ohmmeter should read approximately 0 Ohms resistance (+/-0.4 Ohms),
and with the leads red and black leads switched the ohmmeter should read between 18 ohms and
100 Ohms. If the same value is indicated for both directions (and it’s above 1 Ohm), add a standard
“general diode” like a 1N4001 (can be found at any electronic components store) across the relay
coil pins (see the gure below for connection diagram).
Clamping diode polarity and connection to relay coil
Solid State Loads: The 12-volt triggers do not have a minimum load requirement, which enables
our triggers to drive solid state control devices (MOSFETs and optocouplers) found within newer
devices.

Display Proles

A Display Prole is a user-dened preset which contains all settings from the output setup menu.
More information can be found on page 17.
seCTion 5 –appendiX
Complete Menu Tree
Input Select
Video 1
Video 1
s-Video 1
s-Video 2
Component 1
Component 2
rGbHV/Component
HdMi 1
HdMi 2
HdMi 3
HdMi 4
auto
Input Aspect Ratio
frame ar
4:3
16:9
active ar
1.33:1
1.55:1
1.66:1
1.78:1
1.85:1
2.35:1
user
panorama
on
off
Zoom
Horizontal
range: 0-100
Vertical
range: 0-100
pan
Horizontal
range: 0-100
Vertical
range: 0-100
borders
Horizontal
range: 0-200
Vertical
range: 0-200
presets
4:3 full frame
Letterbox
16:9 full frame
4:3 stretch
preset 1
preset 2
preset 3
preset 4
preset 5
preset 6
preset 7
preset 8
preset 9
preset 10