
TransEagle Network Software, 900-00027-001 specifications
Eagle Electronics TransEagle Network Software, model 900-00027-001, is a powerful tool designed to enhance the efficiency of network management and data analysis in various industries. This sophisticated software package offers a robust platform for monitoring and optimizing network operations, making it a crucial asset for businesses that rely on seamless connectivity and communication.One of the standout features of TransEagle Network Software is its intuitive user interface, which allows users to navigate complex network data with ease. The interface is designed for both technical and non-technical users, ensuring that everyone can utilize the software to its full potential. The dashboard provides real-time visibility into network performance, showcasing key metrics such as bandwidth usage, latency, and error rates.
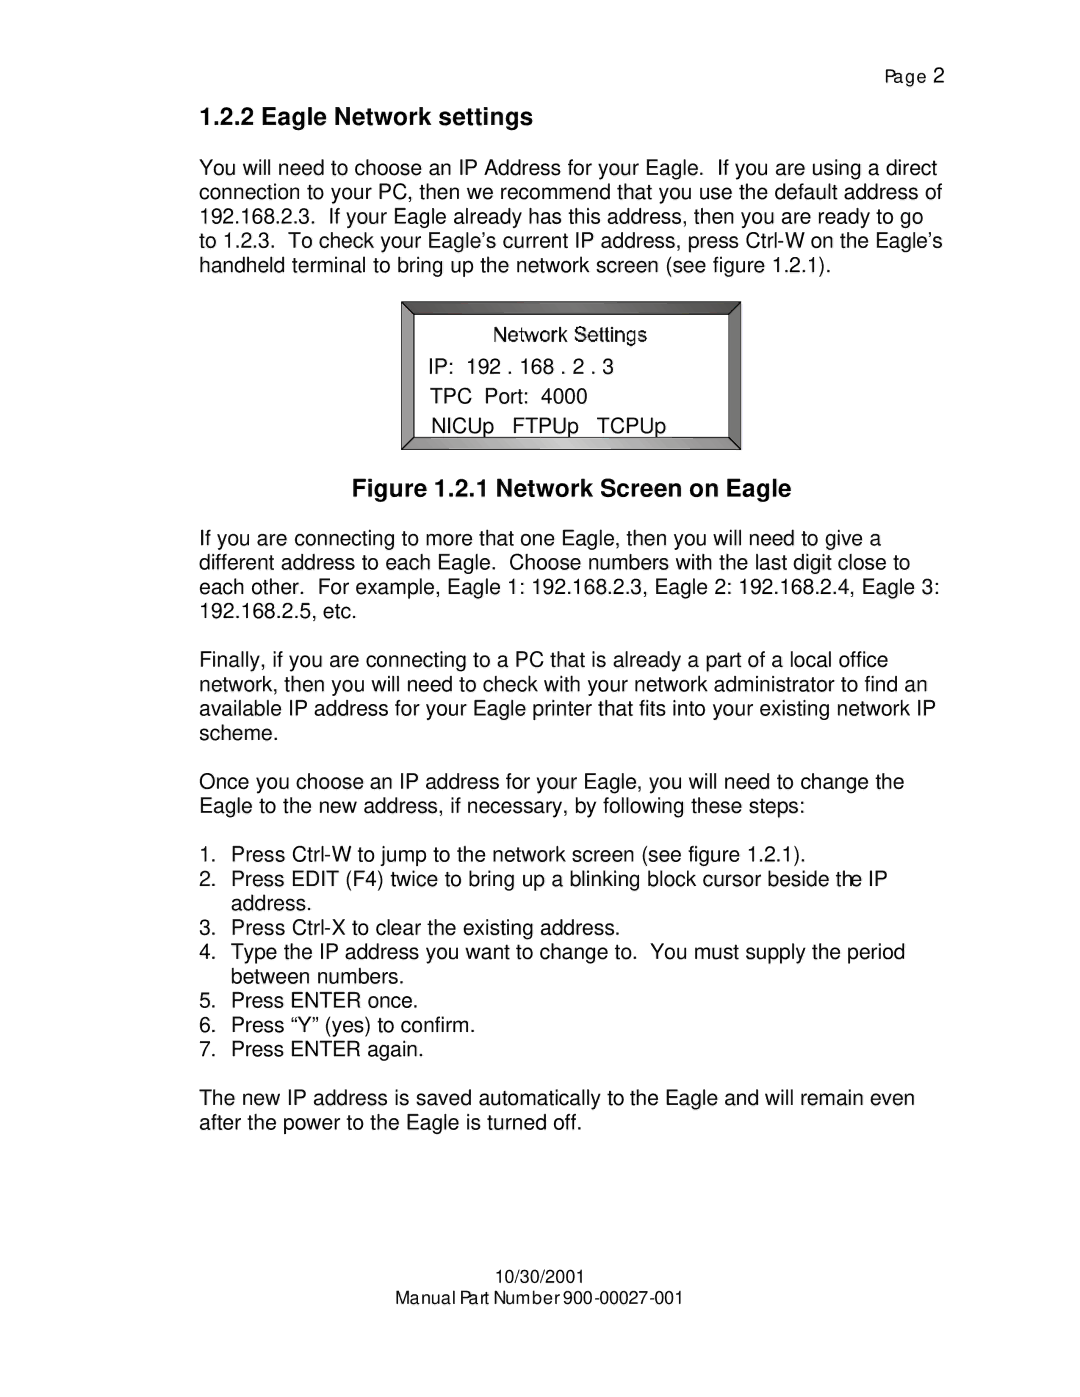
TransEagle utilizes advanced technologies for data analytics and reporting. It employs machine learning algorithms that analyze historical data patterns and predict future network behavior, helping administrators to proactively address potential issues before they escalate. This predictive capability significantly reduces downtime and enhances overall network reliability.
Another key characteristic of the software is its compatibility with a wide range of network devices and protocols. This flexibility allows organizations to integrate TransEagle into their existing network infrastructure without the need for extensive modifications. Whether the network consists of routers, switches, or firewalls, TransEagle seamlessly communicates with these devices, ensuring comprehensive monitoring and management.
Security is another critical focus for the TransEagle software. It includes built-in features for threat detection, alerting administrators to suspicious activities in real-time. By employing advanced encryption protocols and access controls, TransEagle safeguards sensitive data against unauthorized access, thereby enhancing overall network security.
Additionally, TransEagle offers customizable reporting features that enable users to generate detailed reports tailored to specific needs. These reports can highlight trends over time, performance metrics, and compliance with industry standards, providing valuable insights for decision-making.
In summary, Eagle Electronics TransEagle Network Software, model 900-00027-001, stands out for its user-friendly interface, advanced data analytics capabilities, compatibility with various network devices, strong security measures, and flexible reporting tools. It is an ideal solution for organizations looking to enhance their network management and ensure uninterrupted service delivery. Embracing this software not only empowers administrators but also fosters a more resilient and efficient network environment.