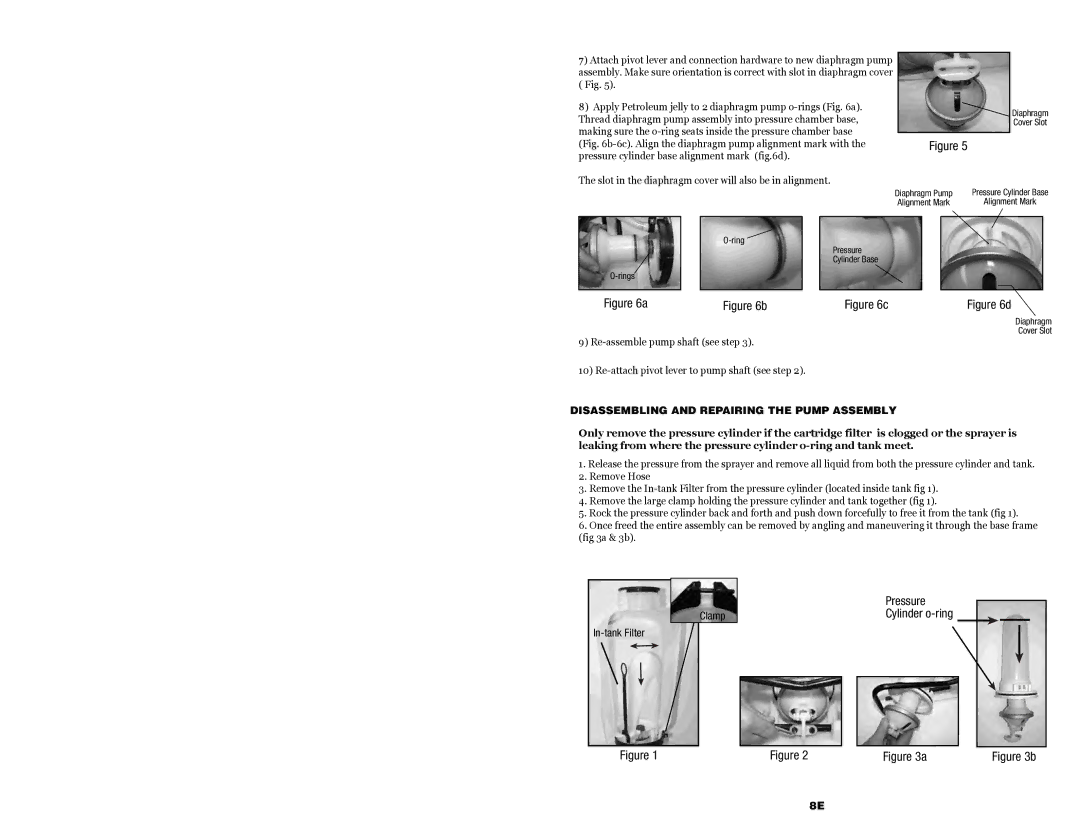
7)Attach pivot lever and connection hardware to new diaphragm pump assembly. Make sure orientation is correct with slot in diaphragm cover ( Fig. 5).
8)Apply Petroleum jelly to 2 diaphragm pump
(Fig. | Figure 5 |
pressure cylinder base alignment mark (fig.6d). |
|
The slot in the diaphragm cover will also be in alignment. |
|
Diaphragm Cover Slot
Figure 6a
Figure 6b
Diaphragm Pump | Pressure Cylinder Base |
Alignment Mark | Alignment Mark |
Pressure
Cylinder Base
Figure 6c | Figure 6d |
Diaphragm
Cover Slot
9)
10)
DISASSEMBLING AND REPAIRING THE PUMP ASSEMBLY
Only remove the pressure cylinder if the cartridge filter is clogged or the sprayer is leaking from where the pressure cylinder
1.Release the pressure from the sprayer and remove all liquid from both the pressure cylinder and tank.
2.Remove Hose
3.Remove the
4.Remove the large clamp holding the pressure cylinder and tank together (fig 1).
5.Rock the pressure cylinder back and forth and push down forcefully to free it from the tank (fig 1).
6.Once freed the entire assembly can be removed by angling and maneuvering it through the base frame (fig 3a & 3b).
In-tank Filter
Clamp
Pressure Cylinder o-ring
Figure 1 | Figure 2 | Figure 3a | Figure 3b |
8E