Part Names and Functions
Remote Control
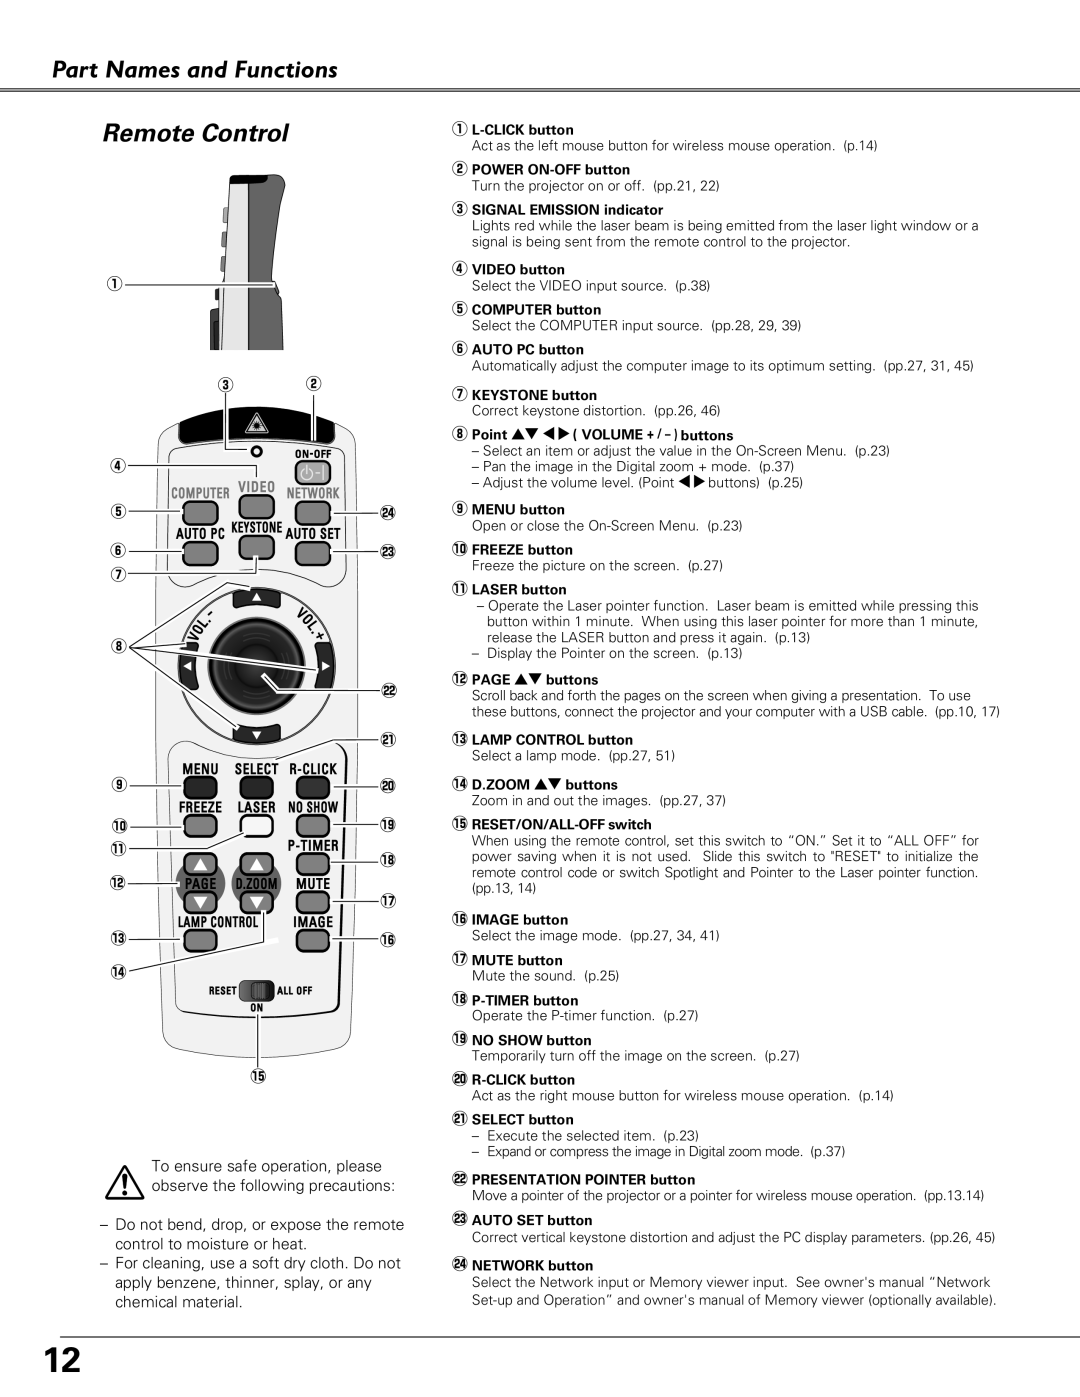
q
ew
r |
|
t | @4 |
y | @3 |
u |
|
i ![]()
![]()
![]() @2
@2
![]()
![]() @1
@1
o ![]()
![]()
![]()
![]()
![]() @0
@0
!0 | !9 |
!1 | !8 |
| |
!2 |
|
| !7 |
!3 | !6 |
!4 |
|
!5
To ensure safe operation, please observe the following precautions:
–Do not bend, drop, or expose the remote control to moisture or heat.
–For cleaning, use a soft dry cloth. Do not apply benzene, thinner, splay, or any chemical material.
q
Act as the left mouse button for wireless mouse operation. (p.14)
wPOWER
Turn the projector on or off. (pp.21, 22)
eSIGNAL EMISSION indicator
Lights red while the laser beam is being emitted from the laser light window or a signal is being sent from the remote control to the projector.
rVIDEO button
Select the VIDEO input source. (p.38)
tCOMPUTER button
Select the COMPUTER input source. (pp.28, 29, 39)
yAUTO PC button
Automatically adjust the computer image to its optimum setting. (pp.27, 31, 45)
uKEYSTONE button
Correct keystone distortion. (pp.26, 46)
iPoint ed 78( VOLUME + / – ) buttons
–Select an item or adjust the value in the
–Pan the image in the Digital zoom + mode. (p.37)
–Adjust the volume level. (Point 78buttons) (p.25)
oMENU button
Open or close the
!0FREEZE button
Freeze the picture on the screen. (p.27)
!1LASER button
–Operate the Laser pointer function. Laser beam is emitted while pressing this button within 1 minute. When using this laser pointer for more than 1 minute, release the LASER button and press it again. (p.13)
–Display the Pointer on the screen. (p.13)
!2PAGE ed buttons
Scroll back and forth the pages on the screen when giving a presentation. To use these buttons, connect the projector and your computer with a USB cable. (pp.10, 17)
!3LAMP CONTROL button
Select a lamp mode. (pp.27, 51)
!4D.ZOOM ed buttons
Zoom in and out the images. (pp.27, 37)
!5RESET/ON/ALL-OFF switch
When using the remote control, set this switch to “ON.” Set it to “ALL OFF” for power saving when it is not used. Slide this switch to "RESET" to initialize the remote control code or switch Spotlight and Pointer to the Laser pointer function. (pp.13, 14)
!6IMAGE button
Select the image mode. (pp.27, 34, 41)
!7MUTE button
Mute the sound. (p.25)
Operate the
!9NO SHOW button
Temporarily turn off the image on the screen. (p.27)
Act as the right mouse button for wireless mouse operation. (p.14)
@1SELECT button
–Execute the selected item. (p.23)
–Expand or compress the image in Digital zoom mode. (p.37)
@2PRESENTATION POINTER button
Move a pointer of the projector or a pointer for wireless mouse operation. (pp.13.14)
@3AUTO SET button
Correct vertical keystone distortion and adjust the PC display parameters. (pp.26, 45)
@4NETWORK button
Select the Network input or Memory viewer input. See owner's manual “Network
12