Lens Installation
When replacing the lens or using an optional lens, install the lens by following the instructions below. Ask the sales dealer for detailed information of the optional lens specifications.
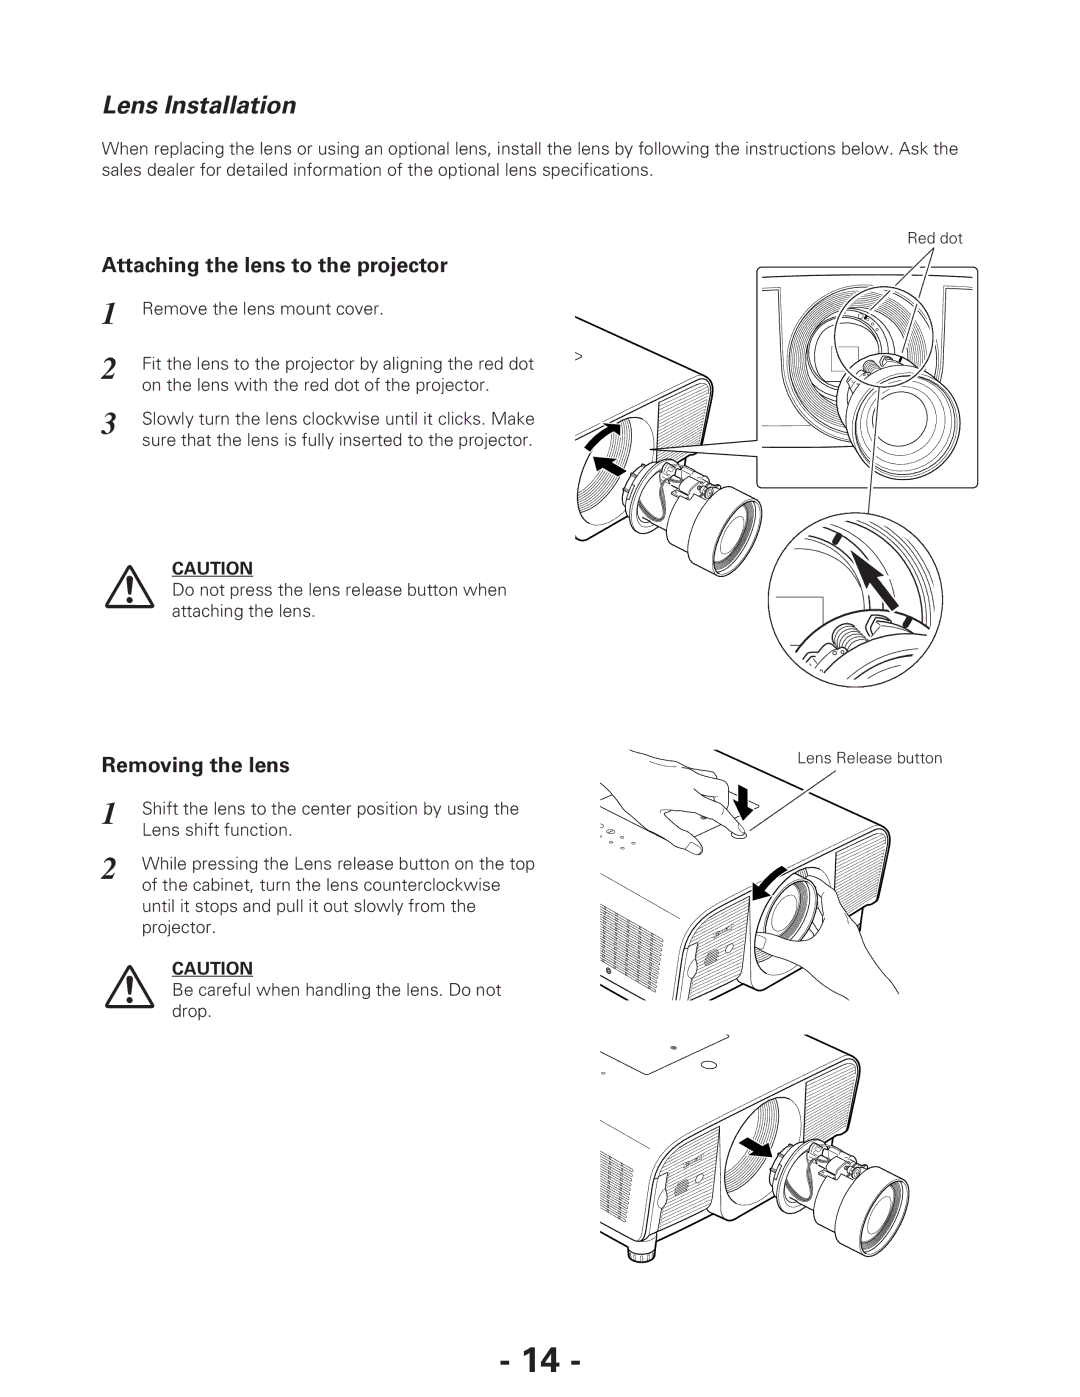
Attaching the lens to the projector
1 | Remove the lens mount cover. |
2 | Fit the lens to the projector by aligning the red dot |
| on the lens with the red dot of the projector. |
3 | Slowly turn the lens clockwise until it clicks. Make |
| sure that the lens is fully inserted to the projector. |
CAUTION
Do not press the lens release button when attaching the lens.
Removing the lens
1 | Shift the lens to the center position by using the |
| Lens shift function. |
2 | While pressing the Lens release button on the top |
| of the cabinet, turn the lens counterclockwise |
until it stops and pull it out slowly from the projector.
CAUTION
Be careful when handling the lens. Do not drop.
Red dot
Lens Release button
- 14 -