LC-XT1
Follow these steps to replace the lamp assembly.
1 Check the number of lamp to be replaced on Lamp Status
Display.
2 Turn off the projector and disconnect the AC Power Cord. Allow the projector to cool down for at least 45 minutes.
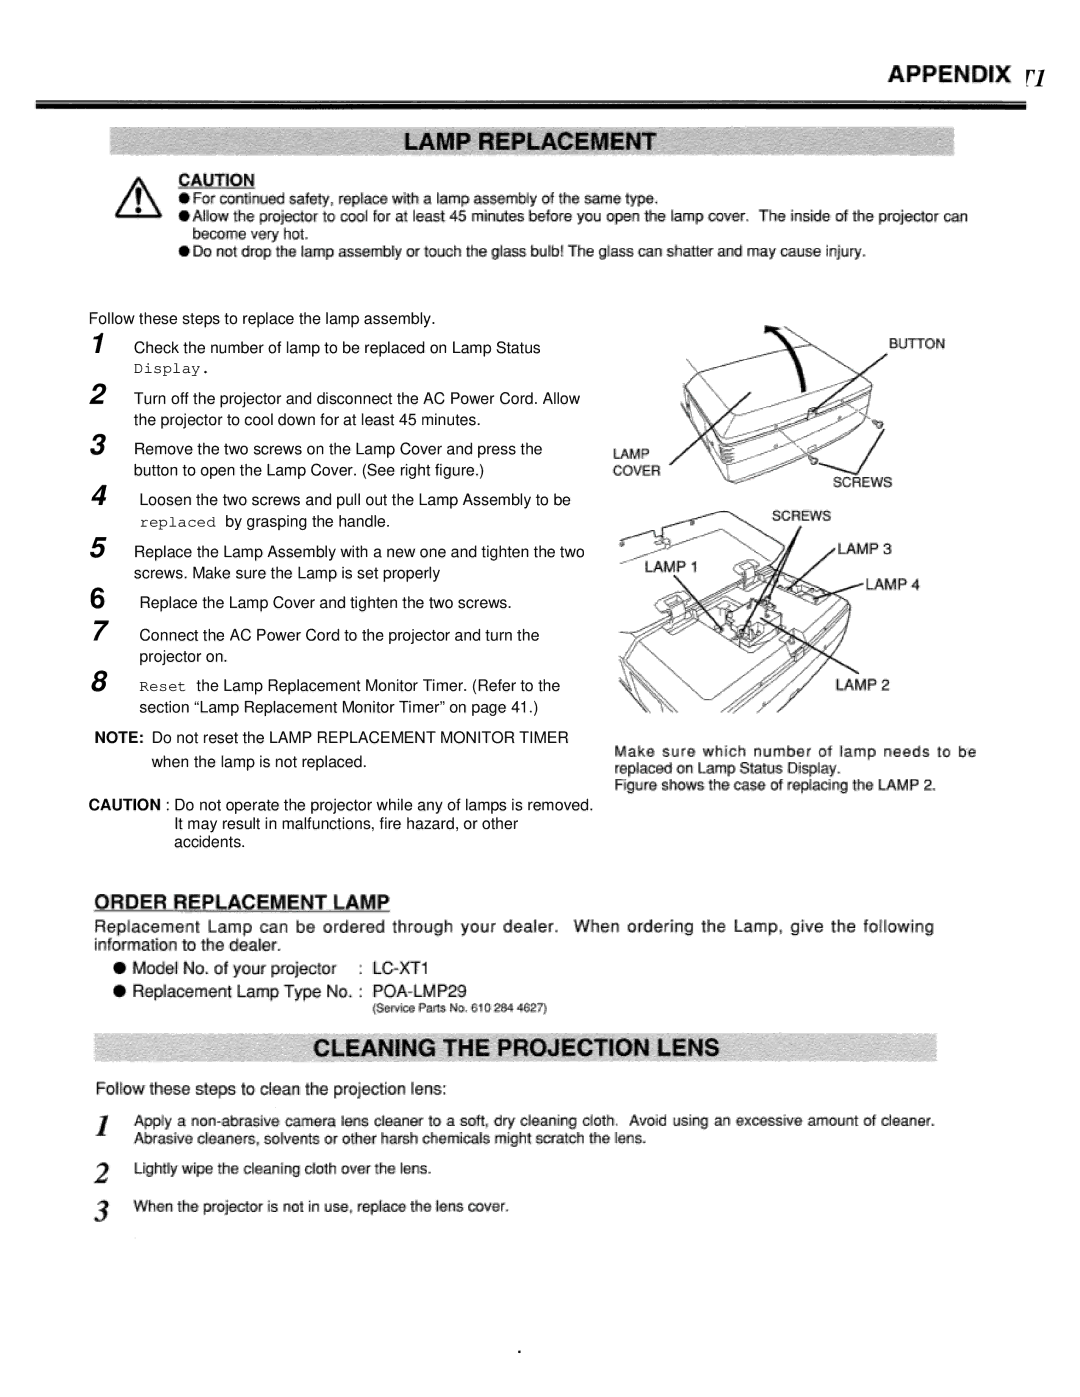
3 Remove the two screws on the Lamp Cover and press the button to open the Lamp Cover. (See right figure.)
4 Loosen the two screws and pull out the Lamp Assembly to be replaced by grasping the handle.
5 Replace the Lamp Assembly with a new one and tighten the two screws. Make sure the Lamp is set properly
6 Replace the Lamp Cover and tighten the two screws.
7 Connect the AC Power Cord to the projector and turn the projector on.
8 Reset the Lamp Replacement Monitor Timer. (Refer to the section “Lamp Replacement Monitor Timer” on page 41.)
NOTE: Do not reset the LAMP REPLACEMENT MONITOR TIMER when the lamp is not replaced.
CAUTION : Do not operate the projector while any of lamps is removed. It may result in malfunctions, fire hazard, or other accidents.
.