SETTING
SETTING MENU
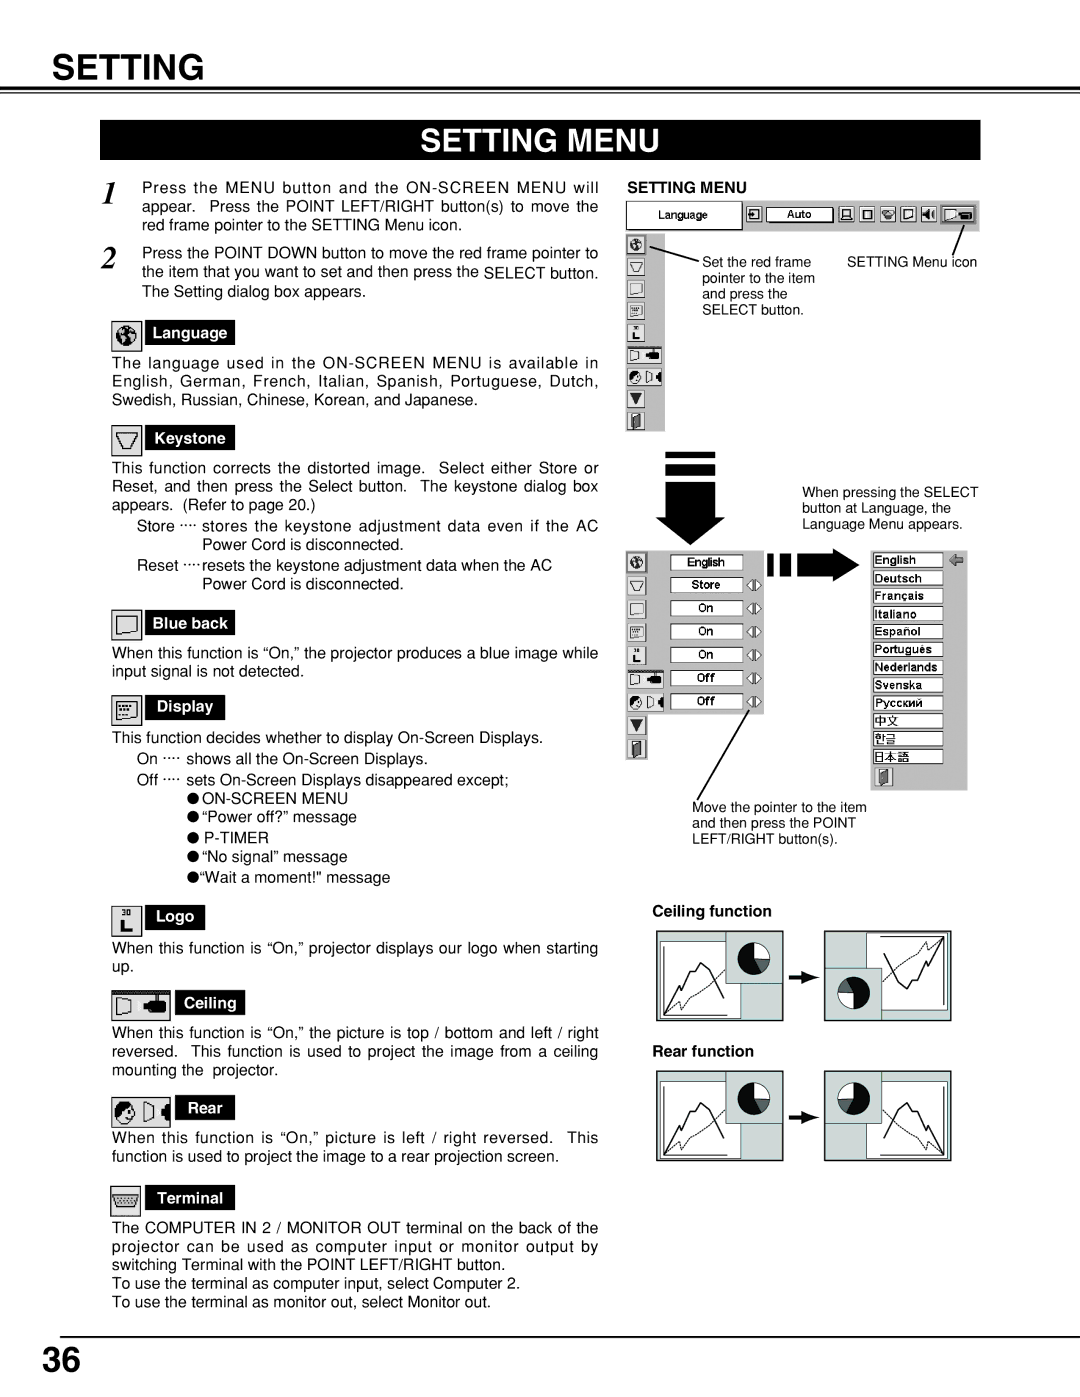
1 | Press the MENU button and the |
| appear. Press the POINT LEFT/RIGHT button(s) to move the |
| red frame pointer to the SETTING Menu icon. |
2 | Press the POINT DOWN button to move the red frame pointer to |
| the item that you want to set and then press the SELECT button. |
The Setting dialog box appears.
Language
The language used in the
Keystone
This function corrects the distorted image. Select either Store or Reset, and then press the Select button. The keystone dialog box appears. (Refer to page 20.)
Store ···· stores the keystone adjustment data even if the AC Power Cord is disconnected.
Reset ····resets the keystone adjustment data when the AC Power Cord is disconnected.
Blue back
When this function is “On,” the projector produces a blue image while input signal is not detected.
Display
This function decides whether to display
Off ···· sets
●
●“Power off?” message
●
●“No signal” message
●“Wait a moment!" message
Logo
When this function is “On,” projector displays our logo when starting up.
Ceiling
When this function is “On,” the picture is top / bottom and left / right reversed. This function is used to project the image from a ceiling mounting the projector.
Rear
When this function is “On,” picture is left / right reversed. This function is used to project the image to a rear projection screen.
SETTING MENU
Set the red frame | SETTING Menu icon |
pointer to the item |
|
and press the |
|
SELECT button. |
|
When pressing the SELECT button at Language, the Language Menu appears.
Move the pointer to the item and then press the POINT LEFT/RIGHT button(s).
Ceiling function
Rear function
Terminal
The COMPUTER IN 2 / MONITOR OUT terminal on the back of the projector can be used as computer input or monitor output by switching Terminal with the POINT LEFT/RIGHT button.
To use the terminal as computer input, select Computer 2. To use the terminal as monitor out, select Monitor out.
36
