Setting up and connection instructions
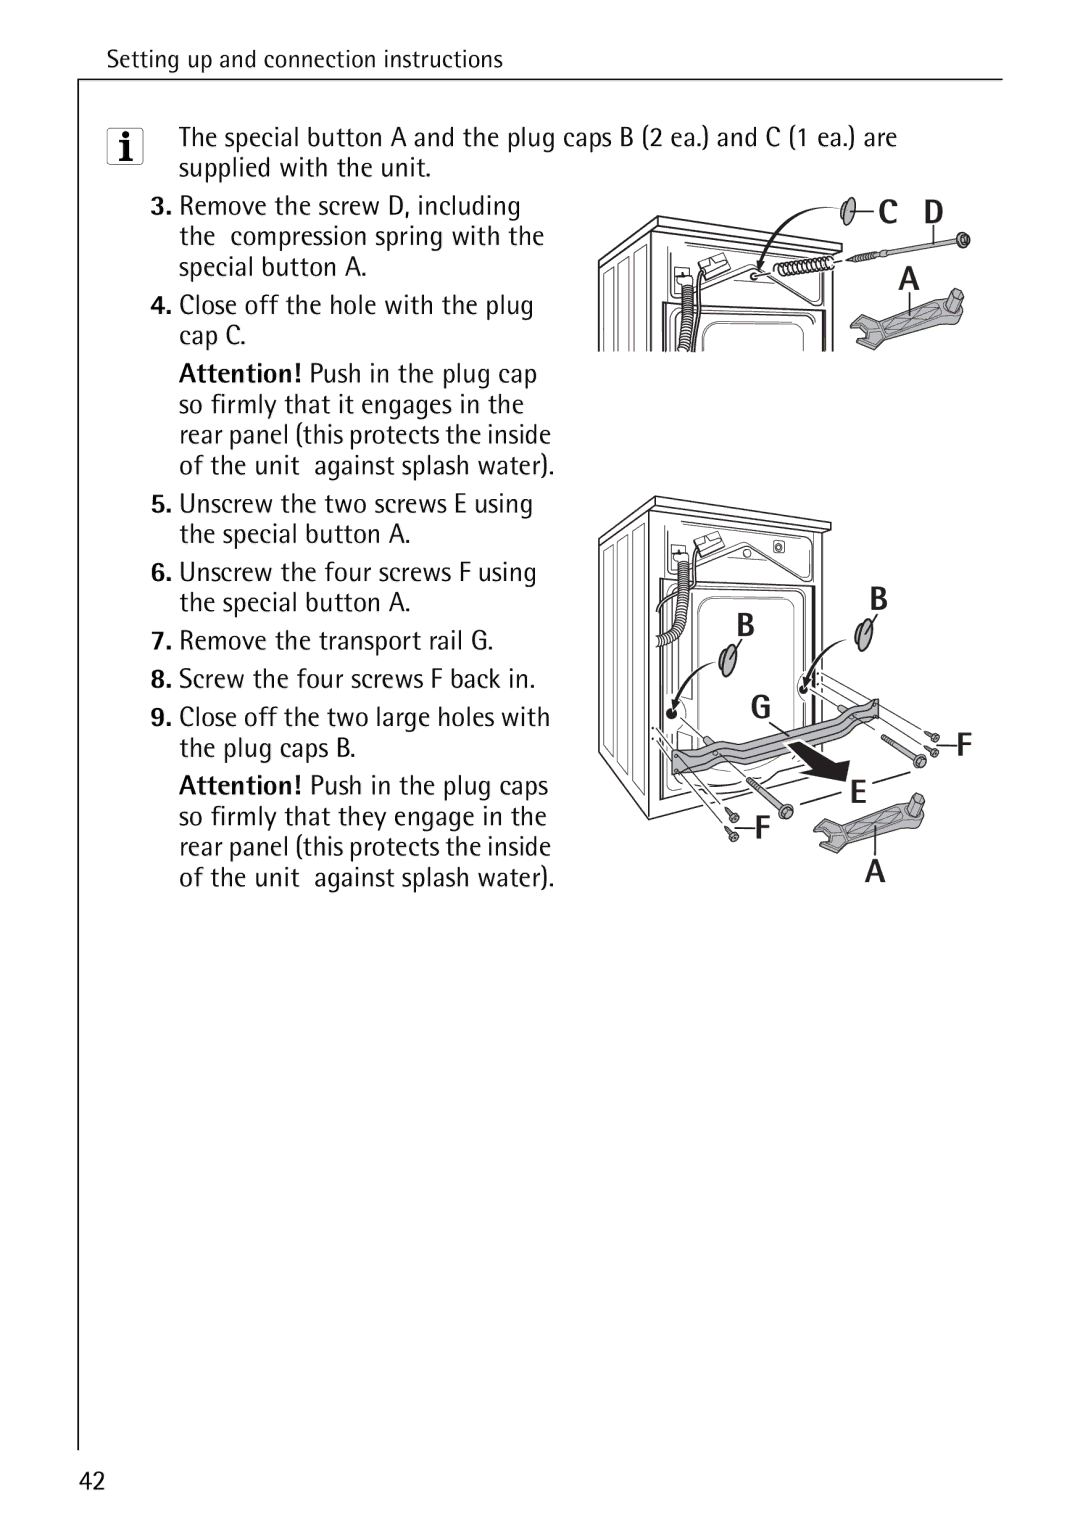
3 | The special button A and the plug caps B (2 ea.) and C (1 ea.) are |
| supplied with the unit. |
3. Remove the screw D, including the compression spring with the special button A.
4. Close off the hole with the plug cap C.
Attention! Push in the plug cap so firmly that it engages in the rear panel (this protects the inside of the unit against splash water).
5.Unscrew the two screws E using
the special button A.
6. Unscrew the four screws F using the special button A.
7. Remove the transport rail G.
8. Screw the four screws F back in.
9. Close off the two large holes with the plug caps B.
Attention! Push in the plug caps so firmly that they engage in the rear panel (this protects the inside of the unit against splash water).
42