
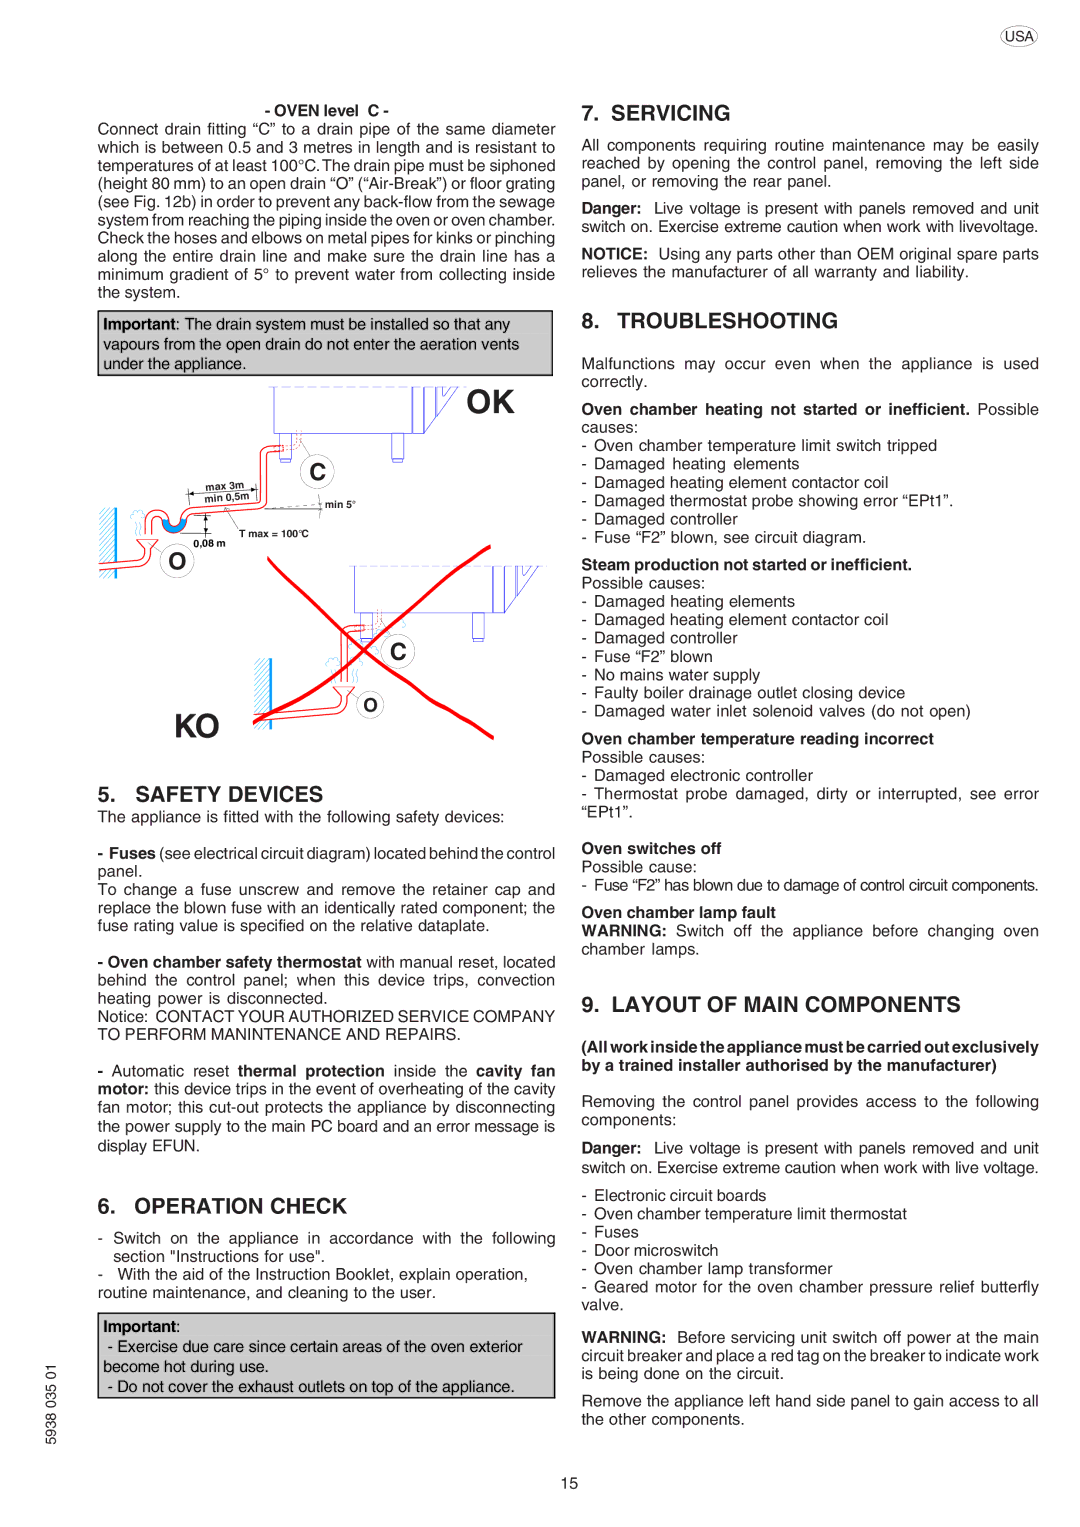
260462, 267084, 260450, 269091, 269082 specifications
The Electrolux models 260456, 267085, 269093, 269092, and 269095 represent a series of innovative and high-performing appliances that showcase the brand's commitment to quality, efficiency, and user convenience. Each model is designed with unique features that cater to a range of household needs, making them a popular choice among consumers.One of the standout features across these models is the incorporation of advanced technology that enhances performance while ensuring energy efficiency. For instance, these appliances often utilize Electrolux’s state-of-the-art Energy Saving technology, which optimizes power consumption, resulting in lower utility bills and a reduced environmental footprint.
The design of each model is sleek and modern, with user-friendly controls that allow for easy operation. Many of these appliances include intuitive touch controls and LED displays, ensuring that users can easily select and adjust settings to suit their preferences. The ergonomic design enhances functionality while also complementing contemporary kitchen aesthetics.
Additionally, the Electrolux 260456, 267085, 269093, 269092, and 269095 models feature multiple cooking modes and settings. They are built to accommodate various culinary techniques, such as baking, grilling, and steaming. This versatility makes them suitable for both novice cooks and seasoned chefs looking to experiment in the kitchen.
Another notable characteristic of these Electrolux appliances is the emphasis on hygiene and cleanliness. Many models come equipped with self-cleaning options, which significantly reduce the effort required to maintain the appliance. The innovative materials used in construction also resist stains and odors, ensuring that the kitchen remains fresh and inviting.
Safety features are paramount in these models, with options like automatic shut-off systems and child safety locks, providing peace of mind for families. The reliability and durability of Electrolux products are also well-known, with many appliances designed to withstand years of use without compromising performance.
Overall, the Electrolux 260456, 267085, 269093, 269092, and 269095 encompass a blend of cutting-edge technology, energy efficiency, and user-centric design. They address the needs of modern consumers while ensuring exceptional performance in the kitchen. Whether for everyday cooking or special occasions, these appliances stand out as reliable partners in culinary endeavors. Electrolux continues to lead the way in promoting innovation and quality in home appliances, and these models are a testament to that legacy.