Special accessories
Active carbon filter
When the hood is used in recirculation mode an active carbon filter should be used.
Order by the retailer
PNC 942 120 180
Installation
Unpacking
Check that the cooker hood has no damages. Trans- portation damages should immediately be reported to the one responsible for the transport Damages, faults and eventually missing details should immedi- ately be reported to the seller.
Take care of the packing material so that small children cannot play with it.
Placement
The hood is to be mounted on the wall or under a wall cupboard.
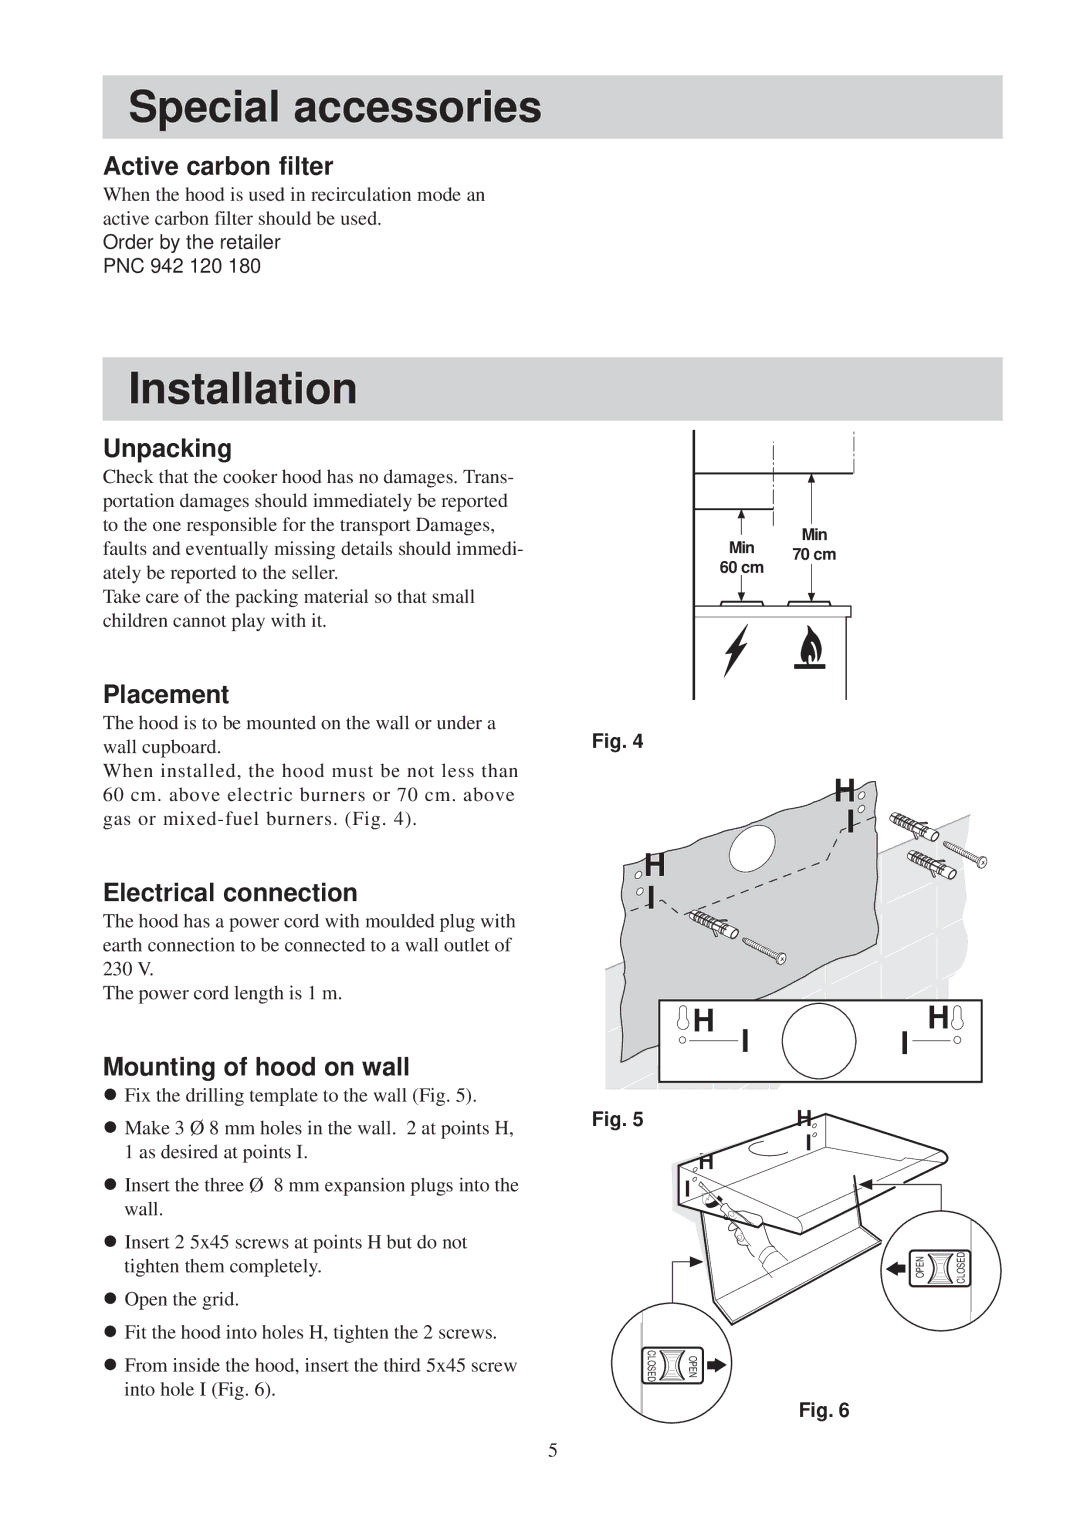
When installed, the hood must be not less than 60 cm. above electric burners or 70 cm. above gas or
Electrical connection
The hood has a power cord with moulded plug with earth connection to be connected to a wall outlet of 230 V.
The power cord length is 1 m.
Mounting of hood on wall
lFix the drilling template to the wall (Fig. 5).
lMake 3 Ø 8 mm holes in the wall. 2 at points H, 1 as desired at points I.
lInsert the three Ø 8 mm expansion plugs into the wall.
lInsert 2 5x45 screws at points H but do not tighten them completely.
lOpen the grid.
lFit the hood into holes H, tighten the 2 screws.
lFrom inside the hood, insert the third 5x45 screw into hole I (Fig. 6).
Min | Min | |
70 cm | ||
60 cm | ||
|
Fig. 4
H![]()
I
![]() H
H
![]() I
I
H I  I H
I H
Fig. 5
I![]()
I ![]()
OPEN | CLOSED |
CLOSED | OPEN |
Fig. 6
5