
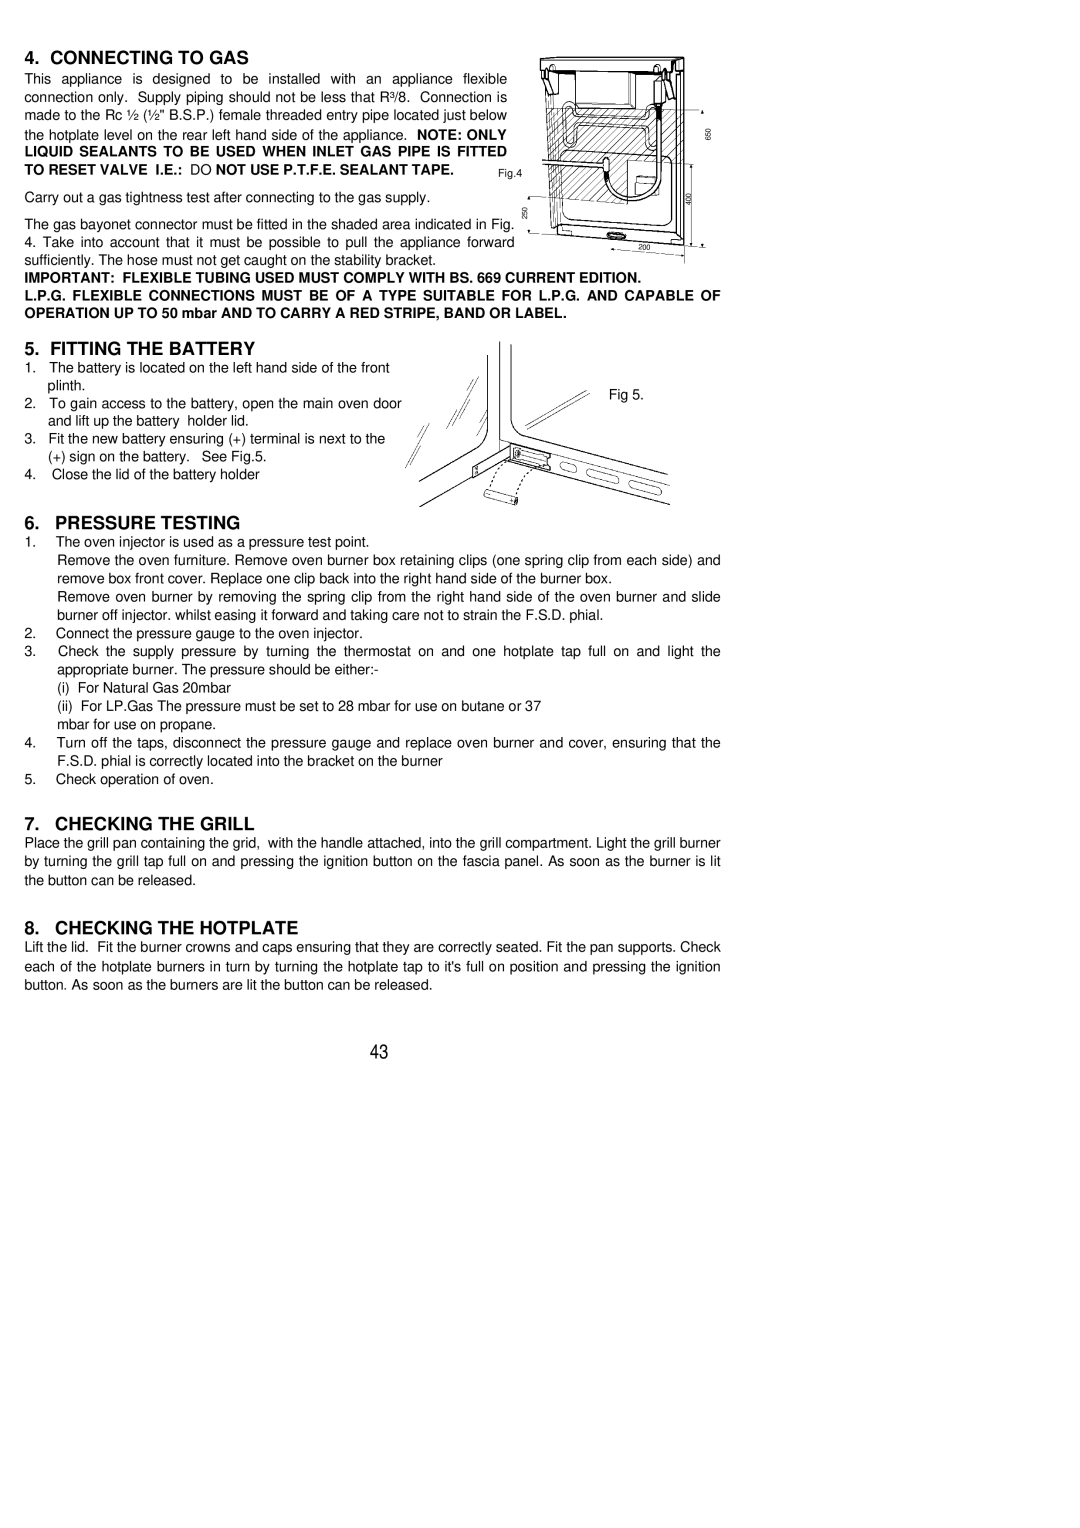
SG 340 specifications
The Electrolux SG 340 is a versatile and powerful upright vacuum cleaner designed to deliver exceptional performance across various cleaning tasks. It embodies the perfect combination of innovative technology, user-friendly design, and efficient cleaning capabilities, making it an ideal choice for homes of all sizes.One of the standout features of the SG 340 is its powerful suction. Equipped with a high-efficiency motor, this vacuum ensures that dirt, dust, and debris are effectively lifted from carpets, hardwood floors, and upholstery. The adjustable suction settings allow users to optimize performance for different surfaces, ensuring thorough cleaning without damaging delicate materials.
The SG 340 is built with a multi-cyclonic filtration system that enhances its cleaning effectiveness. This system not only separates dirt and dust from the airflow but also minimizes filter maintenance and reduces the chances of clogging. The advanced filtration system is particularly beneficial for allergy sufferers, as it captures allergen particles and helps improve indoor air quality.
Adding to its convenience, the Electrolux SG 340 features a bagless design, eliminating the need for replacement bags. Its large dust container is easy to empty, ensuring that users can continue their cleaning tasks without interruption. The transparent container also allows users to monitor the fill level, making it easier to manage.
In terms of maneuverability, the SG 340 is designed with a lightweight frame and a swivel steering feature that allows for easy navigation around furniture and tight spaces. The vacuum’s long power cord provides an extended reach, enabling users to clean larger areas without frequently changing outlets.
Safety and durability are key considerations in the design of the SG 340. The vacuum is built with robust materials that withstand the rigors of regular use. Additionally, it includes safety features such as thermal protection to prevent overheating during prolonged use.
Overall, the Electrolux SG 340 stands out as a reliable and efficient cleaning solution, featuring powerful suction, a user-friendly design, and advanced filtration technology. Whether tackling everyday messes or deep cleaning tasks, the SG 340 is engineered to meet the diverse needs of modern households, making it a valuable addition to any cleaning arsenal.