
9CHG584139, 9CHG584138, WKGROAOOOO, WKGROFOOOO specifications
Electrolux is a leader in innovative home appliances, offering products that prioritize efficiency, performance, and user-friendliness. Among its impressive lineup are models WKGROFOOOO and WKGROAOOOO, as well as two identifiers, 9CHG584138 and 9CHG584139, each designed to meet diverse consumer needs.The Electrolux WKGROFOOOO stands out with its advanced features aimed at maximizing convenience and functionality. It typically includes a robust motor designed for high performance, ensuring reliable operation across various tasks, whether for washing or drying. The model likely incorporates energy-efficient technologies, contributing to reduced electricity costs and a lower environmental footprint. User-friendly controls and smart technology integrations facilitate easy operation, and many users appreciate features like delayed starts and cycle customization for added flexibility.
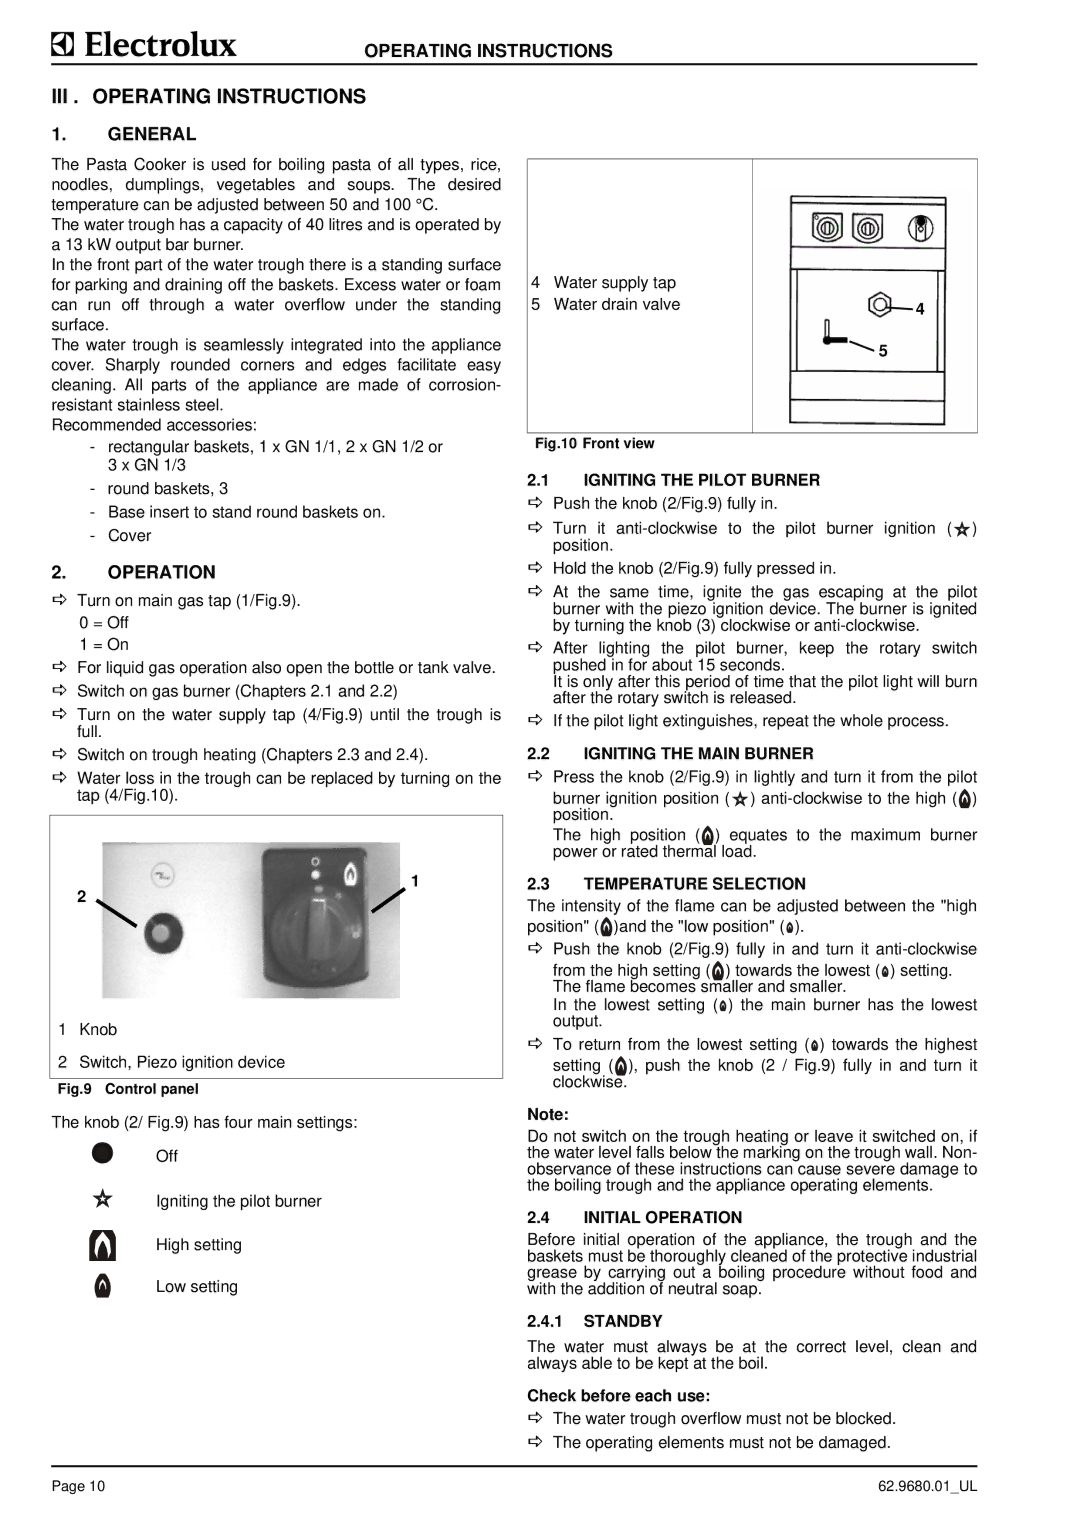
Similarly, the WKGROAOOOO model is crafted with versatility in mind. It may offer multiple wash and dry programs that cater to different fabric types, allowing users to handle everything from delicate silk to sturdy denim with optimal care. This model often includes technologies that reduce noise levels, making it suitable for homes where noise can be a concern, allowing users to run cycles during night hours without disturbing others.
The 9CHG584138 and 9CHG584139 numbers may refer to specific features or components that enhance the overall functionality of Electrolux appliances. These could represent specific enhancements such as improved water efficiency features, allowing for reduced water consumption during wash cycles while maintaining superior cleaning effectiveness. State-of-the-art sensor technologies often help in automatically adjusting wash and drying times based on the load, providing efficient use of resources.
Across these models, Electrolux typically emphasizes sustainability by incorporating eco-friendly materials and processes. Smart diagnostics may also be present, enabling users to easily troubleshoot issues, ensuring longevity and reliable performance. The combination of thoughtful design and innovative technology makes Electrolux appliances like WKGROFOOOO, WKGROAOOOO, and their associated models highly attractive to consumers seeking quality and efficiency in their home cleaning solutions.