Attaching the StarBright7 screen material to the frame
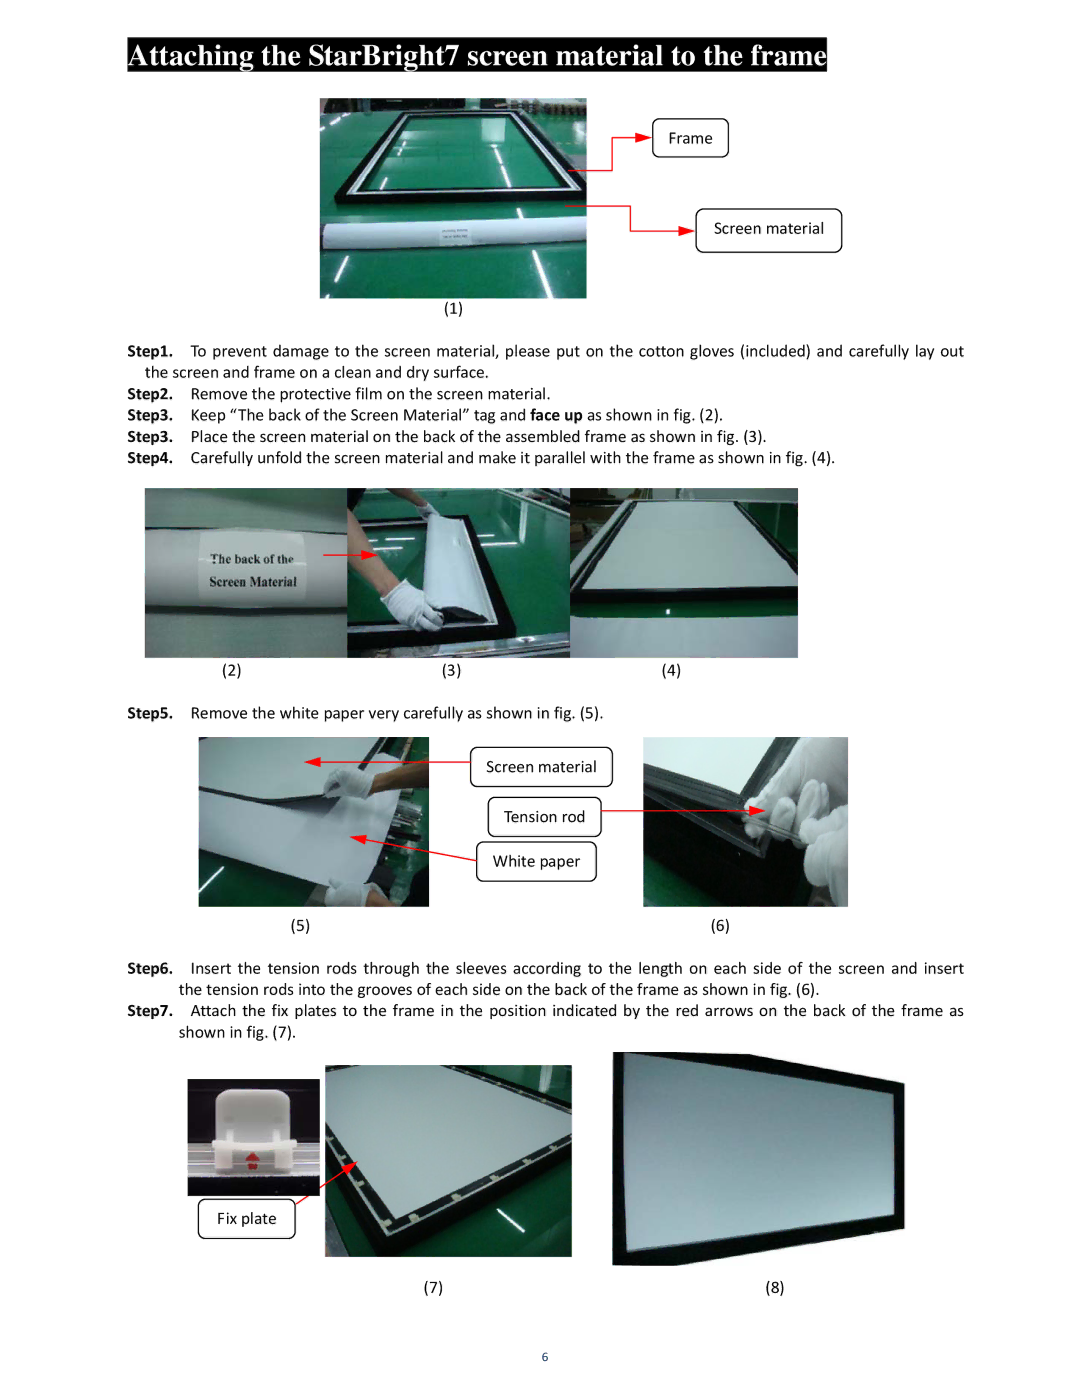
Frame
Screen material
(1)
Step1. To prevent damage to the screen material, please put on the cotton gloves (included) and carefully lay out the screen and frame on a clean and dry surface.
Step2. Remove the protective film on the screen material.
Step3. Keep “The back of the Screen Material” tag and face up as shown in fig. (2). Step3. Place the screen material on the back of the assembled frame as shown in fig. (3).
Step4. Carefully unfold the screen material and make it parallel with the frame as shown in fig. (4).
(2)(3)(4)
Step5. Remove the white paper very carefully as shown in fig. (5).
Screen material
Tension rod
White paper
(5) | (6) |
Step6. Insert the tension rods through the sleeves according to the length on each side of the screen and insert the tension rods into the grooves of each side on the back of the frame as shown in fig. (6).
Step7. Attach the fix plates to the frame in the position indicated by the red arrows on the back of the frame as shown in fig. (7).
Fix plate
(7)(8)
6