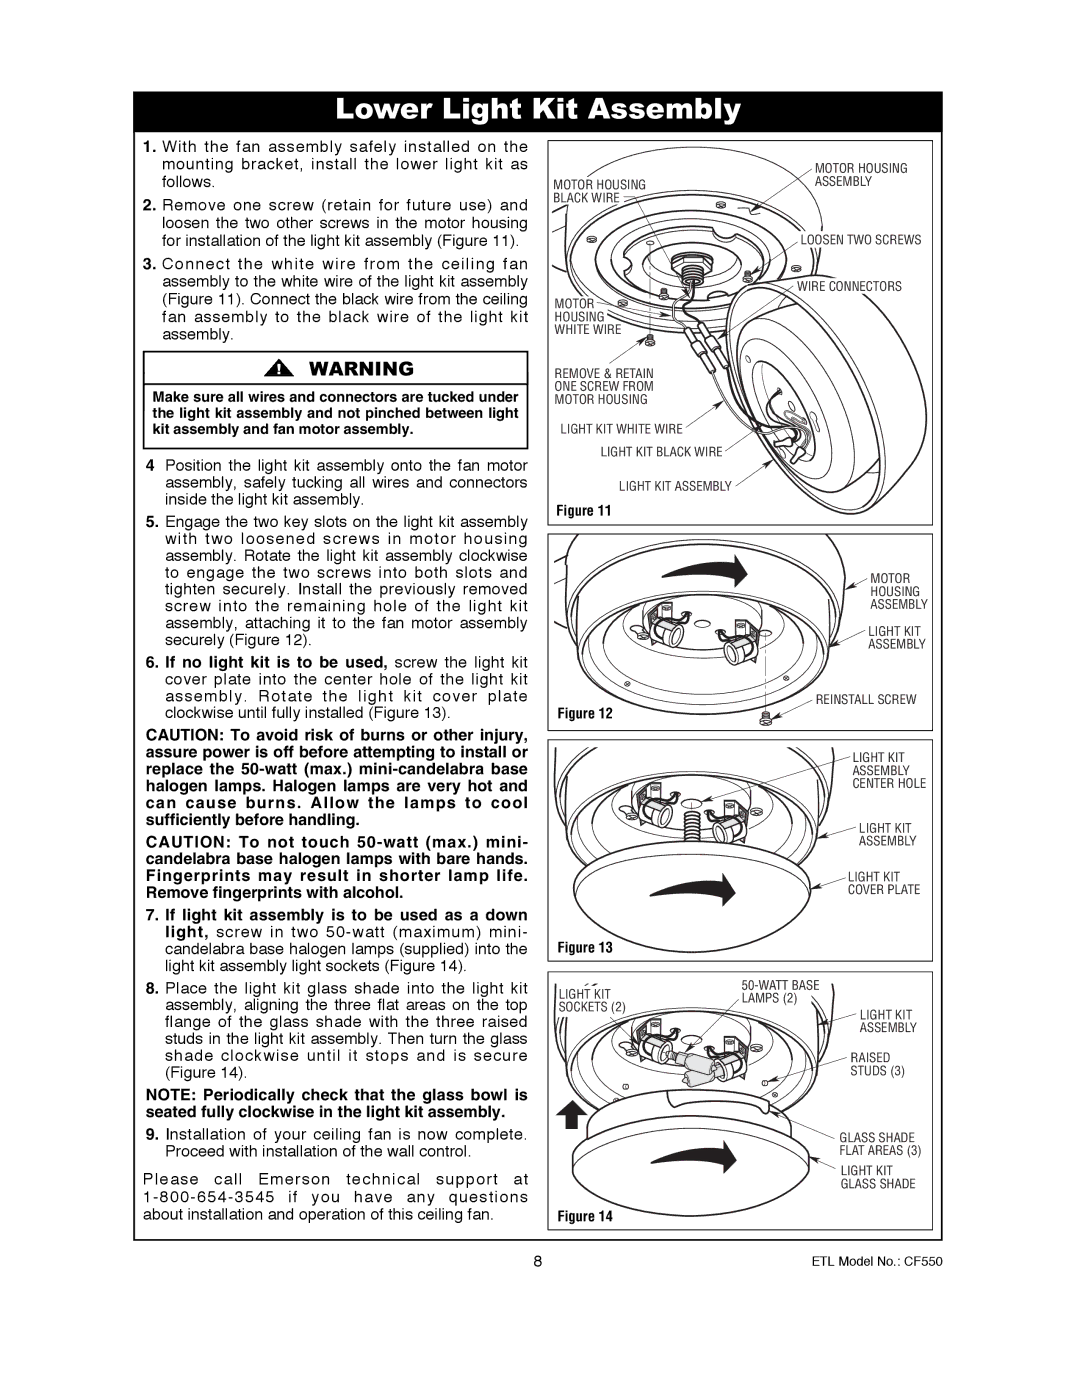
CF550BS00, CF550ORB00 specifications
The Emerson CF550BS00 and CF550ORB00 ceiling fans are two impressive models designed for both style and efficient airflow. These fans combine aesthetics with advanced technology, making them suitable for any room setting, whether modern or traditionally styled.One of the standout features of the Emerson CF550 fans is their powerful energy-efficient motor. This motor ensures high airflow while consuming minimal energy, making the ceiling fans ideal for those looking to reduce energy costs. The fans operate at various speeds, allowing users to customize airflow according to their comfort needs. With a maximum airflow of over 5,000 CFM, these fans can effectively circulate air in larger spaces.
Both models sport a sleek design, available in brushed steel (CF550BS00) and oil-rubbed bronze (CF550ORB00) finishes. This versatility allows homeowners to choose a model that complements their interior decor. The fans are equipped with five high-quality blades, engineered for optimal performance. These blades are not only aesthetically pleasing but also designed to generate powerful airflow while minimizing noise, ensuring a peaceful environment.
The Emerson CF550 fans feature a dual-mount installation system, allowing for both standard and angled mounting. This flexibility enables installation in various ceiling heights and styles, accommodating a range of room layouts. Additionally, the fans come with a remote control option, providing convenient accessibility for adjusting settings from anywhere in the room.
In terms of user comfort, these fans are equipped with a reverse motor function, allowing users to change the direction of the blades. This feature becomes particularly useful in different seasons; during warmer months, the fans provide a cooling effect, while in winter, the reverse function helps circulate heated air, enhancing energy efficiency and comfort.
Durability is another hallmark of the Emerson CF550 series. Constructed with high-quality materials, these fans are designed to withstand the test of time. The blades are treated against warping and fading, ensuring they retain their beauty and functionality for years.
In summary, the Emerson CF550BS00 and CF550ORB00 ceiling fans offer an exceptional combination of style, energy efficiency, and innovative technology. With their robust performance, aesthetic appeal, and versatile features, these fans provide a perfect solution for comfortable climate control in any living space. Whether enhancing a cozy bedroom or a spacious living area, these ceiling fans are an excellent investment for modern and classic homes alike.

