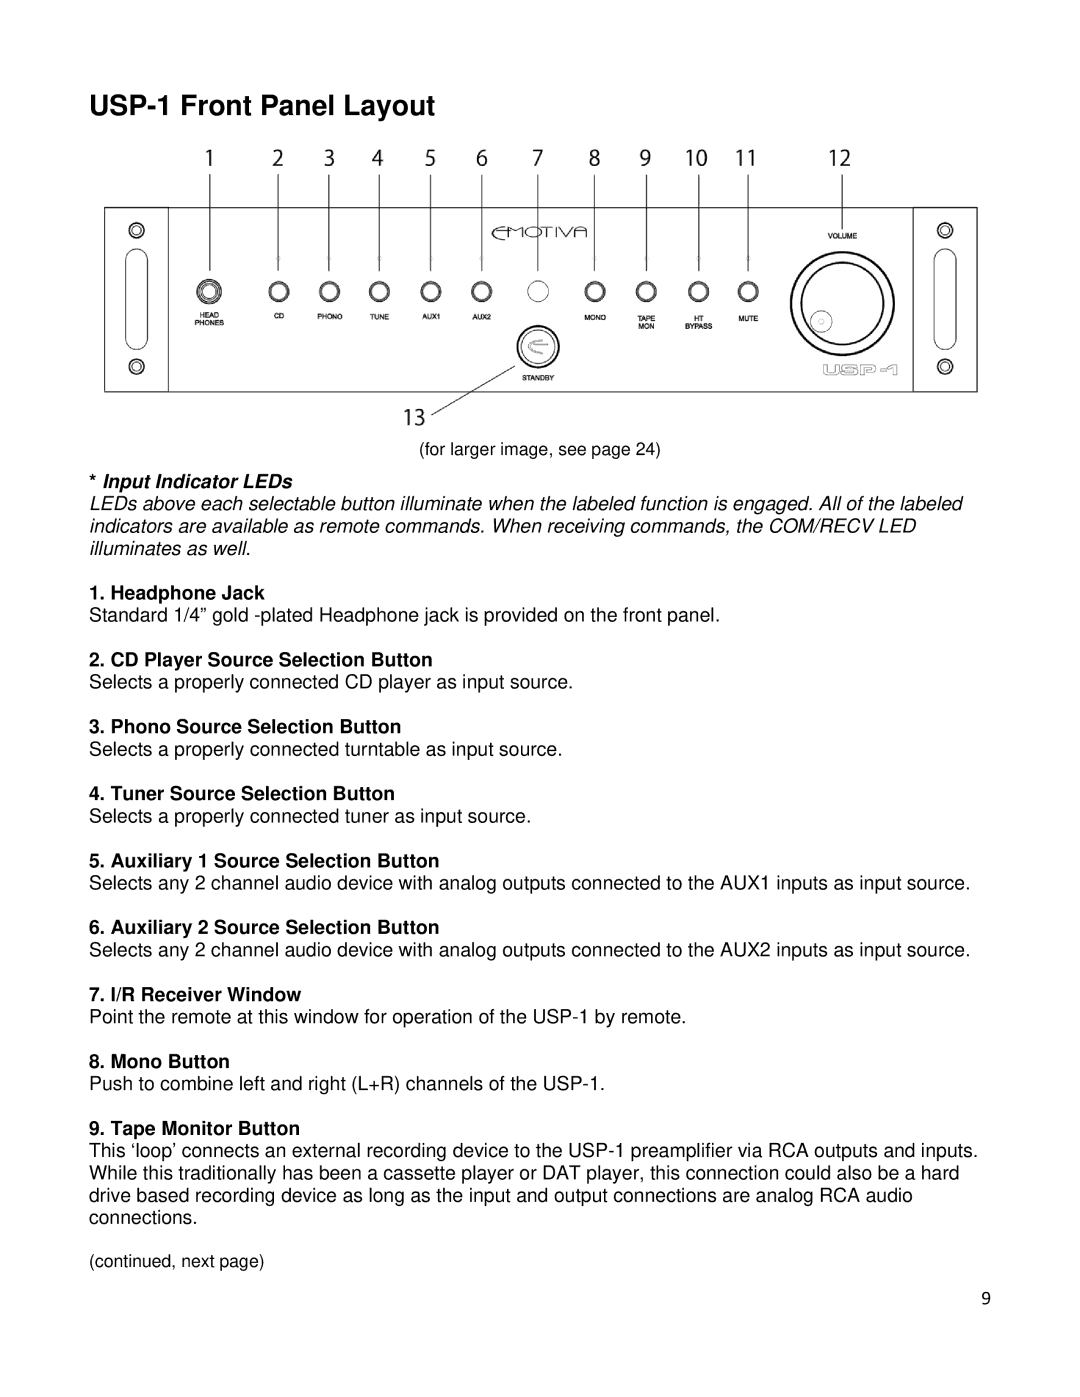
USP-1 Front Panel Layout
(for larger image, see page 24)
*Input Indicator LEDs
LEDs above each selectable button illuminate when the labeled function is engaged. All of the labeled indicators are available as remote commands. When receiving commands, the COM/RECV LED illuminates as well.
1. Headphone Jack
Standard 1/4” gold
2. CD Player Source Selection Button
Selects a properly connected CD player as input source.
3. Phono Source Selection Button
Selects a properly connected turntable as input source.
4. Tuner Source Selection Button
Selects a properly connected tuner as input source.
5. Auxiliary 1 Source Selection Button
Selects any 2 channel audio device with analog outputs connected to the AUX1 inputs as input source.
6. Auxiliary 2 Source Selection Button
Selects any 2 channel audio device with analog outputs connected to the AUX2 inputs as input source.
7. I/R Receiver Window
Point the remote at this window for operation of the
8. Mono Button
Push to combine left and right (L+R) channels of the
9. Tape Monitor Button
This ‘loop’ connects an external recording device to the
(continued, next page)
9