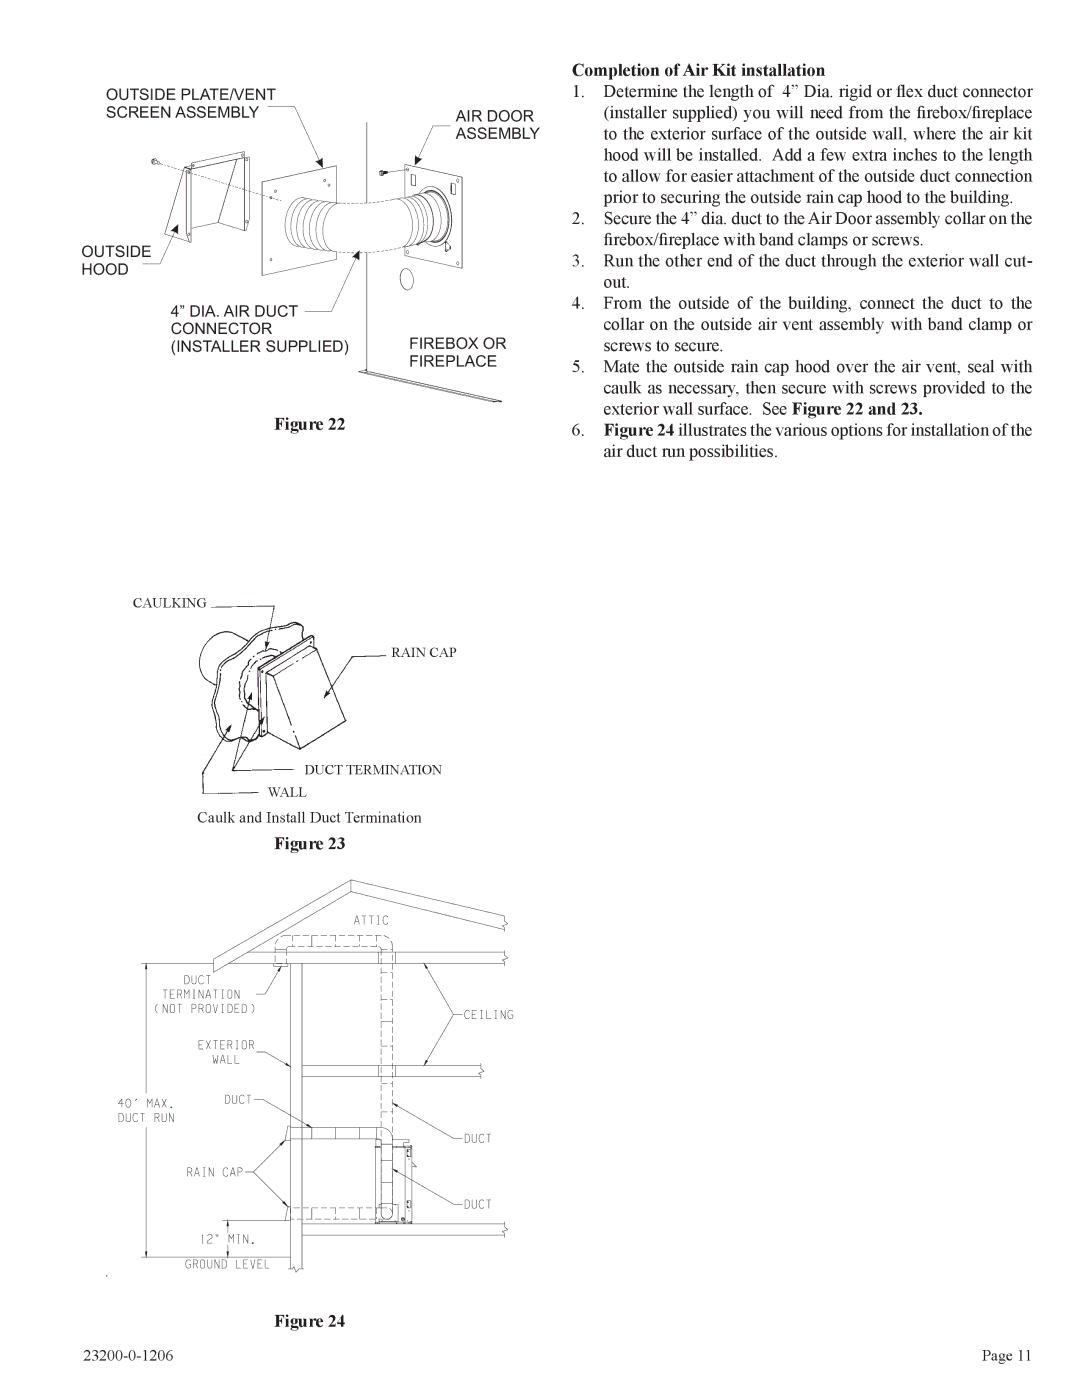
OUTSIDE PLATE/VENT
SCREEN ASSEMBLYAIR DOOR ![]() ASSEMBLY
ASSEMBLY
OUTSIDE
HOOD
4” DIA. AIR DUCT CONNECTOR
(INSTALLER SUPPLIED) FIREBOX OR FIREPLACE
Figure 22
Completion of Air Kit installation
1.Determine the length of 4” Dia. rigid or flex duct connector (installer supplied) you will need from the firebox/fireplace to the exterior surface of the outside wall, where the air kit hood will be installed. Add a few extra inches to the length to allow for easier attachment of the outside duct connection prior to securing the outside rain cap hood to the building.
2.Secure the 4” dia. duct to the Air Door assembly collar on the firebox/fireplace with band clamps or screws.
3.Run the other end of the duct through the exterior wall cut- out.
4.From the outside of the building, connect the duct to the collar on the outside air vent assembly with band clamp or screws to secure.
5.Mate the outside rain cap hood over the air vent, seal with caulk as necessary, then secure with screws provided to the exterior wall surface. See Figure 22 and 23.
6.Figure 24 illustrates the various options for installation of the air duct run possibilities.
CAULKING
RAIN CAP
DUCT TERMINATION
WALL
Caulk and Install Duct Termination
Figure 23
Figure 24
Page 11 |