Manuals
/
Enterasys Networks
/
Computer Equipment
/
Power Supply
Enterasys Networks
C2RPS-CHAS2
manual
Replacing an Installed C2RPS-PSM, 1 C2RPS-PSM Installation
Models:
C2RPS-CHAS2
1
25
34
34
Download
34 pages
46.33 Kb
22
23
24
25
26
27
28
29
Specs
Install
How to
Safety
C2RPS-PSM Power Supply Module
Page 25
Image 25
Page 24
Page 26
Page 25
Image 25
Page 24
Page 26
Contents
Installation Guide
SecureStack C2 Redundant Power Supply Chassis
C2RPS-CHAS2
Page
Enterasys Networks, Inc 50 Minuteman Road Andover, MA
Product Safety
Regulatory Compliance Information
Federal Communications Commission FCC Notice
Industry Canada Notice
Compatibilidad Electromágnetica EMC
Electromagnetic Compatibility EMC
Elektro- magnetische Kompatibilität EMC
VCCI Notice
Declaration of Conformity
BEFORE OPENING OR UTILIZING THE ENCLOSED PRODUCT
Enterasys Networks, Inc Firmware License Agreement
CAREFULLY READ THIS LICENSE AGREEMENT
You and Enterasys agree as follows
3. APPLICABLE LAW. This Agreement shall be interpreted and governed under the laws and in the state and
9. OWNERSHIP. This is a license agreement and not an agreement for sale. You acknowledge and agree that the Program constitutes trade secrets and/or copyrighted material of Enterasys and/or its suppliers. You agree to implement reasonable security measures to protect such trade secrets and copyrighted material. All right, title and interest in and to the Program shall remain with Enterasys and/or its suppliers. All rights not specifically granted to You shall be reserved to Enterasys
viii
Chapter 2 Installation
Contents
Appendix A Specifications
About This Guide
Contents of C2RPS-CHAS2 Carton
Tables
Contents of C2RPS-PSM Carton
C2RPS-CHAS2 Specifications
About This Guide
How to Use This Guide
Who Should Use This Guide
Refer to
Related Documents
The following conventions are used in this guide
Conventions Used in This Guide
xiv About This Guide
RPS Overview
Introduction
For information about
Refer to page
Figure 1-1 SecureStack C2RPS-CHAS2 front view without PSM
C2RPS-CHAS2 Chassis
Figure 1-2 SecureStack C2RPS-CHAS2 front view with two PSMs
Figure 1-3 SecureStack C2RPS-CHAS2 rear view with two PSMs
Figure 1-4 C2RPS-PSM front view
C2RPS-PSM Power Supply Module
Figure 1-5 C2RPS-PSM rear view
Figure 1-6 RPS Supporting Two SecureStack Switches
RPS Deployment Strategies
Getting Help
1-6 Introduction
Unpacking Chassis and Power Supply Modules
Installation
Required Tools
Table 2-1 Contents of C2RPS-CHAS2 Carton
Installing C2RPS-PSMs
Table 2-2 Contents of C2RPS-PSM Carton
Quantity
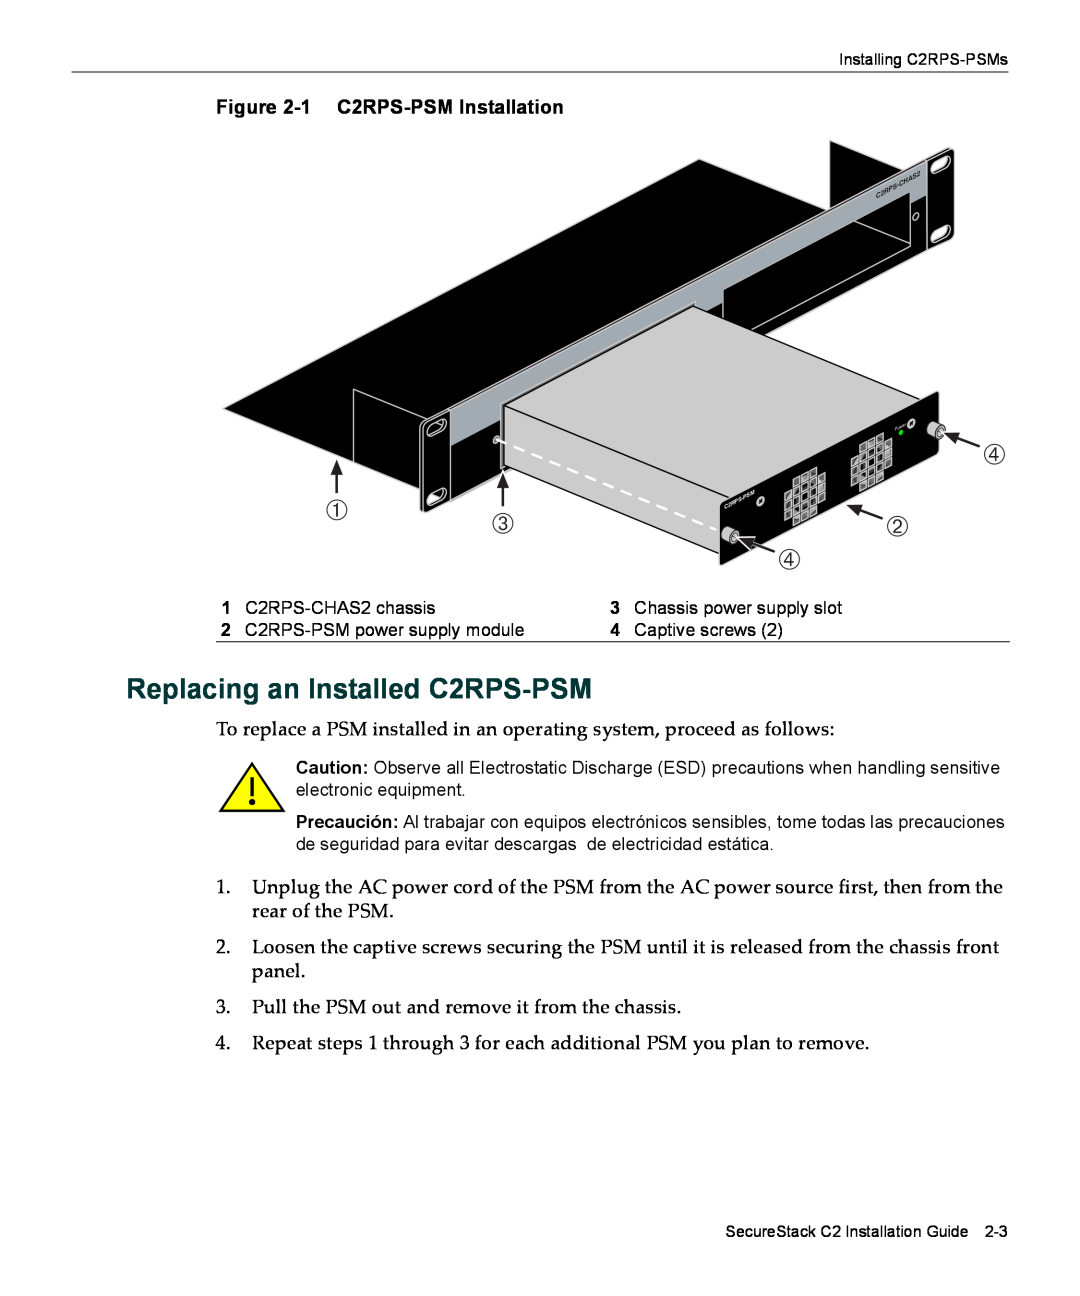
Figure 2-1 C2RPS-PSM Installation
Replacing an Installed C2RPS-PSM
Guidelines for Rackmount Installation
Installing C2RPS-CHAS2 into the Rack
Figure 2-2 Fastening the C2RPS-CHAS2 to the Rack
Rack Mounting the Chassis
Figure 2-4 Power Connectors on C2RPS-PSM rear view
Connecting the PSM Cables and AC Power Cords
Figure 2-3 C2RPS-PSM Cable
This completes the installation
Figure 2-5 C2RPS-PSM Cable and AC Power Cord Connections
2-8 Installation
C2RPS-CHAS2 Chassis Specifications
Specifications
Table A-1 C2RPS-CHAS2 Specifications
Specification
C2RPS-PSM Redundant Power Supply Output Connector
C2RPS-PSM Specifications
Table A-2 C2RPS-PSM Specifications
Figure A-1 C2RPS-PSM Redundant Power Supply Connector Pin Locations
Table A-3 C2RPS-PSM Redundant Power Supply Connector Pin Functions
Compliance Standards
Pin Number
Function
A-4 Specifications
Top
Page
Image
Contents