Sawgrass Technologies, Inc.SubliJet IQ® Getting Started Guide for the EPSON Stylus Photo 1280
6.Clean the area where the adhesive will contact the printer with the alcohol pad provided. Let dry.
7.Pull the bottom piece of 3M Dual Lock Tape off of the support bracket, peel the plastic backing and attach to the marked position. Firmly push down the entire piece.
The support arm may need to be shifted left or right, up to a quarter of an inch, if the tubing contacts any part of the printer. If the tubing appears overly stressed when the print head is in the far left position, move the support arm slightly left by pulling the 3M Dual Lock Tape connection apart and reattaching. Make sure the 3M Dual Lock Tape on the support arm is fully locked onto the 3M Dual Lock Tape on the printer by applying pressure to it and slightly twisting the support arm back and forth.
8.Slide the print head left and right, as far as it will go to ensure that none of the tubing or any part of the QuickConnect system touches the interior of the printer.
9.When you are confident that the QuickConnect system will not interfere with normal print head movement, push the print head to the far right into the parked position.
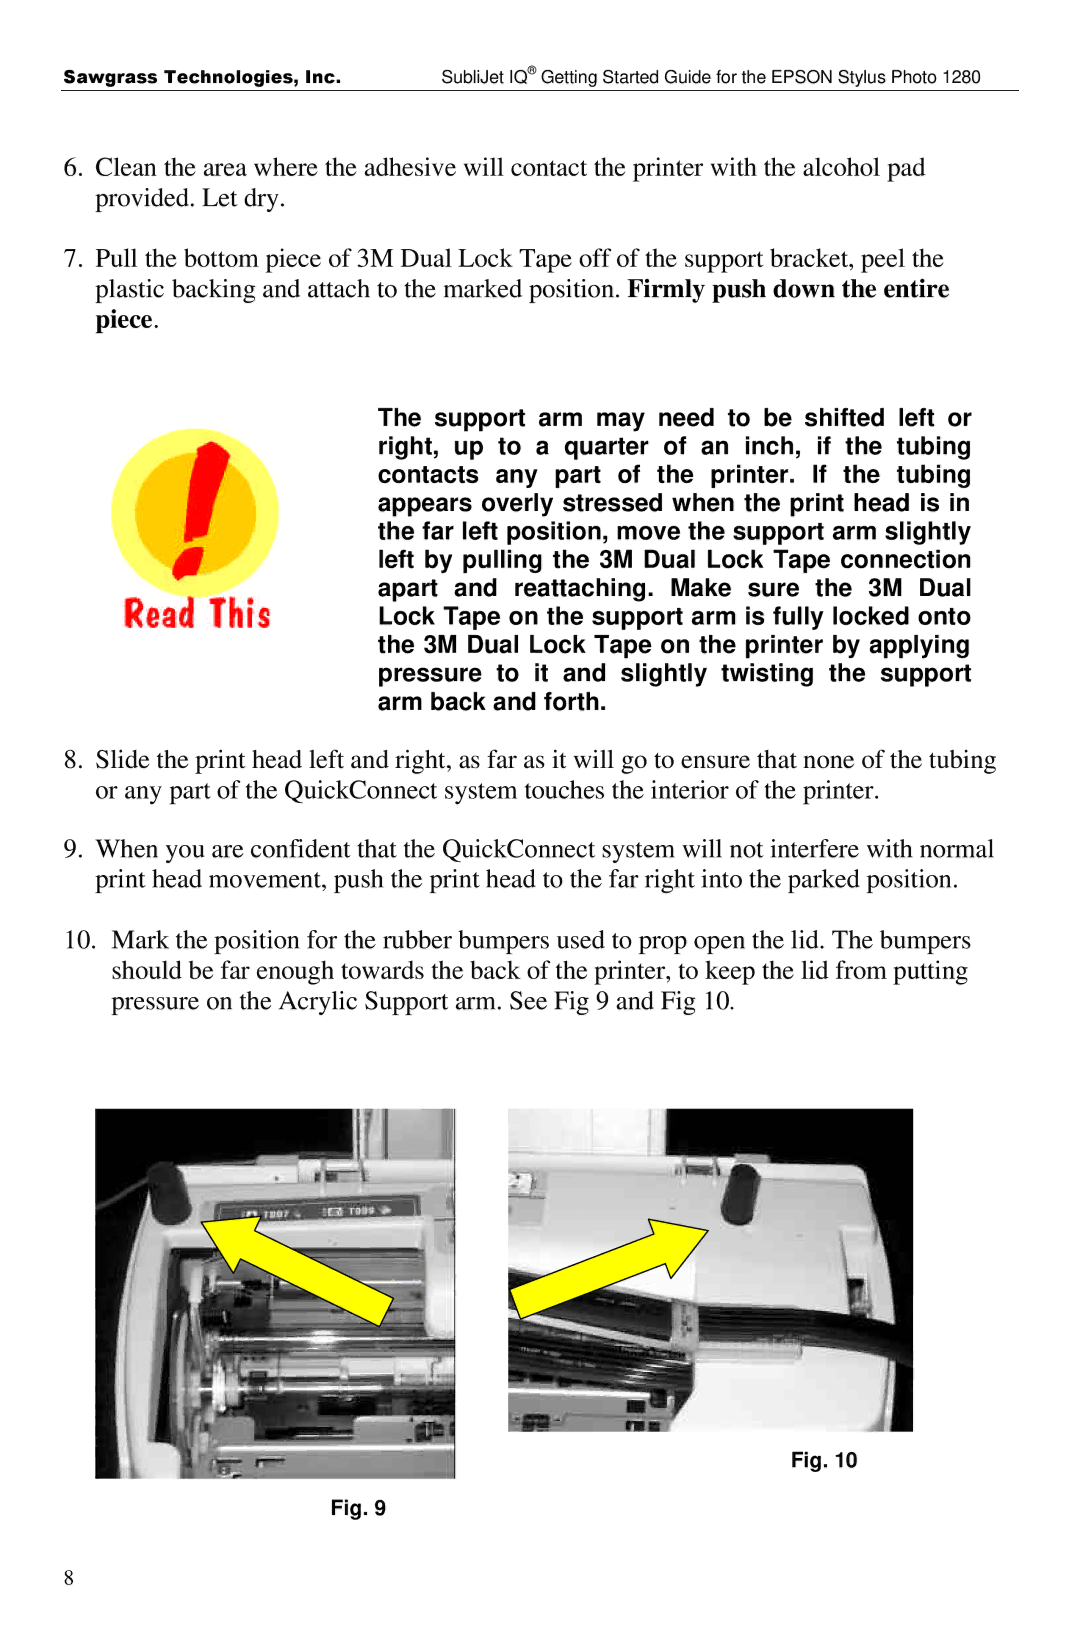
10.Mark the position for the rubber bumpers used to prop open the lid. The bumpers should be far enough towards the back of the printer, to keep the lid from putting pressure on the Acrylic Support arm. See Fig 9 and Fig 10.
Fig. 10
Fig. 9
8