English
2.Slide the battery pack in firmly until you hear the battery pack lock in place.
REMOVING THE BATTERY PACK
1.Push the battery in slightly, press the release buttons, and firm- ly pull the battery pack out of the receptacle.
2.The battery ejector pin (B) will aid in removing the pack.
3.To recharge the battery pack, insert it into the charger as described in the charger section of this manual.
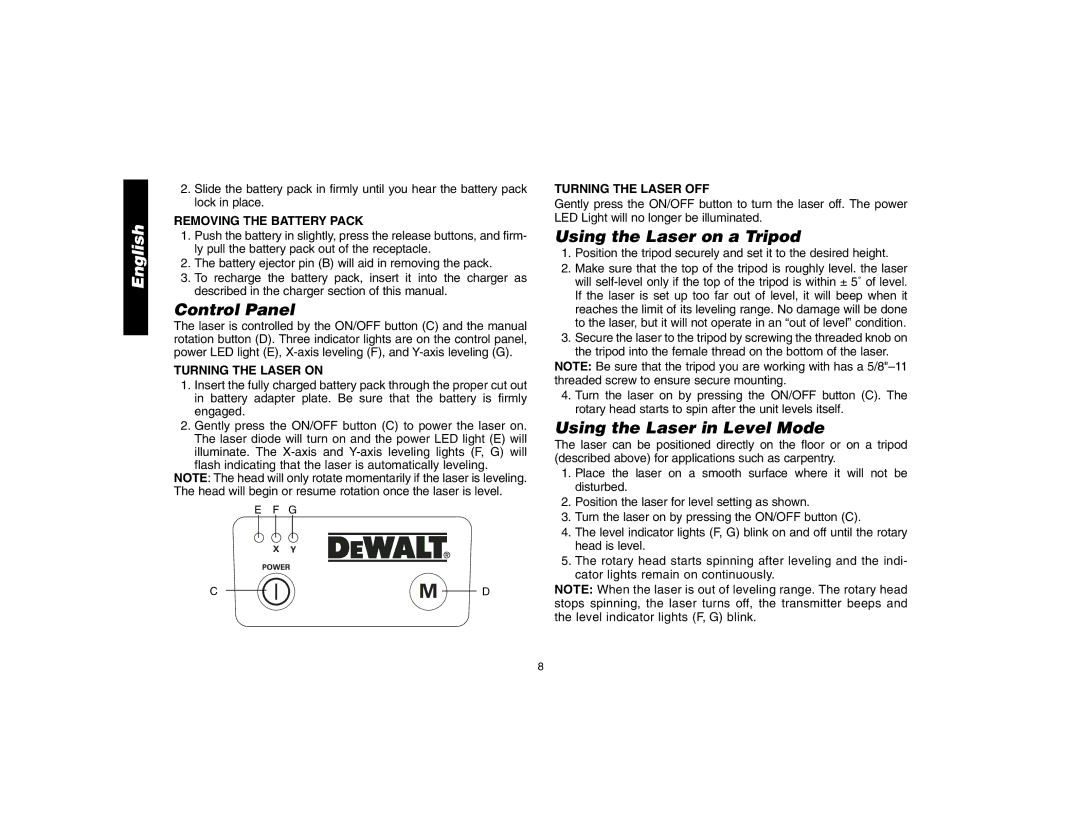
Control Panel
The laser is controlled by the ON/OFF button (C) and the manual rotation button (D). Three indicator lights are on the control panel, power LED light (E),
TURNING THE LASER ON
1.Insert the fully charged battery pack through the proper cut out in battery adapter plate. Be sure that the battery is firmly engaged.
2.Gently press the ON/OFF button (C) to power the laser on. The laser diode will turn on and the power LED light (E) will illuminate. The
flash indicating that the laser is automatically leveling. NOTE: The head will only rotate momentarily if the laser is leveling. The head will begin or resume rotation once the laser is level.
EF G
C ![]()
![]()
![]() D
D
TURNING THE LASER OFF
Gently press the ON/OFF button to turn the laser off. The power LED Light will no longer be illuminated.
Using the Laser on a Tripod
1.Position the tripod securely and set it to the desired height.
2.Make sure that the top of the tripod is roughly level. the laser will
3.Secure the laser to the tripod by screwing the threaded knob on the tripod into the female thread on the bottom of the laser.
NOTE: Be sure that the tripod you are working with has a
4.Turn the laser on by pressing the ON/OFF button (C). The rotary head starts to spin after the unit levels itself.
Using the Laser in Level Mode
The laser can be positioned directly on the floor or on a tripod (described above) for applications such as carpentry.
1.Place the laser on a smooth surface where it will not be disturbed.
2.Position the laser for level setting as shown.
3.Turn the laser on by pressing the ON/OFF button (C).
4.The level indicator lights (F, G) blink on and off until the rotary head is level.
5.The rotary head starts spinning after leveling and the indi- cator lights remain on continuously.
NOTE: When the laser is out of leveling range. The rotary head stops spinning, the laser turns off, the transmitter beeps and the level indicator lights (F, G) blink.
8