Fig. 12
Fig. 11
Non-WovenPre-Filter
HEPA
Filter
Fig. 5
Fig. 8

OPERATING INSTRUCTIONS

OPERATING INSTRUCTIONS

WINDING & UNWINDING THE POWER CORD

Your vacuum cleaner includes a power cord which is automatically retractable.

To extend your power cord, pull from side and extend to desired length up to the yellow mark on the

power cord. (Fig. 5) Do not pull the power

cord beyond the redRed mark. When vacuuming

is finished, first switch

off power and disconnect plug from electrical outlet. Then press on cord rewind button. If the cord does not fully retract, pull it out again and then press on cord rewind button.

Warning: Hold the plug when rewinding the cord. Do not allow the cord to whip when rewinding.

ON/OFF SWITCH

The On/Off switch has two different positions.

Push on the "I" side to turn the vacuum ON.

Push on the "O" side to turn the vacuum OFF.

=OFF

= ON

USING THE UNIT AS AN UPRIGHT

Unwind the power cord and plug into the 120V outlet.

Push down on the locking button to adjust the height of the telescopic handle.

NOTE: When vacuuming deep pile carpets or hard to vacuum carpets, lower the angle of

the telescopic handle (see illustration at right)

for easier maneuverability.

USING THE UNIT AS A HAND VACUUM

Press the telescopic tube release button to remove the telescopic tube. (See Fig. 2 page 4)

Press the floor brush release button to remove the floor brush. (See Fig 3 page 4)

Attach the shoulder strap to the

Yellow

shoulder strap attachment point.


(Fig. 6)

Attach the crevice tool or the dusting brush to the end of the hose.

Fig. 6

Warning: After extended use, the body of the vacuum cleaner may become hot. When using the unit with the shoulder strap, the unit will touch the body of the user. Therefore, make sure that the unit body is cool before you use with the shoulder strap. If during use, the vacuum gets too warm, allow it to cool before continuing to use.

Crevice Tool

For radiators, crevices, corners, baseboards and

between cushions.

Dusting Brush

The dusting brush is used for the furniture, venetian blinds, books, lamp shades and shelves.

Intelli-SenseTMFilter Monitor

When the Intelli-SenseTMFilter Monitor lights up, it means that the dust cup is full, the HEPA filter, non-woven pre-filter or debris screen need cleaning. You must empty the dust from the dust cup and clean the HEPA filter, non-woven pre-filter, or debris screen.

Also check the hose and attachments to see if they are blocked with any debris. If they are, unblock them.

Emptying the Dust Cup Container

and Cleaning / Changing the Non-

Woven Pre-Filter, HEPA Filter &

Debris Screen

Warning: Always unplug the unit from electrical outlet before opening the Dust Cup (container).

Important: Do NOT use the vacuum without the HEPA filter in place.

Warning: After each Use - Always remove Filter Assembly and the Dust Cup Cover with the Debris Screen, then vigorously “TapClean” HEPA Filter and clean Debris Screen and Non-Woven Pre-Filter until no more dust can be removed.

IMPORTANT, Please Note: The “TapClean” HEPA Filter will stop most of the tiniest dust particles from re-entering the air you breathe. In fact it stops 99.97% of all particles as small as 0.3 microns - many times smaller than a human hair!!! Because of this incredible filtration performance, the HEPA Filter will quickly accumulate, inside the white filter folds, many fine dust particles that are difficult to see but which will eventually block or reduce your suction power - if not cleaned properly.

1.To remove the dust cup container, first press on the dust cup release button (1) that is located on the dust cup handle and at the same time press on the dust cup release button

(2) that is on the side of the upper housing. (Fig. 7) Then pull the dust cup container out.

Dust

Cup

Release

Button 1

Dust

Cup

Release

Button 2

Fig. 7

2.To empty the dust cup container, press on the trap door release button that is on the back side of the dust cup container. (Fig. 8)

3.The HEPA filter is

located underneath the dust cup container. (Fig.9) Remove the Non-Woven Pre-Filter. (Fig. 10) Remove the HEPA filter, hold the edges and pull it out slowly.

Fig. 10

Fig. 9

4.Hold the HEPA filter

by the edges and vigorously “TapClean” the HEPA Filter dirty side down on a hard, flat surface until no more dust is observed falling out

from between the pleats of the filter. (Fig. 11) We recommend washing the HEPA filter once a month or when suction appears to be reduced. Let the HEPA filter air dry completely for 24 hours.

5.Rinse the non-woven pre-filter and let air dry completely for 24 hours.

6.Insert the non-woven pre-filter.

7.Reinstall the HEPA filter in the vacuum.

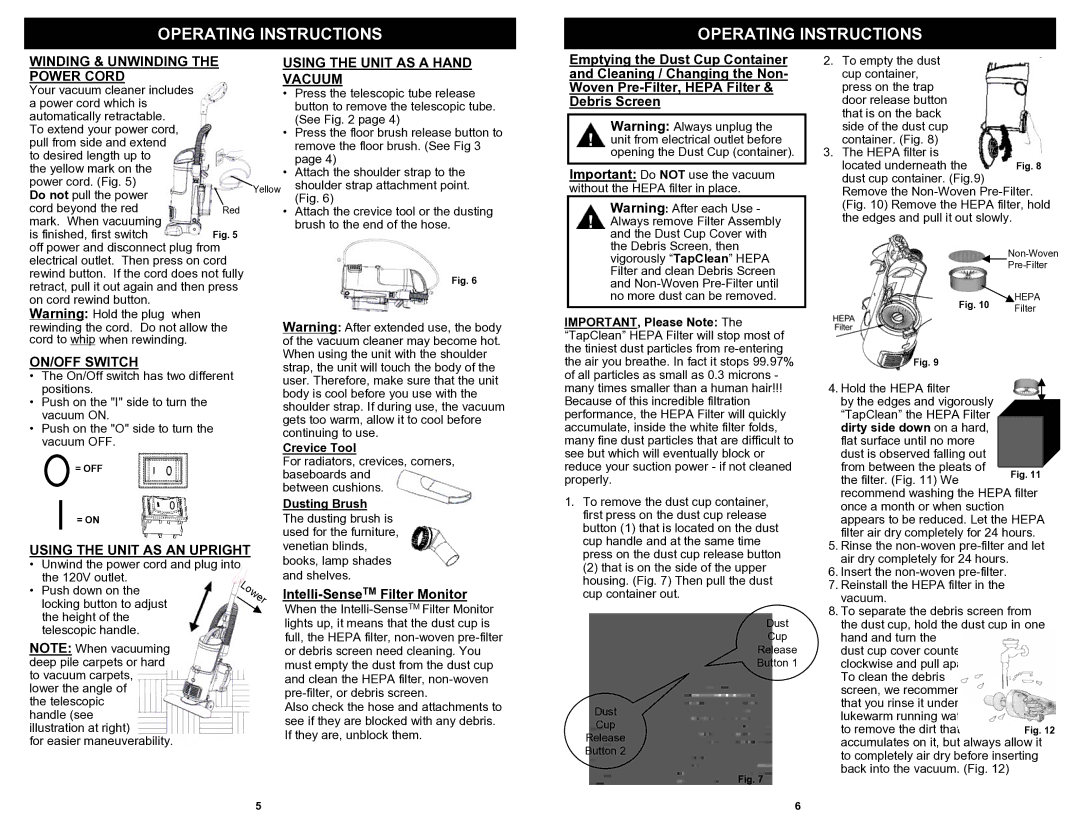
8.To separate the debris screen from the dust cup, hold the dust cup in one hand and turn the

dust cup cover counter clockwise and pull apart. To clean the debris screen, we recommend that you rinse it under lukewarm running water

to remove the dirt that

accumulates on it, but always allow it to completely air dry before inserting back into the vacuum. (Fig. 12)

5

6

Page 6
Image 6
Euro-Pro EP603H owner manual Winding & Unwinding the Power Cord, ON/OFF Switch, Using the Unit AS AN Upright

EP603H specifications

The Euro-Pro EP603H stands out as an innovative and efficient home appliance, designed specifically for those seeking to maintain a seamless cleaning routine. This vacuum cleaner combines advanced technology with user-friendly features, making it a go-to choice for homeowners.

One of the standout characteristics of the Euro-Pro EP603H is its powerful suction capability. Leveraging high-performance motor technology, it effortlessly captures dirt, debris, and pet hair from various surfaces. Whether tackling carpets, hardwood floors, or tiles, the EP603H adapts to the cleaning environment, ensuring optimal performance.

Equipped with a multi-surface cleaning head, this vacuum cleaner excels in transitioning between different types of flooring. The brush roll automatically adjusts its height, allowing the EP603H to glide over various surfaces without manual intervention. This adaptability makes it highly convenient, saving users time and effort during their cleaning sessions.

Moreover, the Euro-Pro EP603H includes a range of specialized attachments, such as crevice tools, dusting brushes, and upholstery tools. These accessories enhance its versatility, enabling users to clean tight spaces, delicate furnishings, and even high surfaces with ease.

An important feature of the EP603H is its lightweight design. Weighing significantly less than traditional vacuum cleaners, it offers users unparalleled maneuverability. Coupled with an ergonomic handle, this makes it comfortable to use for extended periods, reducing arm and back strain.

Another noteworthy aspect of the Euro-Pro EP603H is its filtration system. It features a HEPA filter that traps allergens and dust particles, ensuring that the air in your home remains fresh and clean. This is particularly beneficial for allergy sufferers, as it helps maintain a healthy indoor environment.

In terms of storage, the EP603H is designed with convenience in mind. Its compact design allows for easy storage in closets or small spaces, helping to keep living areas tidy and uncluttered. Additionally, the vacuum integrates a retractable cord feature, which simplifies the winding process and keeps cords organized.

In conclusion, the Euro-Pro EP603H is an exemplary vacuum cleaner that offers a blend of power, versatility, and convenience. With its advanced technology and user-centric features, it serves as a reliable ally in maintaining a clean and healthy home. For those in search of an efficient cleaning solution, the Euro-Pro EP603H is an excellent option to consider.