OPERATING INSTRUCTIONS

OPERATING INSTRUCTIONS

Pre-Heating

Warning: In order to avoid injury or burns, never touch any metal parts on the deep fryer because they may be hot.

Make sure the oil level in the oil container is between the "minimum" and "maximum" lines. Do NOT exceed the "MAX" line on the oil container when filling with oil.

The frying basket should not be immersed in the oil during the pre- heating.

Replace the deep fryer cover.

Plug the appliance into a 120-volt outlet. The unit will beep and the ”Ready Light” light will come on and it will be “Green”.

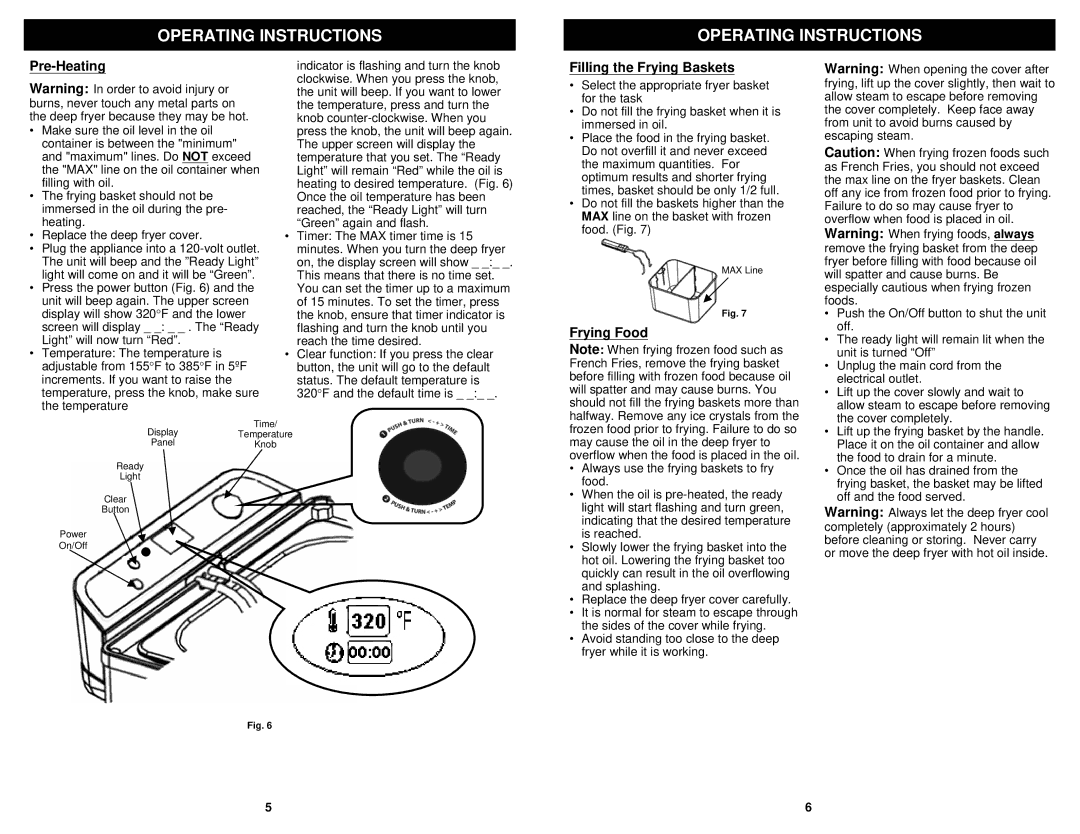
Press the power button (Fig. 6) and the unit will beep again. The upper screen display will show 320°F and the lower screen will display _ _: _ _ . The “Ready Light” will now turn “Red”.

Temperature: The temperature is adjustable from 155°F to 385°F in 5ºF increments. If you want to raise the temperature, press the knob, make sure the temperature

indicator is flashing and turn the knob clockwise. When you press the knob, the unit will beep. If you want to lower the temperature, press and turn the knob counter-clockwise. When you press the knob, the unit will beep again. The upper screen will display the temperature that you set. The “Ready Light” will remain “Red” while the oil is heating to desired temperature. (Fig. 6) Once the oil temperature has been reached, the “Ready Light” will turn “Green” again and flash.

Timer: The MAX timer time is 15 minutes. When you turn the deep fryer on, the display screen will show _ _:_ _. This means that there is no time set. You can set the timer up to a maximum of 15 minutes. To set the timer, press the knob, ensure that timer indicator is flashing and turn the knob until you reach the time desired.

Clear function: If you press the clear button, the unit will go to the default status. The default temperature is 320°F and the default time is _ _:_ _.

Filling the Frying Baskets

Select the appropriate fryer basket for the task

Do not fill the frying basket when it is immersed in oil.

Place the food in the frying basket. Do not overfill it and never exceed the maximum quantities. For optimum results and shorter frying times, basket should be only 1/2 full.

Do not fill the baskets higher than the MAX line on the basket with frozen food. (Fig. 7)

MAX Line

Fig. 7

Frying Food

Note: When frying frozen food such as French Fries, remove the frying basket before filling with frozen food because oil will spatter and may cause burns. You should not fill the frying baskets more than halfway. Remove any ice crystals from the

Warning: When opening the cover after frying, lift up the cover slightly, then wait to allow steam to escape before removing the cover completely. Keep face away from unit to avoid burns caused by escaping steam.

Caution: When frying frozen foods such as French Fries, you should not exceed the max line on the fryer baskets. Clean off any ice from frozen food prior to frying. Failure to do so may cause fryer to overflow when food is placed in oil. Warning: When frying foods, always remove the frying basket from the deep fryer before filling with food because oil will spatter and cause burns. Be especially cautious when frying frozen foods.

Push the On/Off button to shut the unit


off.

The ready light will remain lit when the


unit is turned “Off”

Unplug the main cord from the


electrical outlet.

Lift up the cover slowly and wait to


allow steam to escape before removing


the cover completely.

Display

Time/

Temperature

Panel

Knob

Ready

Light

Clear

Button

Power

On/Off

Fig. 6

frozen food prior to frying. Failure to do so may cause the oil in the deep fryer to overflow when the food is placed in the oil.

Always use the frying baskets to fry food.

When the oil is pre-heated, the ready light will start flashing and turn green, indicating that the desired temperature is reached.

Slowly lower the frying basket into the hot oil. Lowering the frying basket too quickly can result in the oil overflowing and splashing.

Replace the deep fryer cover carefully.

It is normal for steam to escape through the sides of the cover while frying.

Avoid standing too close to the deep fryer while it is working.

Lift up the frying basket by the handle.

Place it on the oil container and allow

the food to drain for a minute.

Once the oil has drained from the

frying basket, the basket may be lifted

off and the food served.

Warning: Always let the deep fryer cool completely (approximately 2 hours) before cleaning or storing. Never carry or move the deep fryer with hot oil inside.

5

6

Page 4
Image 4
Euro-Pro F1100B owner manual Pre-Heating, Filling the Frying Baskets, Frying Food

F1100B specifications

The Euro-Pro F1100B is a versatile and highly efficient floor cleaner designed for both residential and commercial spaces. Known for its cutting-edge technology and user-friendly features, this machine is a favorite among cleaning professionals and homeowners alike.

One of the standout features of the Euro-Pro F1100B is its powerful suction capability. The machine is equipped with a high-performance motor that provides robust suction to pick up dirt, dust, and debris from a variety of surfaces. This makes it particularly effective for high-traffic areas and homes with pets where hair and allergens can accumulate.

The F1100B also boasts a lightweight design that allows for easy maneuverability. Weighing in at just under ten pounds, users can easily transport the cleaner from room to room or even up and down the stairs. This feature is especially beneficial for those who may struggle with heavier equipment, ensuring that thorough cleaning is achievable for everyone.

In terms of technology, the Euro-Pro F1100B features advanced filtration systems that capture fine particles, helping to improve indoor air quality. The HEPA filter traps allergens, dust, and other microscopic particles, making the machine an excellent choice for allergy sufferers. The filter is washable and reusable, reducing the overall cost of maintenance and contributing to eco-friendliness.

Another significant characteristic of the F1100B is its versatility. The unit comes with multiple attachments that allow users to clean various surfaces, from carpets to hard floors, as well as upholstery and even crevices in hard-to-reach areas. These attachments include a crevice tool, dusting brush, and upholstery nozzle, making it a comprehensive tool in the cleaning arsenal.

User comfort has not been overlooked in the design of the Euro-Pro F1100B. The ergonomic handle is designed to reduce strain during prolonged use, and the cord length provides ample reach without having to constantly switch outlets. Additionally, the machine's noise level is relatively low, allowing for quiet operation even in busy environments.

Overall, the Euro-Pro F1100B is a powerful, efficient, and user-friendly cleaning solution. With its lightweight design, advanced filtration, and versatile attachments, it offers an impressive cleaning experience suitable for a wide range of cleaning needs. Whether for home or office use, this machine stands out as an effective option in the modern cleaning landscape.