Maintenance
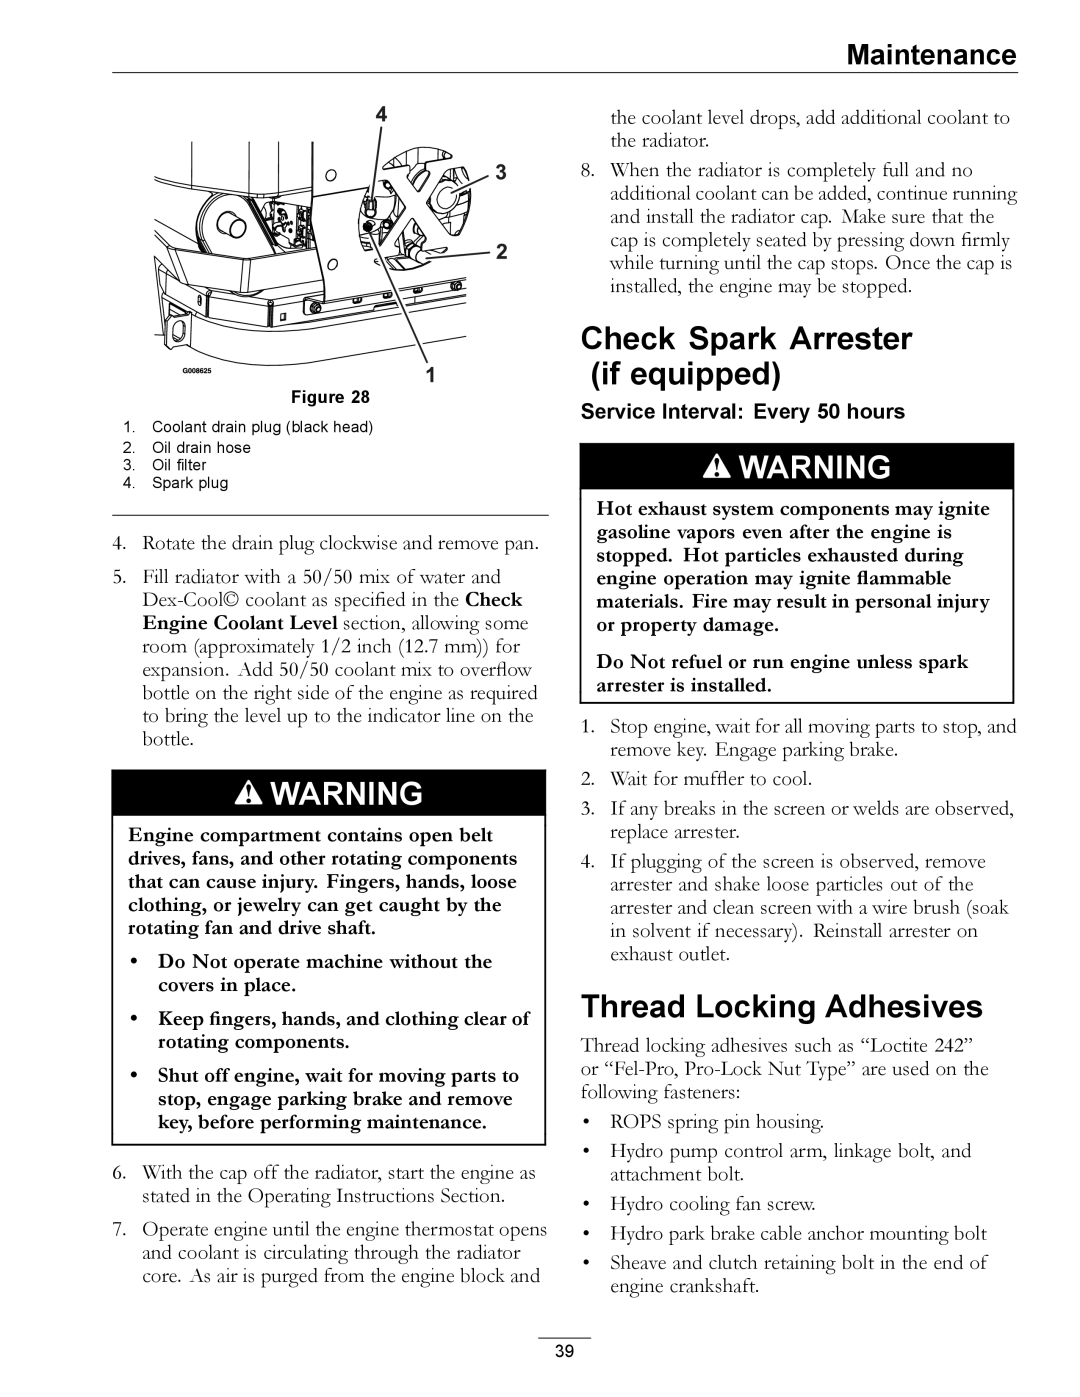
Figure 28
1.Coolant drain plug (black head)
2.Oil drain hose
3.Oil filter
4.Spark plug
4.Rotate the drain plug clockwise and remove pan.
5.Fill radiator with a 50/50 mix of water and
![]() WARNING
WARNING
Engine compartment contains open belt drives, fans, and other rotating components that can cause injury. Fingers, hands, loose clothing, or jewelry can get caught by the rotating fan and drive shaft.
•Do Not operate machine without the covers in place.
•Keep fingers, hands, and clothing clear of rotating components.
•Shut off engine, wait for moving parts to stop, engage parking brake and remove key, before performing maintenance.
6.With the cap off the radiator, start the engine as stated in the Operating Instructions Section.
7.Operate engine until the engine thermostat opens and coolant is circulating through the radiator core. As air is purged from the engine block and
the coolant level drops, add additional coolant to the radiator.
8.When the radiator is completely full and no additional coolant can be added, continue running and install the radiator cap. Make sure that the cap is completely seated by pressing down firmly while turning until the cap stops. Once the cap is installed, the engine may be stopped.
Check Spark Arrester (if equipped)
Service Interval: Every 50 hours
![]() WARNING
WARNING
Hot exhaust system components may ignite gasoline vapors even after the engine is stopped. Hot particles exhausted during engine operation may ignite flammable materials. Fire may result in personal injury or property damage.
Do Not refuel or run engine unless spark arrester is installed.
1.Stop engine, wait for all moving parts to stop, and remove key. Engage parking brake.
2.Wait for muffler to cool.
3.If any breaks in the screen or welds are observed, replace arrester.
4.If plugging of the screen is observed, remove arrester and shake loose particles out of the arrester and clean screen with a wire brush (soak in solvent if necessary). Reinstall arrester on exhaust outlet.
Thread Locking Adhesives
Thread locking adhesives such as “Loctite 242” or
•ROPS spring pin housing.
•Hydro pump control arm, linkage bolt, and attachment bolt.
•Hydro cooling fan screw.
•Hydro park brake cable anchor mounting bolt
•Sheave and clutch retaining bolt in the end of engine crankshaft.
39