Installation and Operation
The DAV/DAS101CM modules can be attached to a CPM mini architectural adapter plate (MAAP) mounting frame and mounted in a wall or furniture using either a
Installing a Wall Box or Wall Bracket
For wall and furniture mounting installations, the installation site must be deep enough for both the wall box (or the DAV/ DAS, if using a wall bracket) and the cables. The box should be at least 2.5" (6.4 cm) deep. Install cables into the wall, furniture, or conduits before installing a wall box or bracket.
1. Place the wall box or mounting bracket against the installation surface; mark the guidelines for the opening on the wall or furniture.
2. Cut out the material from the marked area.
3. Insert the wall box/bracket to check the opening’s size and fit. Enlarge or smooth the edges of the opening if needed.
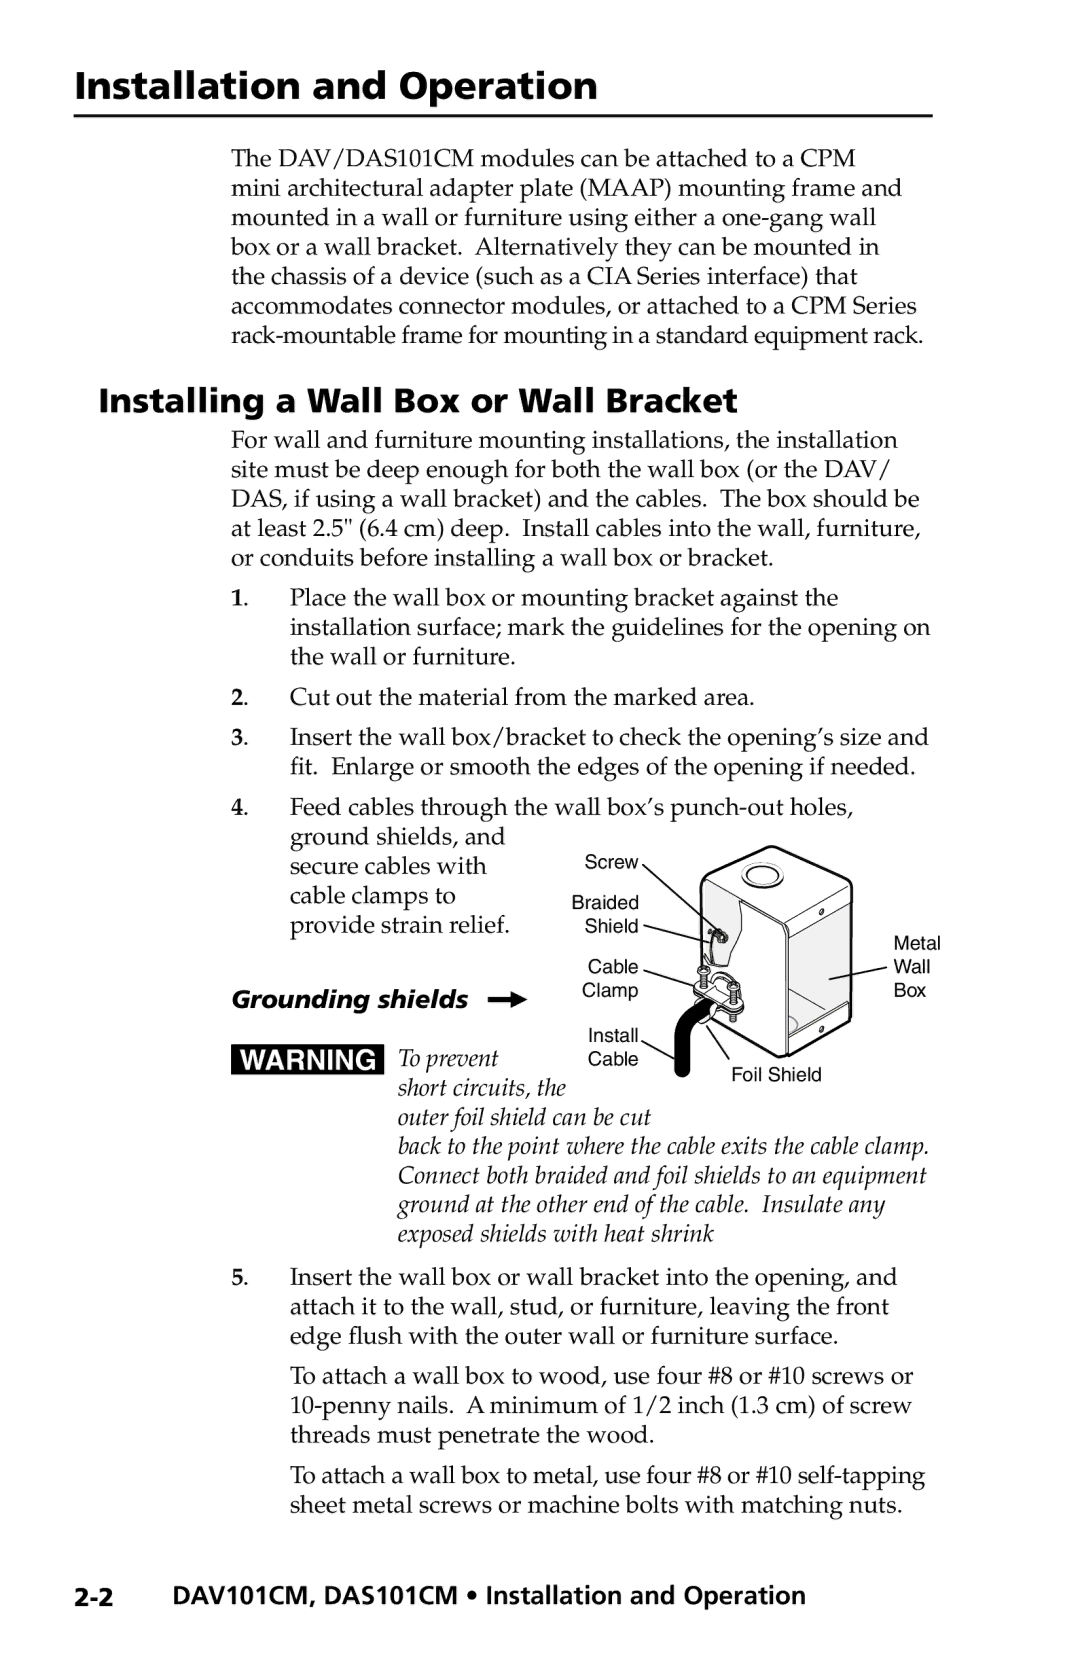
4. Feed cables through the wall box’s
ground shields, and | Screw | |
secure cables with | ||
cable clamps to |
| Braided |
provide strain relief. | Shield | |
|
| Cable |
Grounding shields | } | Clamp |
| ||
|
| |
Metal
Wall
Box
W To prevent short circuits, the
outer foil shield can be cut
back to the point where the cable exits the cable clamp. Connect both braided and foil shields to an equipment ground at the other end of the cable. Insulate any exposed shields with heat shrink
5. Insert the wall box or wall bracket into the opening, and attach it to the wall, stud, or furniture, leaving the front edge flush with the outer wall or furniture surface.
To attach a wall box to wood, use four #8 or #10 screws or
To attach a wall box to metal, use four #8 or #10