Quick Start Guide — DAV/DAS101CM, cont’d
Step 3
For wall/furniture or rack installations, attach the module(s) to a CPM Series mini architectural adapter plate (MAAP) frame or to a
Step 4
Attach the front panel input cable(s).
Step 5
Verify correct cabling and connector wiring and test the system: power on all the devices and monitor the audio/video output. Each DAV module’s Power LED is lit while the unit receives power. If needed, power off the devices, disconnect the
modules’ power supply, correct cabling or wiring errors, then restore power.
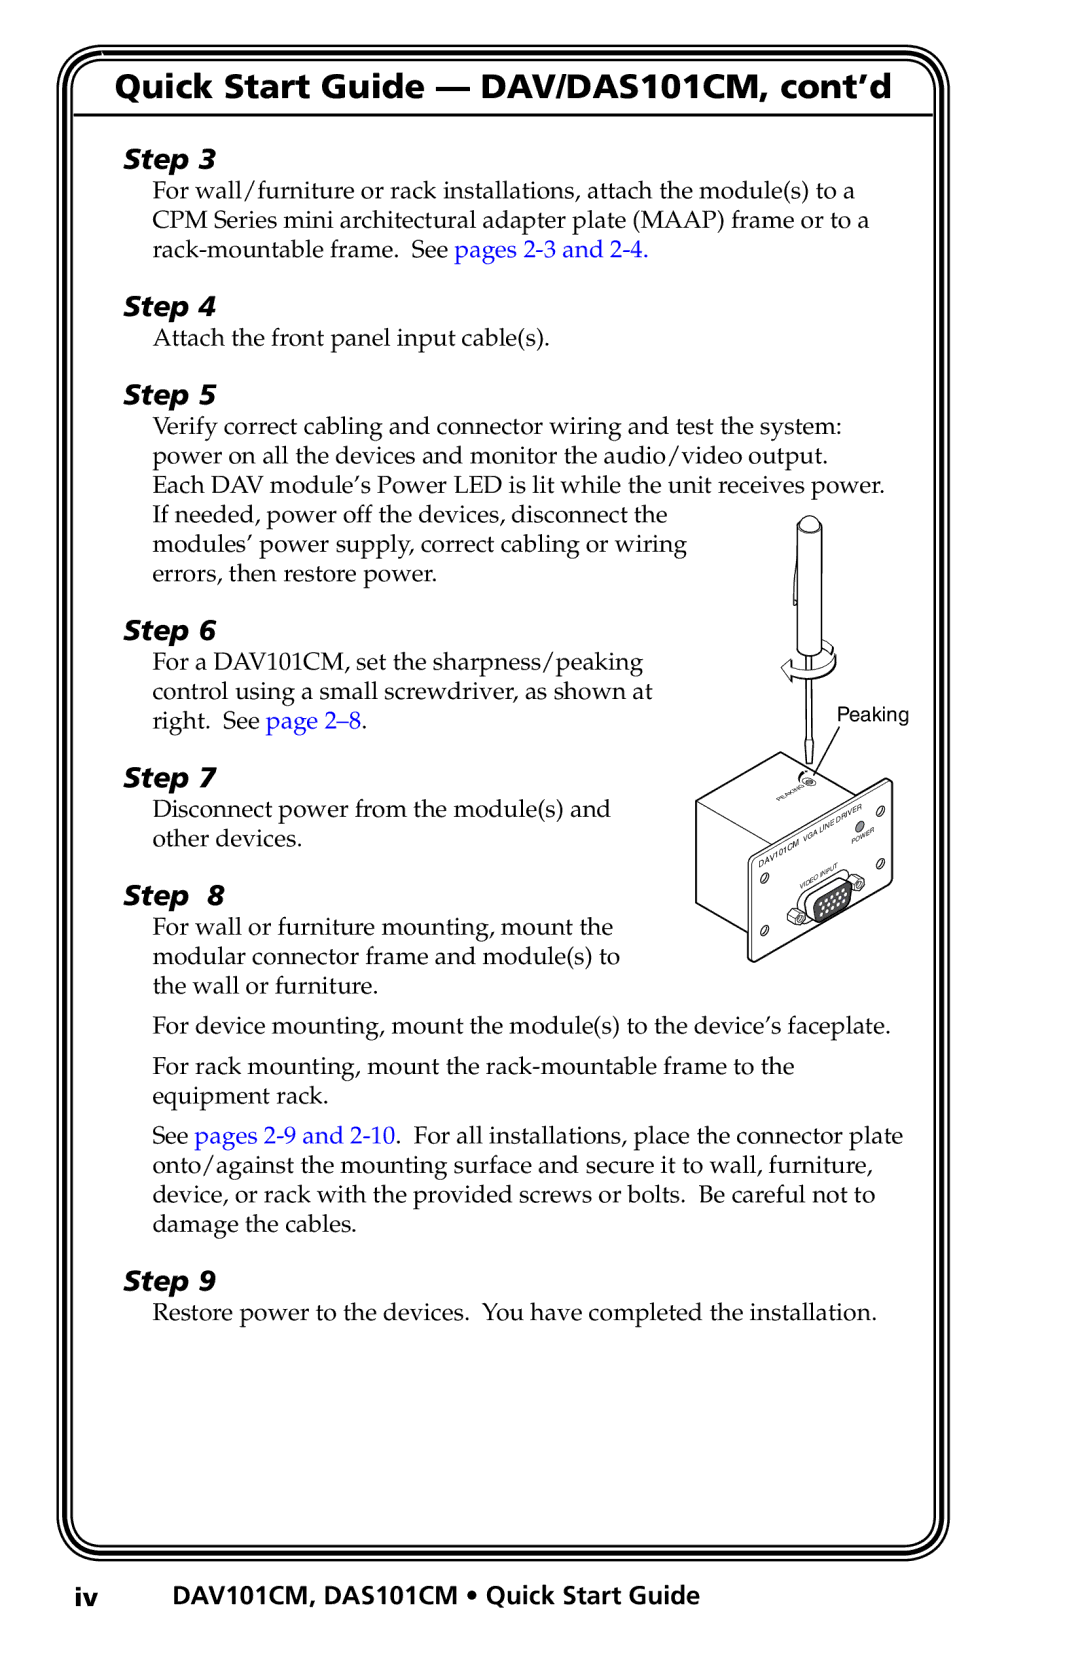
Step 6
For a DAV101CM, set the sharpness/peaking control using a small screwdriver, as shown at right. See page
Step 7
Disconnect power from the module(s) and other devices.
Step 8
For wall or furniture mounting, mount the modular connector frame and module(s) to the wall or furniture.
Peaking
|
|
|
|
| ING |
|
|
|
|
|
|
| |
|
|
|
| K |
|
|
|
|
|
|
|
| |
|
|
| A |
|
|
|
|
|
|
|
|
| |
|
| E |
|
|
|
|
|
|
|
|
|
| |
|
| P |
|
|
|
|
|
|
|
|
|
|
|
|
|
|
|
|
|
|
|
|
|
| DRIVER |
| |
|
|
|
|
|
|
|
|
| LINE |
| W | ER | |
|
|
|
|
| M | VGA |
|
| PO |
| |||
|
|
| 1C |
|
|
|
| ||||||
|
| 10 |
|
|
|
|
|
|
|
| |||
| AV |
|
|
|
|
|
|
|
|
| |||
D |
|
|
|
|
|
|
|
|
|
|
| ||
|
|
|
|
|
|
|
| PU | T |
|
| ||
|
|
|
|
|
|
|
| IN |
|
| |||
|
|
|
|
|
|
|
| O |
|
|
| ||
|
|
|
|
|
|
| DE |
|
|
|
| ||
|
|
|
|
|
| VI |
|
|
|
|
|
| |
For device mounting, mount the module(s) to the device’s faceplate.
For rack mounting, mount the
See pages
Step 9
Restore power to the devices. You have completed the installation.