
MLS 608 D SA, MLS 608 D, MLS 608 D MA specifications
Extron Electronics has long been a leader in the field of AV technology, and their MLS 608 D and MLS 608 D MA, MLS 608 D SA models are perfect examples of their commitment to delivering high-quality solutions for a range of applications. Designed primarily for educational and corporate environments, these systems are built to provide superior performance, advanced features, and ease of use.The MLS 608 D is a versatile AV control system that incorporates various audio and video technologies to facilitate seamless integration within any AV setup. One of its standout features is its ability to manage multiple sources and destinations, allowing users to switch between different input signals with ease. This makes it an ideal choice for classrooms, conference rooms, and auditoriums where multiple devices might need to be connected efficiently.
A key characteristic of the MLS 608 D is its ability to support high-definition video formats. By supporting resolutions up to 4K, it ensures that presentations, videos, and other visual content are displayed with stunning clarity and detail. Additionally, it integrates seamlessly with modern display technology and can connect to a wide range of devices, further enhancing its versatility.
The MLS 608 D MA and MLS 608 D SA models cater to specific needs within audio management. The MA version offers advanced audio mixing capabilities, enabling users to adjust sound levels from various inputs. This is particularly useful in environments where audio balance is crucial, such as large lecture halls or meeting spaces. The SA version specializes in audio amplification, providing powerful output to ensure clear and consistent sound delivery throughout larger areas.
Both the MLS 608 D MA and SA incorporate user-friendly interfaces, often featuring customizable control options that enhance usability. With built-in diagnostics, these systems monitor performance and simplify troubleshooting, which is vital for maintaining operational efficiency in busy environments.
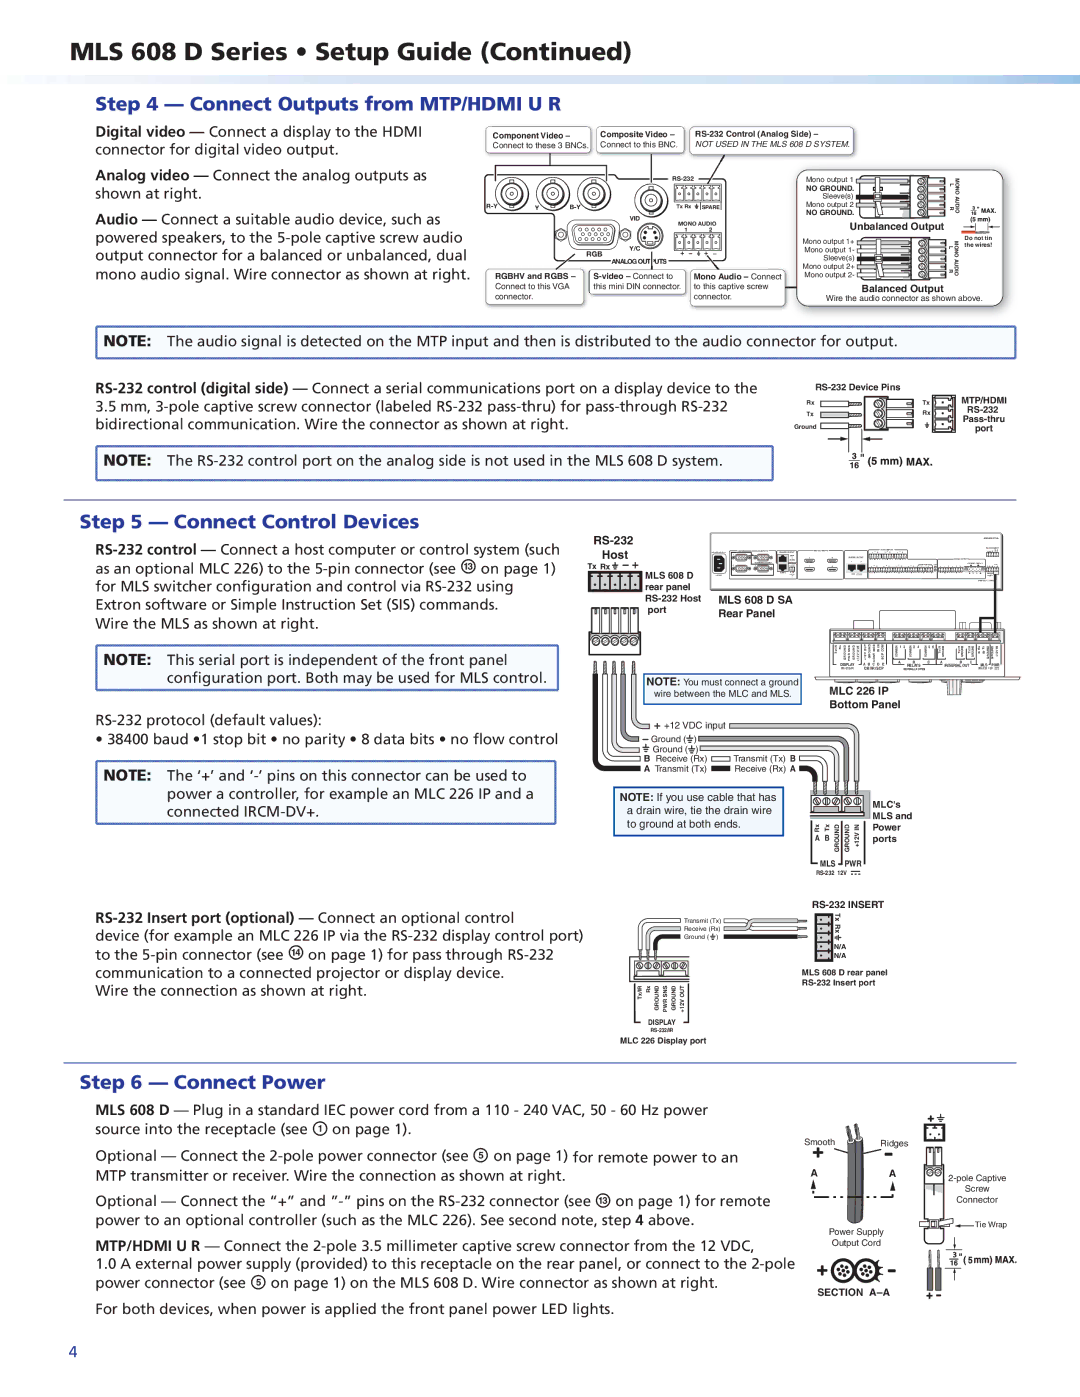
Furthermore, the integration of Extron's renowned AV technologies, such as control processing and scaling, enhances the overall functionality of these systems. They also allow for flexible control options, utilizing RS232, Ethernet, and various other protocols, ensuring compatibility with existing AV infrastructure.
In summary, Extron's MLS 608 D, MLS 608 D MA, and MLS 608 D SA models exemplify excellence in AV control and management. With their advanced features, superior audio and video capabilities, and user-centered design, they are poised to elevate any audiovisual experience in a variety of settings.