
MSW 4V SDI rs specifications
The Extron MSW 4V SDI RS is a high-performance, four-input, SDI switcher that meets the needs of professionals in broadcasting, corporate, educational, and live event environments. The device is designed to facilitate seamless switching between multiple SDI video sources while ensuring high-quality video output. With its robust build and advanced features, the MSW 4V SDI RS is an excellent choice for applications requiring reliable signal management.One of the key features of the MSW 4V SDI RS is its ability to support a wide range of video formats, including high-definition 720p and 1080p signals, making it versatile for diverse video production requirements. The switcher can handle standard definition (SD), high definition (HD), and even 3G-SDI in one compact unit. This adaptability ensures smooth integration into existing setups without the need for additional converters or signal processors.
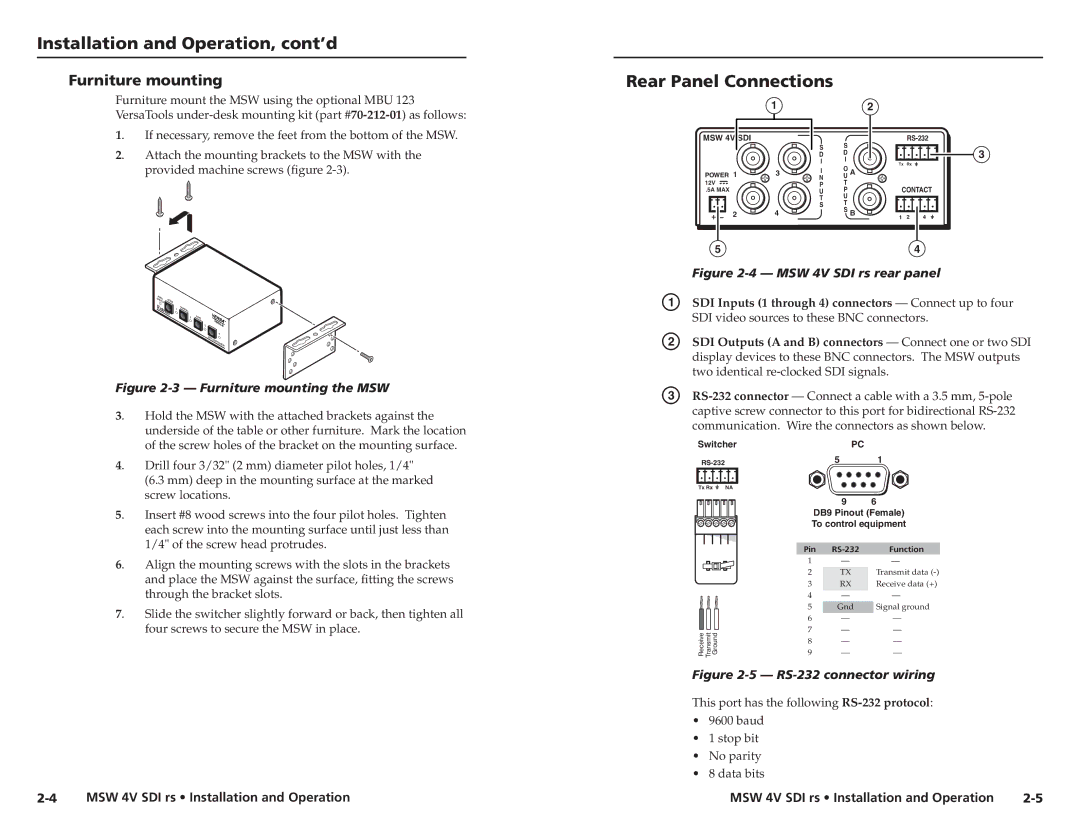
In terms of connectivity, the MSW 4V SDI RS is equipped with four SDI input ports, allowing users to connect multiple sources to a single device. The switcher also boasts dual SDI outputs, providing flexibility in routing and distribution of the selected video signal to different displays or recording devices. This feature is particularly valuable in live event scenarios, where real-time switching and signal distribution are critical.
The MSW 4V SDI RS employs advanced digital processing technology to maintain signal integrity and minimize latency during switching operations. Its design includes features such as automatic input detection and signal reclocking, ensuring optimal performance across various video formats. This attention to detail in signal management guarantees that users experience minimal disruption, even during critical moments of a live broadcast.
Furthermore, the MSW 4V SDI RS offers user-friendly controls and monitoring options. Its intuitive front-panel interface allows operators to easily navigate between inputs and outputs, while LED indicators provide immediate feedback on signal status. For more advanced setups, the switcher supports RS-232 control, enabling integration with third-party control systems or automation setups, enhancing flexibility and usability in professional environments.
In summary, the Extron MSW 4V SDI RS is a feature-rich, reliable SDI switcher that excels in managing multiple video sources for various applications. With its advanced technology, robust build quality, and user-centric design, it is an essential tool for professionals in need of efficient, high-quality signal routing and switching.