
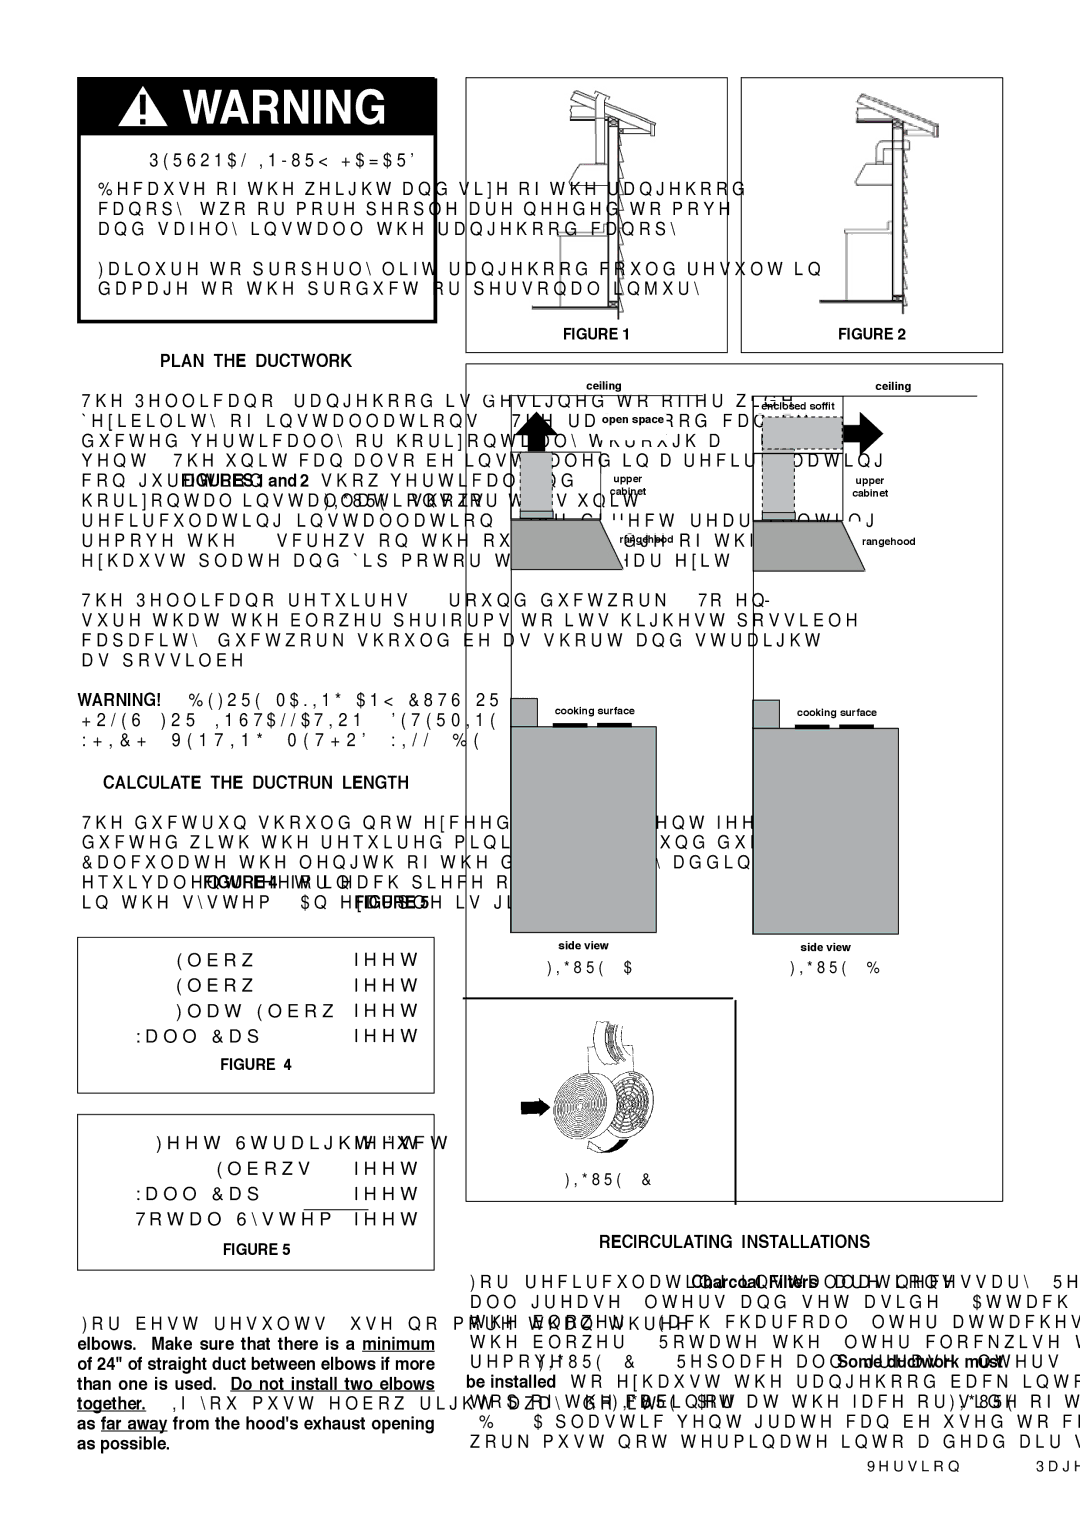
Cabinet Rangehood specifications
The Faber Cabinet Rangehood represents a significant advancement in kitchen ventilation technology, seamlessly integrating into modern cabinetry. This appliance is designed not only for its functionality but also for its aesthetic appeal, making it an ideal choice for contemporary kitchens.One of the standout features of the Faber Cabinet Rangehood is its powerful suction capability. Equipped with high-performance motors, these range hoods are capable of efficiently removing smoke, steam, and odors from the kitchen, ensuring a fresh cooking environment. The rangehood operates at various speeds, allowing users to select the appropriate level of ventilation based on the intensity of cooking.
Another key characteristic of the Faber Cabinet Rangehood is its discreet design. It is engineered to fit snugly within kitchen cabinetry, ensuring that it does not disrupt the overall design of the kitchen. This allows homeowners to maintain a clean and streamlined look while still benefiting from effective ventilation.
Additionally, Faber incorporates advanced technology into their rangehoods. Many models are equipped with sensor controls that automatically adjust the fan speed based on the level of cooking emissions detected. This smart technology not only enhances user convenience but also optimizes energy consumption by minimizing unnecessary power use.
Faber also offers a range of noise-reduction innovations in their cabinet rangehoods. These models operate quietly, allowing for a peaceful cooking experience without the distraction of loud fan noises. This is particularly beneficial in open-concept living spaces where kitchen sounds may affect adjoining areas.
Easy maintenance is another advantage of the Faber Cabinet Rangehood. Many of these range hoods feature dishwasher-safe filters, making it simple to keep the unit clean and functioning efficiently over time. Some models also come with LED lighting, which not only illuminates the cooking surface but provides energy-efficient brightness, enhancing the overall cooking experience.
In summary, the Faber Cabinet Rangehood combines aesthetic elegance with powerful performance. Its high suction capabilities, smart technology, discreet integration into cabinetry, and user-friendly maintenance features make it a smart choice for anyone looking to elevate their kitchen. With a Faber range hood, homeowners can enjoy an effective ventilation solution while maintaining the stylish look of their kitchens.