ASSEMBLY & OPERATION
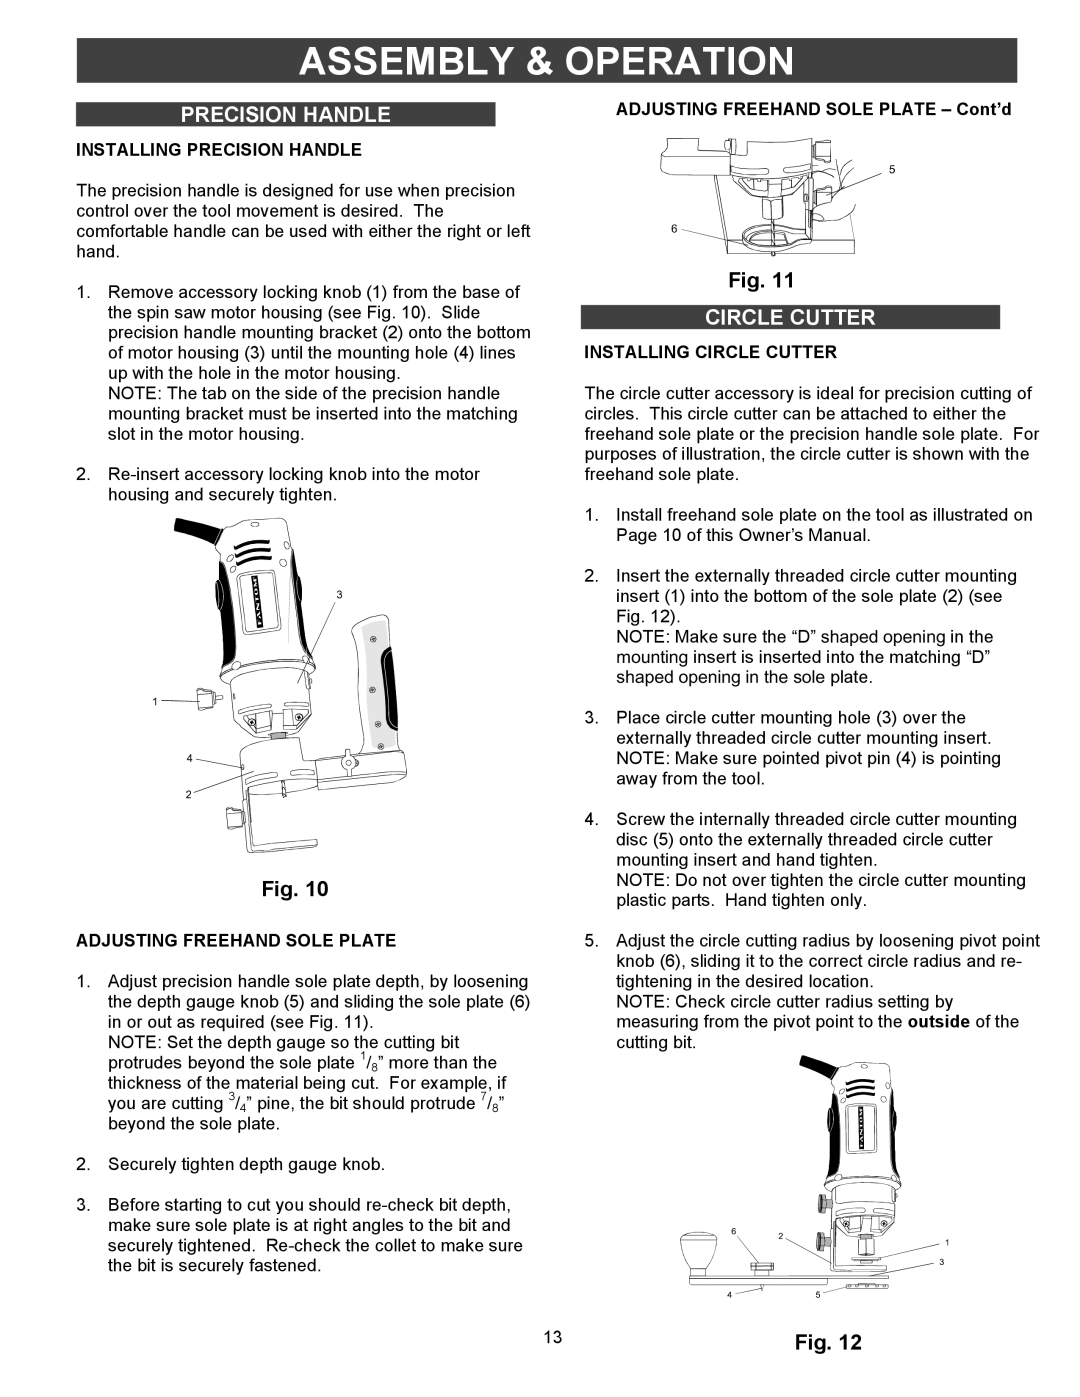
| ADJUSTING FREEHAND SOLE PLATE – Cont’d |
PRECISION HANDLE | |
INSTALLING PRECISION HANDLE |
|
The precision handle is designed for use when precision control over the tool movement is desired. The comfortable handle can be used with either the right or left hand.
1.Remove accessory locking knob (1) from the base of the spin saw motor housing (see Fig. 10). Slide precision handle mounting bracket (2) onto the bottom of motor housing (3) until the mounting hole (4) lines up with the hole in the motor housing.
NOTE: The tab on the side of the precision handle mounting bracket must be inserted into the matching slot in the motor housing.
2.
Fig. 10
ADJUSTING FREEHAND SOLE PLATE
1.Adjust precision handle sole plate depth, by loosening the depth gauge knob (5) and sliding the sole plate (6) in or out as required (see Fig. 11).
NOTE: Set the depth gauge so the cutting bit protrudes beyond the sole plate 1/8” more than the thickness of the material being cut. For example, if you are cutting 3/4” pine, the bit should protrude 7/8” beyond the sole plate.
2.Securely tighten depth gauge knob.
3.Before starting to cut you should
Fig. 11
CIRCLE CUTTER
INSTALLING CIRCLE CUTTER
The circle cutter accessory is ideal for precision cutting of circles. This circle cutter can be attached to either the freehand sole plate or the precision handle sole plate. For purposes of illustration, the circle cutter is shown with the freehand sole plate.
1.Install freehand sole plate on the tool as illustrated on Page 10 of this Owner’s Manual.
2.Insert the externally threaded circle cutter mounting insert (1) into the bottom of the sole plate (2) (see Fig. 12).
NOTE: Make sure the “D” shaped opening in the mounting insert is inserted into the matching “D” shaped opening in the sole plate.
3.Place circle cutter mounting hole (3) over the externally threaded circle cutter mounting insert. NOTE: Make sure pointed pivot pin (4) is pointing away from the tool.
4.Screw the internally threaded circle cutter mounting disc (5) onto the externally threaded circle cutter mounting insert and hand tighten.
NOTE: Do not over tighten the circle cutter mounting plastic parts. Hand tighten only.
5.Adjust the circle cutting radius by loosening pivot point knob (6), sliding it to the correct circle radius and re- tightening in the desired location.
NOTE: Check circle cutter radius setting by measuring from the pivot point to the outside of the cutting bit.
13 | Fig. 12 |