INSTALLATION
WINDOW INSTALLATON
|
| C |
|
| B |
|
| A |
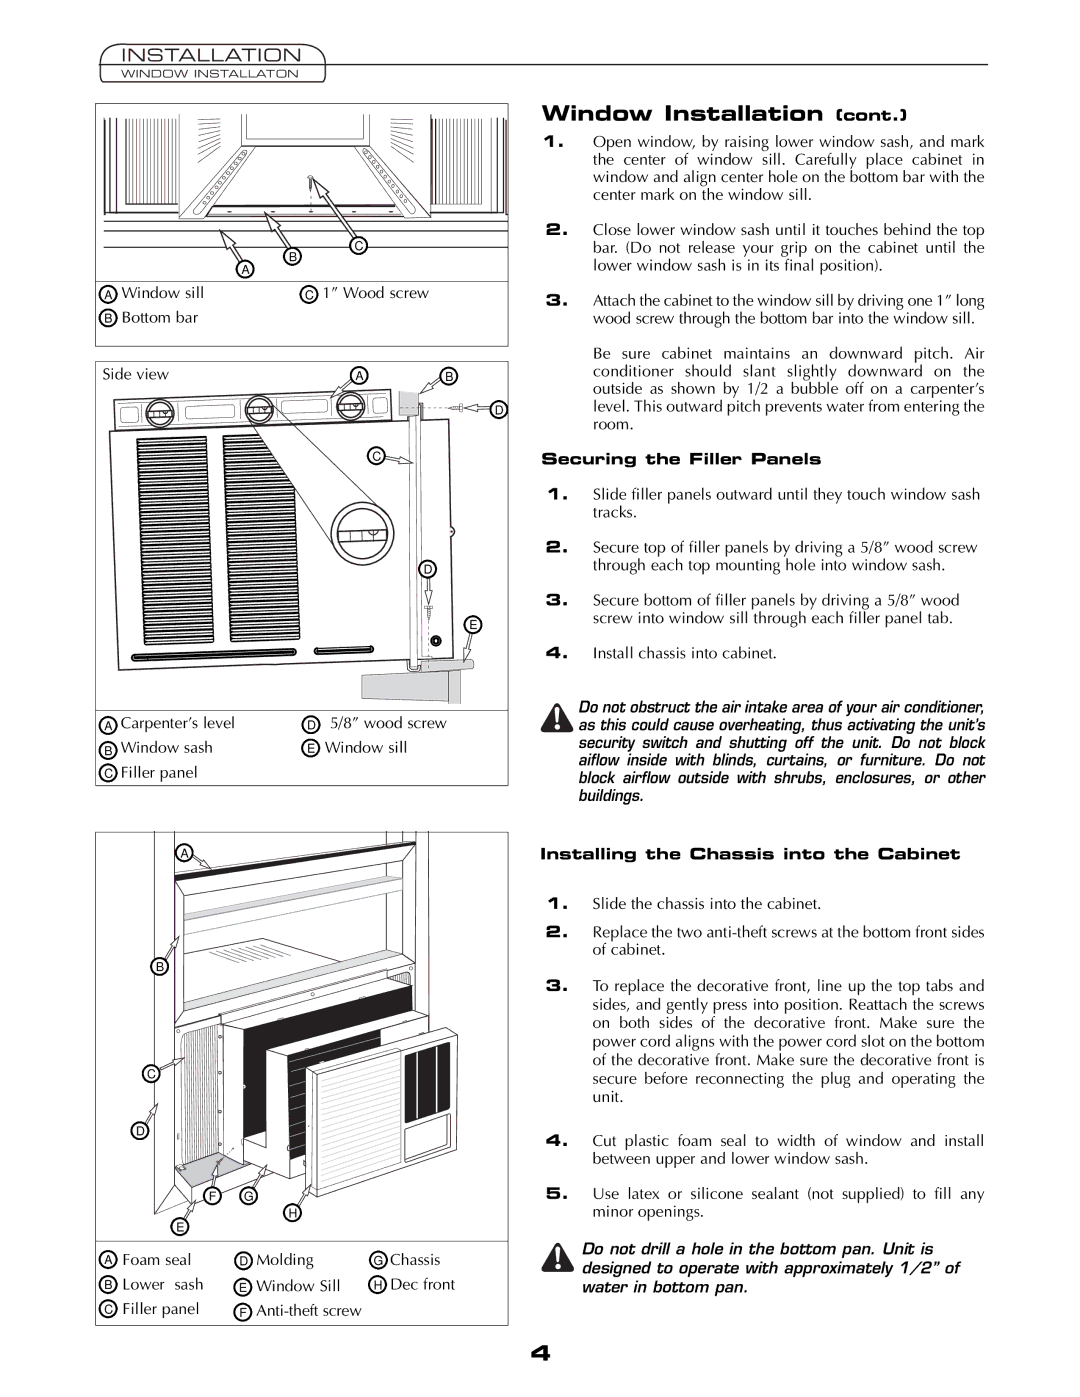
A | Window sill | C 1” Wood screw |
B | Bottom bar |
|
Side view |
| A | B |
|
|
| D |
|
| C |
|
|
|
| D |
|
|
| E |
A Carpenter’s level | D | 5/8” wood screw | |
B Window sash | E | Window sill |
|
C Filler panel |
|
|
|
A |
|
|
|
B |
|
|
|
C |
|
|
|
D |
|
|
|
F | G |
|
|
E | H |
|
|
|
|
| |
A | Foam seal | D | Molding | G Chassis |
B | Lower sash | E | Window Sill | H Dec front |
C | Filler panel | F |
|
Window Installation (cont.)
1.Open window, by raising lower window sash, and mark the center of window sill. Carefully place cabinet in window and align center hole on the bottom bar with the center mark on the window sill.
2.Close lower window sash until it touches behind the top bar. (Do not release your grip on the cabinet until the lower window sash is in its final position).
3.Attach the cabinet to the window sill by driving one 1” long wood screw through the bottom bar into the window sill.
Be sure cabinet maintains an downward pitch. Air conditioner should slant slightly downward on the outside as shown by 1/2 a bubble off on a carpenter’s level. This outward pitch prevents water from entering the room.
Securing the Filler Panels
1.Slide filler panels outward until they touch window sash tracks.
2.Secure top of filler panels by driving a 5/8” wood screw through each top mounting hole into window sash.
3.Secure bottom of filler panels by driving a 5/8” wood screw into window sill through each filler panel tab.
4.Install chassis into cabinet.
Do not obstruct the air intake area of your air conditioner, as this could cause overheating, thus activating the unit’s security switch and shutting off the unit. Do not block aiflow inside with blinds, curtains, or furniture. Do not block airflow outside with shrubs, enclosures, or other buildings.
Installing the Chassis into the Cabinet
1.Slide the chassis into the cabinet.
2.Replace the two
3.To replace the decorative front, line up the top tabs and sides, and gently press into position. Reattach the screws on both sides of the decorative front. Make sure the power cord aligns with the power cord slot on the bottom of the decorative front. Make sure the decorative front is secure before reconnecting the plug and operating the unit.
4.Cut plastic foam seal to width of window and install between upper and lower window sash.
5.Use latex or silicone sealant (not supplied) to fill any minor openings.
Do not drill a hole in the bottom pan. Unit is designed to operate with approximately 1/2” of water in bottom pan.
4