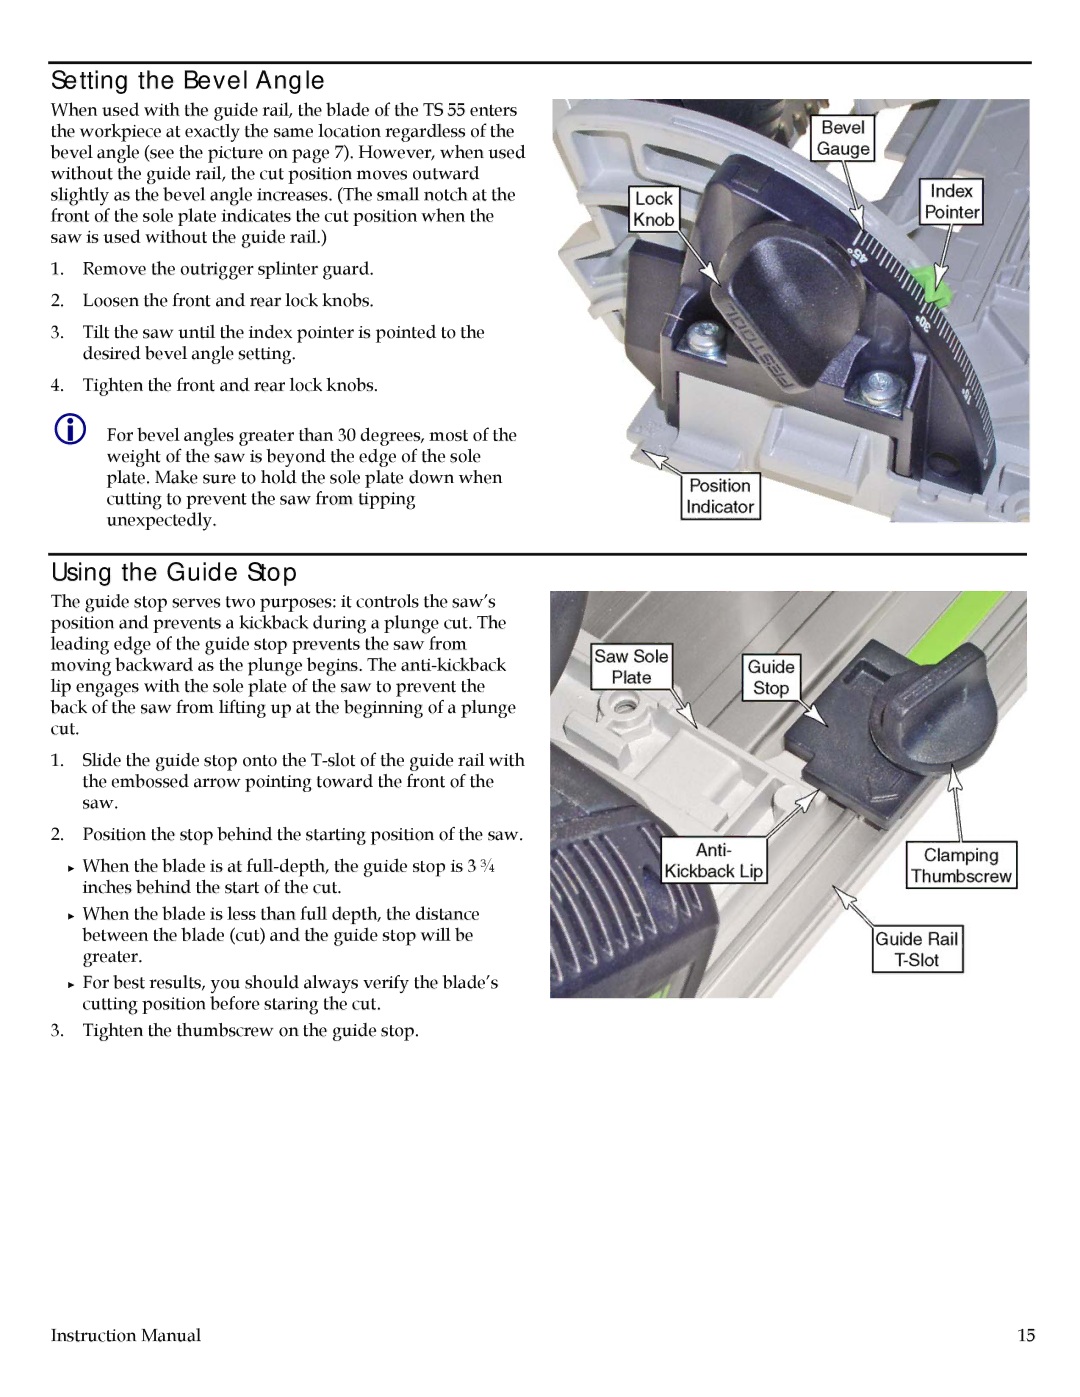
Setting the Bevel Angle
When used with the guide rail, the blade of the TS 55 enters the workpiece at exactly the same location regardless of the bevel angle (see the picture on page 7). However, when used without the guide rail, the cut position moves outward slightly as the bevel angle increases. (The small notch at the front of the sole plate indicates the cut position when the saw is used without the guide rail.)
1.Remove the outrigger splinter guard.
2.Loosen the front and rear lock knobs.
3.Tilt the saw until the index pointer is pointed to the desired bevel angle setting.
4.Tighten the front and rear lock knobs.
For bevel angles greater than 30 degrees, most of the weight of the saw is beyond the edge of the sole plate. Make sure to hold the sole plate down when cutting to prevent the saw from tipping unexpectedly.
Using the Guide Stop
The guide stop serves two purposes: it controls the saw’s position and prevents a kickback during a plunge cut. The leading edge of the guide stop prevents the saw from moving backward as the plunge begins. The
1.Slide the guide stop onto the
2.Position the stop behind the starting position of the saw.
►When the blade is at
►When the blade is less than full depth, the distance between the blade (cut) and the guide stop will be greater.
►For best results, you should always verify the blade’s cutting position before staring the cut.
3.Tighten the thumbscrew on the guide stop.
Instruction Manual | 15 |