Trimming the Outrigger Splinter Guard
The outrigger splinter guard is used to prevent chipping on the offcut side of the sawblade. The outrigger can be retracted away from the workpiece when not needed.
Before the outrigger splinter guard is used for the first time, it needs to be trimmed to fit the sawblade.
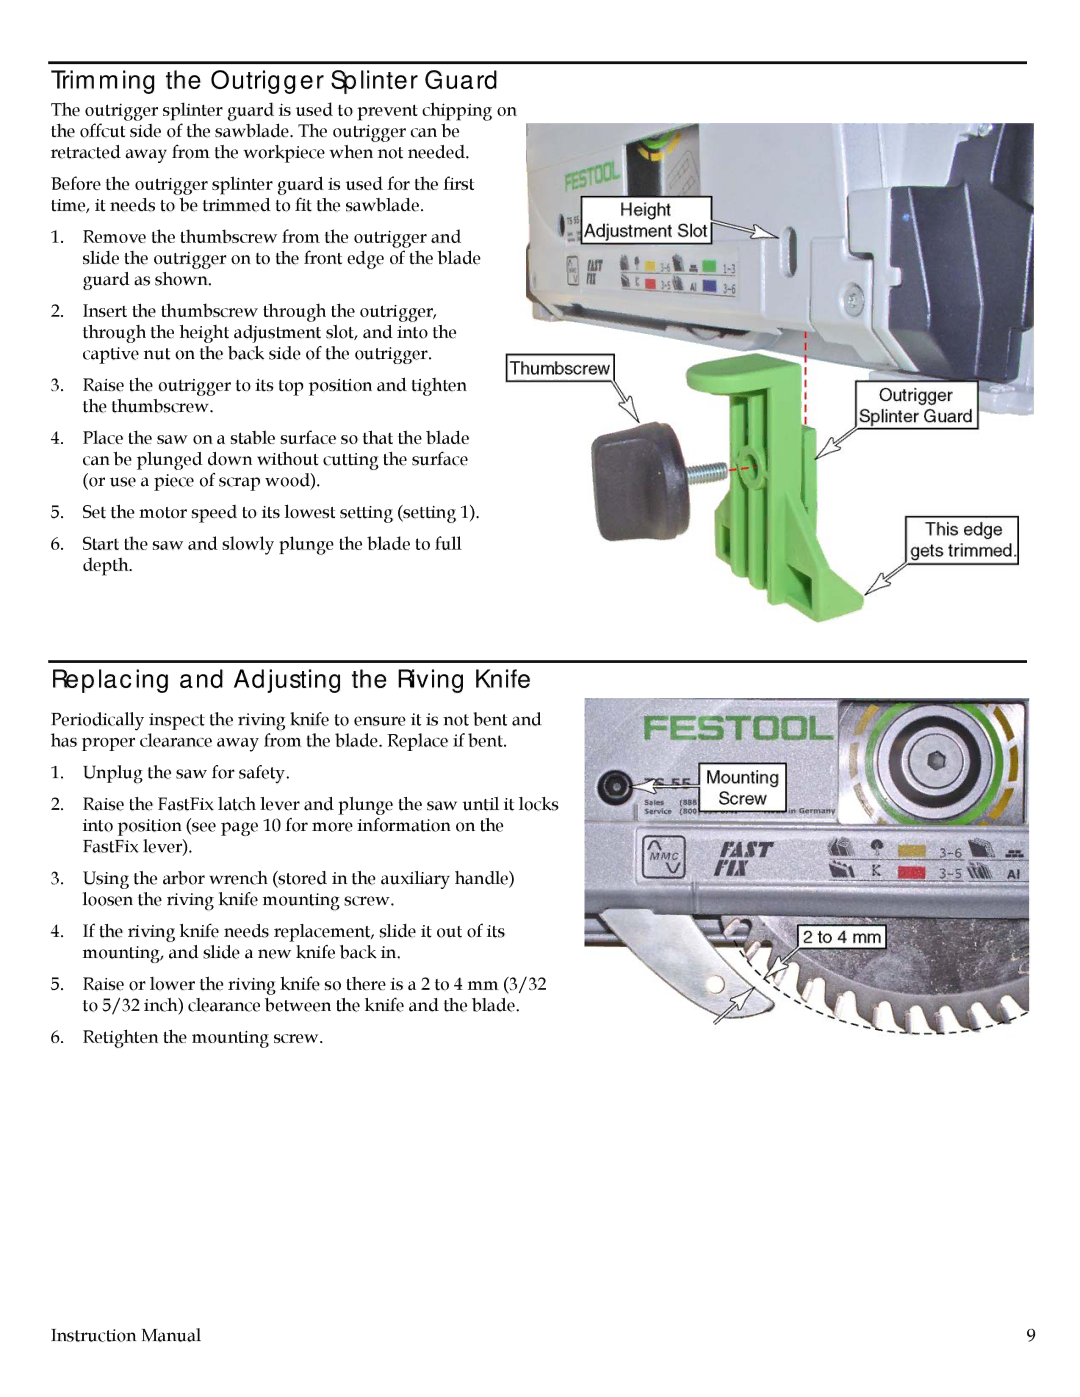
1.Remove the thumbscrew from the outrigger and slide the outrigger on to the front edge of the blade guard as shown.
2.Insert the thumbscrew through the outrigger, through the height adjustment slot, and into the captive nut on the back side of the outrigger.
3.Raise the outrigger to its top position and tighten the thumbscrew.
4.Place the saw on a stable surface so that the blade can be plunged down without cutting the surface (or use a piece of scrap wood).
5.Set the motor speed to its lowest setting (setting 1).
6.Start the saw and slowly plunge the blade to full depth.
Replacing and Adjusting the Riving Knife
Periodically inspect the riving knife to ensure it is not bent and has proper clearance away from the blade. Replace if bent.
1.Unplug the saw for safety.
2.Raise the FastFix latch lever and plunge the saw until it locks into position (see page 10 for more information on the FastFix lever).
3.Using the arbor wrench (stored in the auxiliary handle) loosen the riving knife mounting screw.
4.If the riving knife needs replacement, slide it out of its mounting, and slide a new knife back in.
5.Raise or lower the riving knife so there is a 2 to 4 mm (3/32 to 5/32 inch) clearance between the knife and the blade.
6.Retighten the mounting screw.
Instruction Manual | 9 |
