Replacing the Guide Rail Gib Cams
If the gib cams are over tightened, or the saw is used in an | ► Adjust the cams according to the procedure on page 8. |
environment with abrasive dust, the cams may develop flat |
|
spots and should be replaced. Maintaining proper |
|
adjustment and keeping the saw clean will increase the life |
|
of the cams. |
|
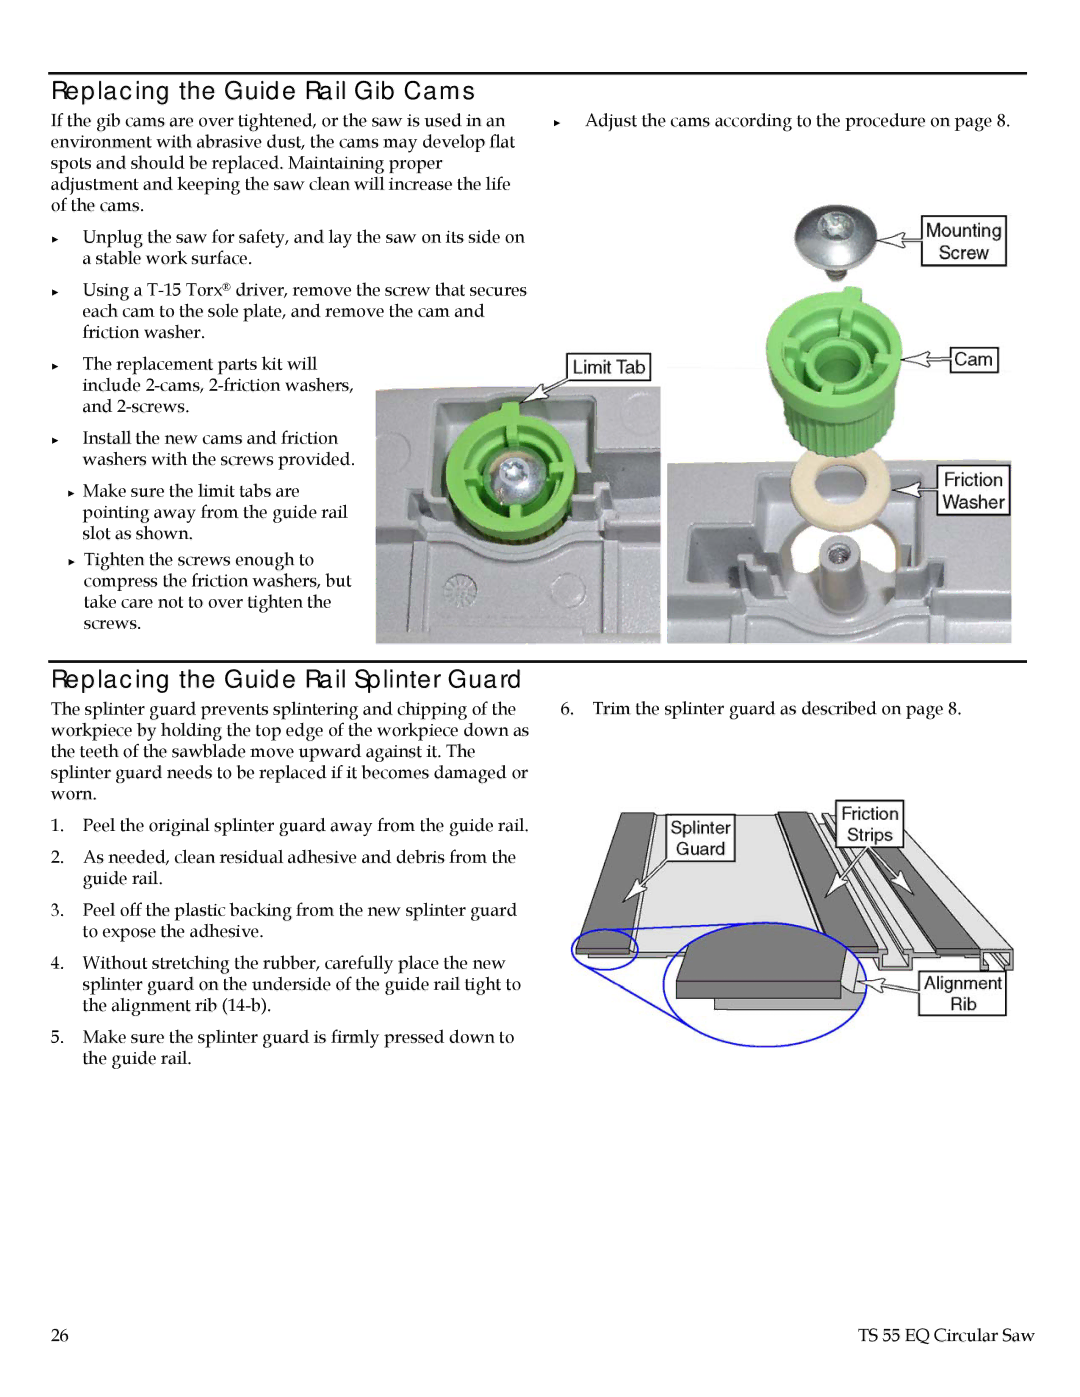
►Unplug the saw for safety, and lay the saw on its side on a stable work surface.
►Using a
►The replacement parts kit will include
►Install the new cams and friction washers with the screws provided.
►Make sure the limit tabs are pointing away from the guide rail slot as shown.
►Tighten the screws enough to compress the friction washers, but take care not to over tighten the screws.
Replacing the Guide Rail Splinter Guard
The splinter guard prevents splintering and chipping of the | 6. Trim the splinter guard as described on page 8. | |
workpiece by holding the top edge of the workpiece down as |
| |
the teeth of the sawblade move upward against it. The |
| |
splinter guard needs to be replaced if it becomes damaged or |
| |
worn. |
| |
1. | Peel the original splinter guard away from the guide rail. |
|
2. | As needed, clean residual adhesive and debris from the |
|
| guide rail. |
|
3. | Peel off the plastic backing from the new splinter guard |
|
| to expose the adhesive. |
|
4. | Without stretching the rubber, carefully place the new |
|
| splinter guard on the underside of the guide rail tight to |
|
| the alignment rib |
|
5. | Make sure the splinter guard is firmly pressed down to |
|
| the guide rail. |
|
26 | TS 55 EQ Circular Saw |
