REPLACEMENT ITEMS
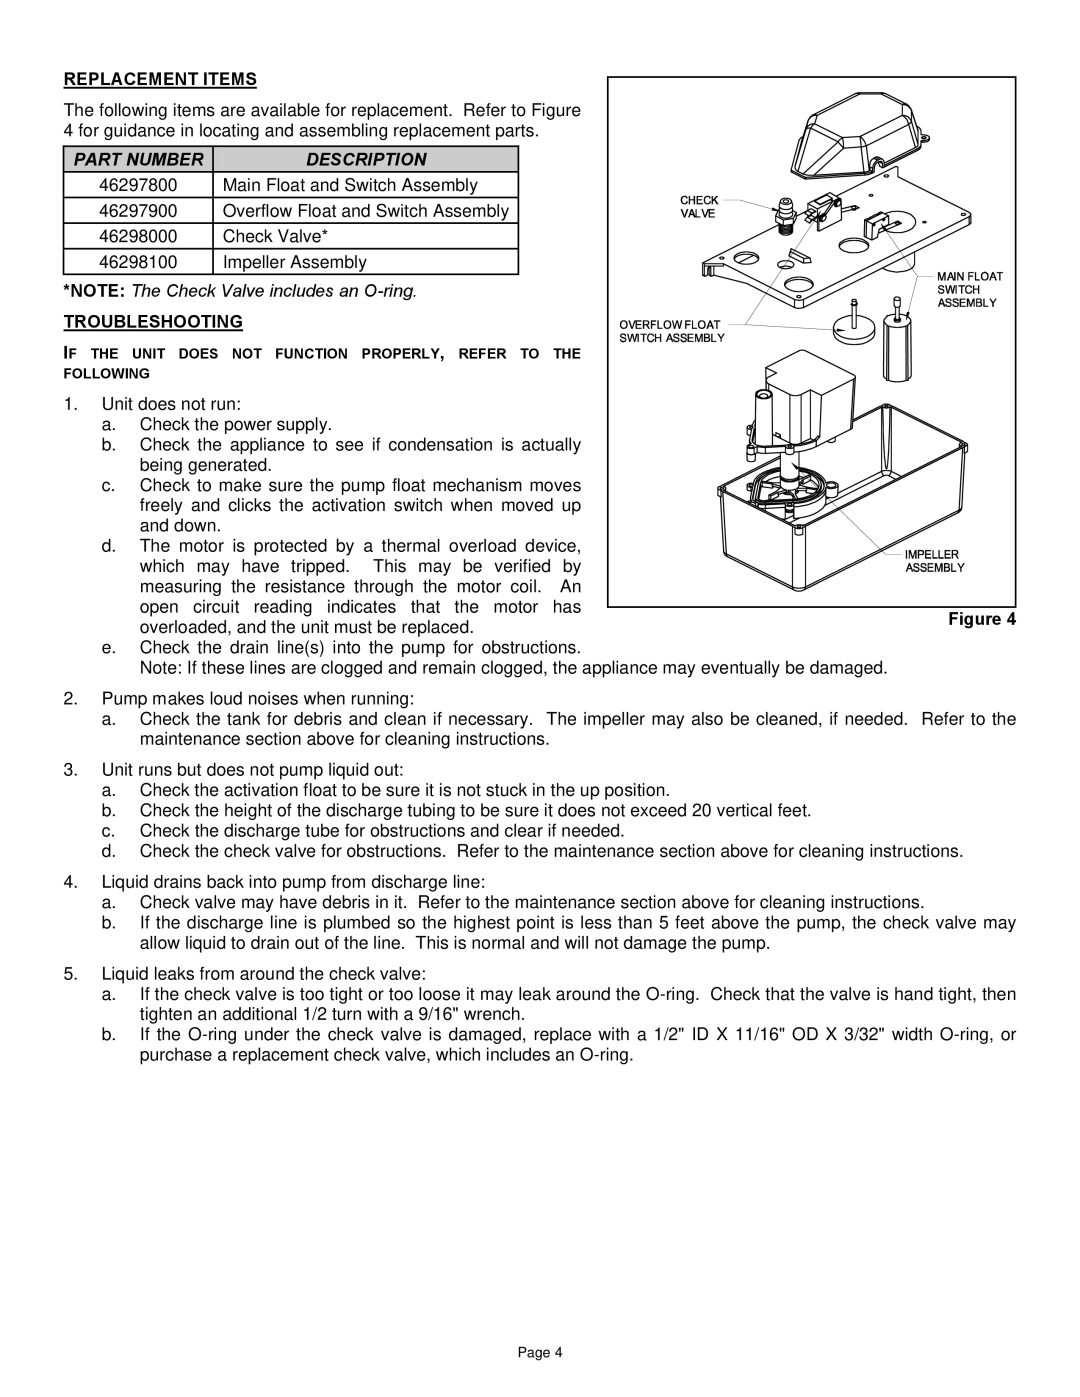
The following items are available for replacement. Refer to Figure 4 for guidance in locating and assembling replacement parts.
PART NUMBER | DESCRIPTION |
46297800 | Main Float and Switch Assembly |
|
|
46297900 | Overflow Float and Switch Assembly |
|
|
46298000 | Check Valve* |
46298100 | Impeller Assembly |
|
|
*NOTE: The Check Valve includes an
TROUBLESHOOTING
IF THE UNIT DOES NOT FUNCTION PROPERLY, REFER TO THE FOLLOWING
1. Unit does not run:
a. Check the power supply.
b. Check the appliance to see if condensation is actually being generated.
c. Check to make sure the pump float mechanism moves freely and clicks the activation switch when moved up and down.
d.The motor is protected by a thermal overload device,
which may have tripped. This may be verified by measuring the resistance through the motor coil. An open circuit reading indicates that the motor has overloaded, and the unit must be replaced.
e.Check the drain line(s) into the pump for obstructions.
Note: If these lines are clogged and remain clogged, the appliance may eventually be damaged.
2.Pump makes loud noises when running:
a.Check the tank for debris and clean if necessary. The impeller may also be cleaned, if needed. maintenance section above for cleaning instructions.
Figure 4
Refer to the
3.Unit runs but does not pump liquid out:
a.Check the activation float to be sure it is not stuck in the up position.
b.Check the height of the discharge tubing to be sure it does not exceed 20 vertical feet.
c.Check the discharge tube for obstructions and clear if needed.
d.Check the check valve for obstructions. Refer to the maintenance section above for cleaning instructions.
4.Liquid drains back into pump from discharge line:
a.Check valve may have debris in it. Refer to the maintenance section above for cleaning instructions.
b.If the discharge line is plumbed so the highest point is less than 5 feet above the pump, the check valve may allow liquid to drain out of the line. This is normal and will not damage the pump.
5.Liquid leaks from around the check valve:
a.If the check valve is too tight or too loose it may leak around the
b.If the
Page 4
