
CG604 specifications
The Fisher & Paykel CG604 is a standout in the world of cooking appliances, offering a perfect blend of functionality, aesthetics, and innovation. This gas cooktop is designed for both the serious home chef and casual cook, featuring four gas burners that provide precise heating for various cooking styles.One of the main highlights of the CG604 is its flexible burner configurations. The cooktop includes a powerful dual-wok burner, offering high heat for quick boiling and stir-frying. The additional burners come in different sizes, catering to everything from simmering sauces to boiling pasta. With precise flame control, users can easily adjust heat levels, ensuring that delicate recipes are executed flawlessly.
The CG604 is equipped with advanced technologies that enhance the cooking experience. It features a flame failure safety device, which automatically shuts off the gas supply if the flame is extinguished, ensuring safety in the kitchen. The cooktop also includes a quick ignition system, allowing for instant lighting of the burners.
The surface of the CG604 is made from high-quality, easy-to-clean stainless steel, coupled with durable cast iron trivets that provide stability and support for pots and pans. The trivets are designed for seamless movement, enabling users to slide cookware easily from one burner to another without lifting.
In terms of design, the Fisher & Paykel CG604 boasts a sleek and modern aesthetic, seamlessly fitting into any kitchen decor. Its minimalist design features smooth lines and a professional look, making it an appealing choice for contemporary kitchens. The cooktop's controls are conveniently located, ensuring easy access and operation for users.
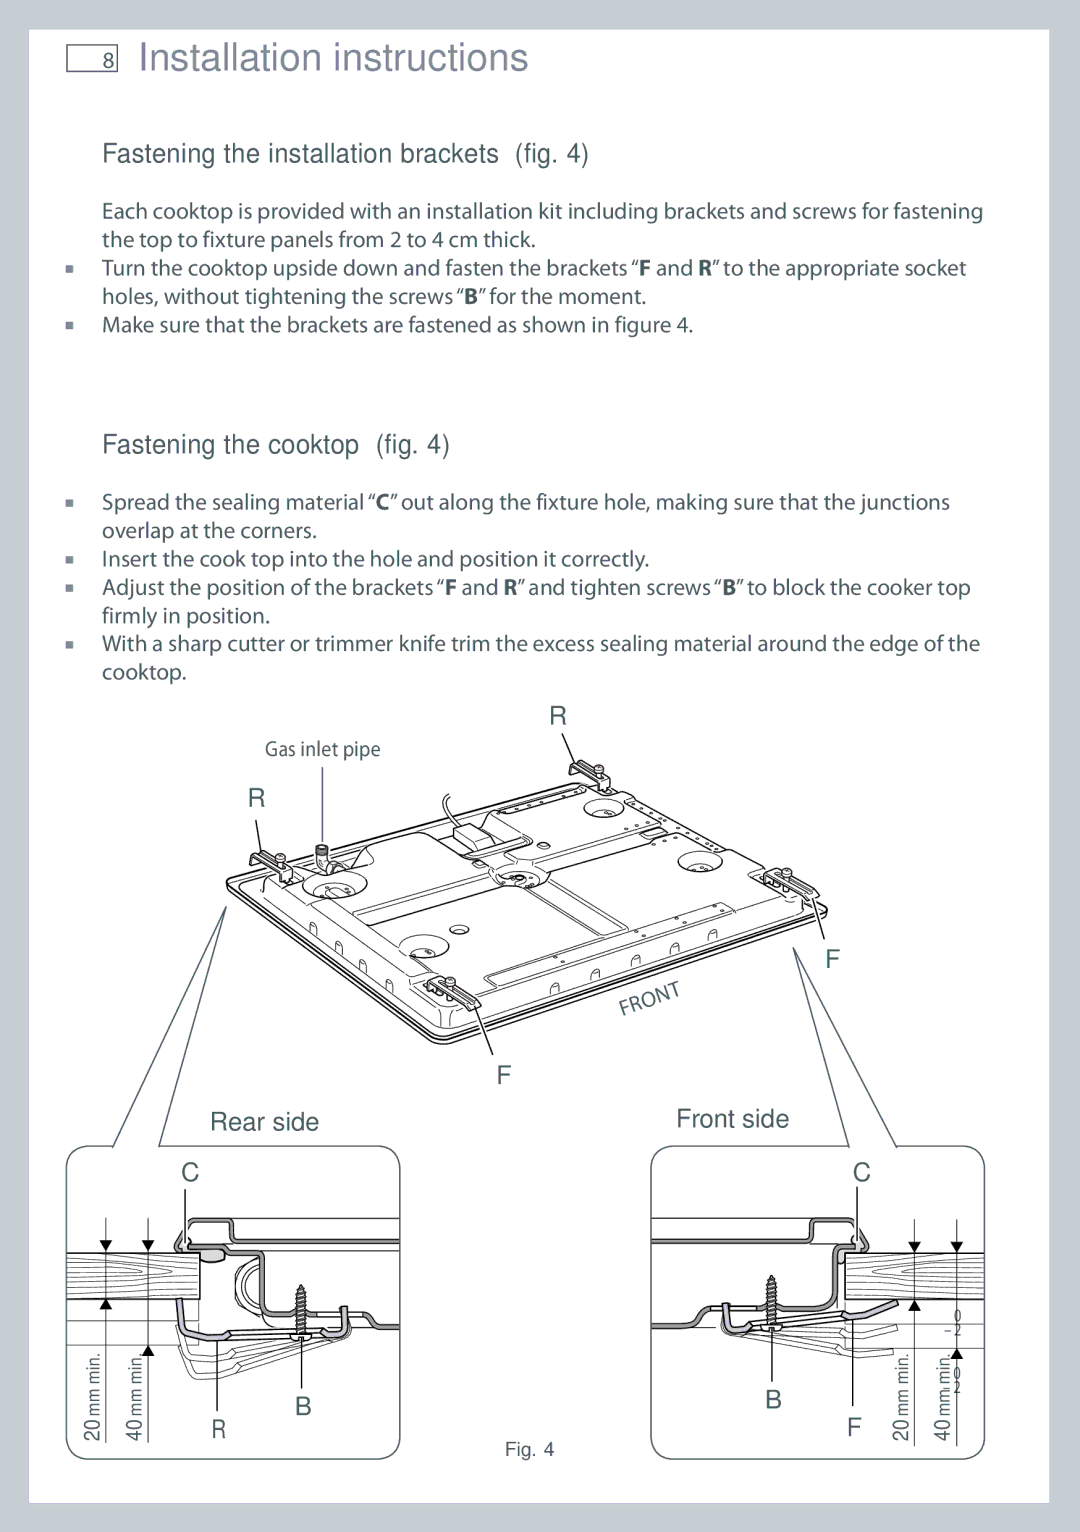
Furthermore, the CG604 is designed for easy installation and compatibility with various kitchen layouts. With its gas safety features and robust construction, this cooktop not only meets but exceeds industry standards, making it a reliable choice for home cooking enthusiasts.
Whether you’re boiling, sautéing, or roasting, the Fisher & Paykel CG604 cooktop offers versatility and control, making it an essential tool in any culinary arsenal. With its advanced technologies and elegant design, it elevates the cooking experience, allowing chefs of all levels to unleash their creativity in the kitchen.