OD302M, OS302M, OS302, OD302 specifications
Fisher & Paykel is renowned for its innovative appliances that blend cutting-edge technology with functionality, and their OD302, OS302, OS302M, and OD302M models are no exception. Designed to cater to the diverse needs of modern kitchens, these built-in ovens embody elegance and performance.The Fisher & Paykel OD302 and OS302 models stand out for their spacious interiors, offering a generous 85 liters of capacity. This makes them ideal for cooking large meals or multiple dishes at once. Both models feature multiple cooking functions, including bake, broil, and convection modes, ensuring versatility for every culinary endeavor. The convection feature circulates hot air throughout the oven, promoting even cooking and helping to reduce cooking times.
One of the defining characteristics of the OD302 and OS302 is their intuitive interface. With a sleek, easy-to-read display and simple touch controls, users can select cooking settings with minimal effort. The models also include a self-cleaning function, which utilizes high temperatures to burn off food residue, simplifying maintenance.
The OS302M and OD302M variants take things a step further with their advanced technologies and additional features. Both units incorporate active venting systems, designed to enhance airflow and improve cooking results. This technology helps to eliminate hot spots while maintaining consistent temperatures throughout the oven cavity.
In terms of design, all four models boast a contemporary aesthetic with stainless steel finishes, making them a stylish addition to any kitchen. Their flush installation ensures a seamless integration with cabinetry, while the soft-close door mechanism adds a touch of luxury.
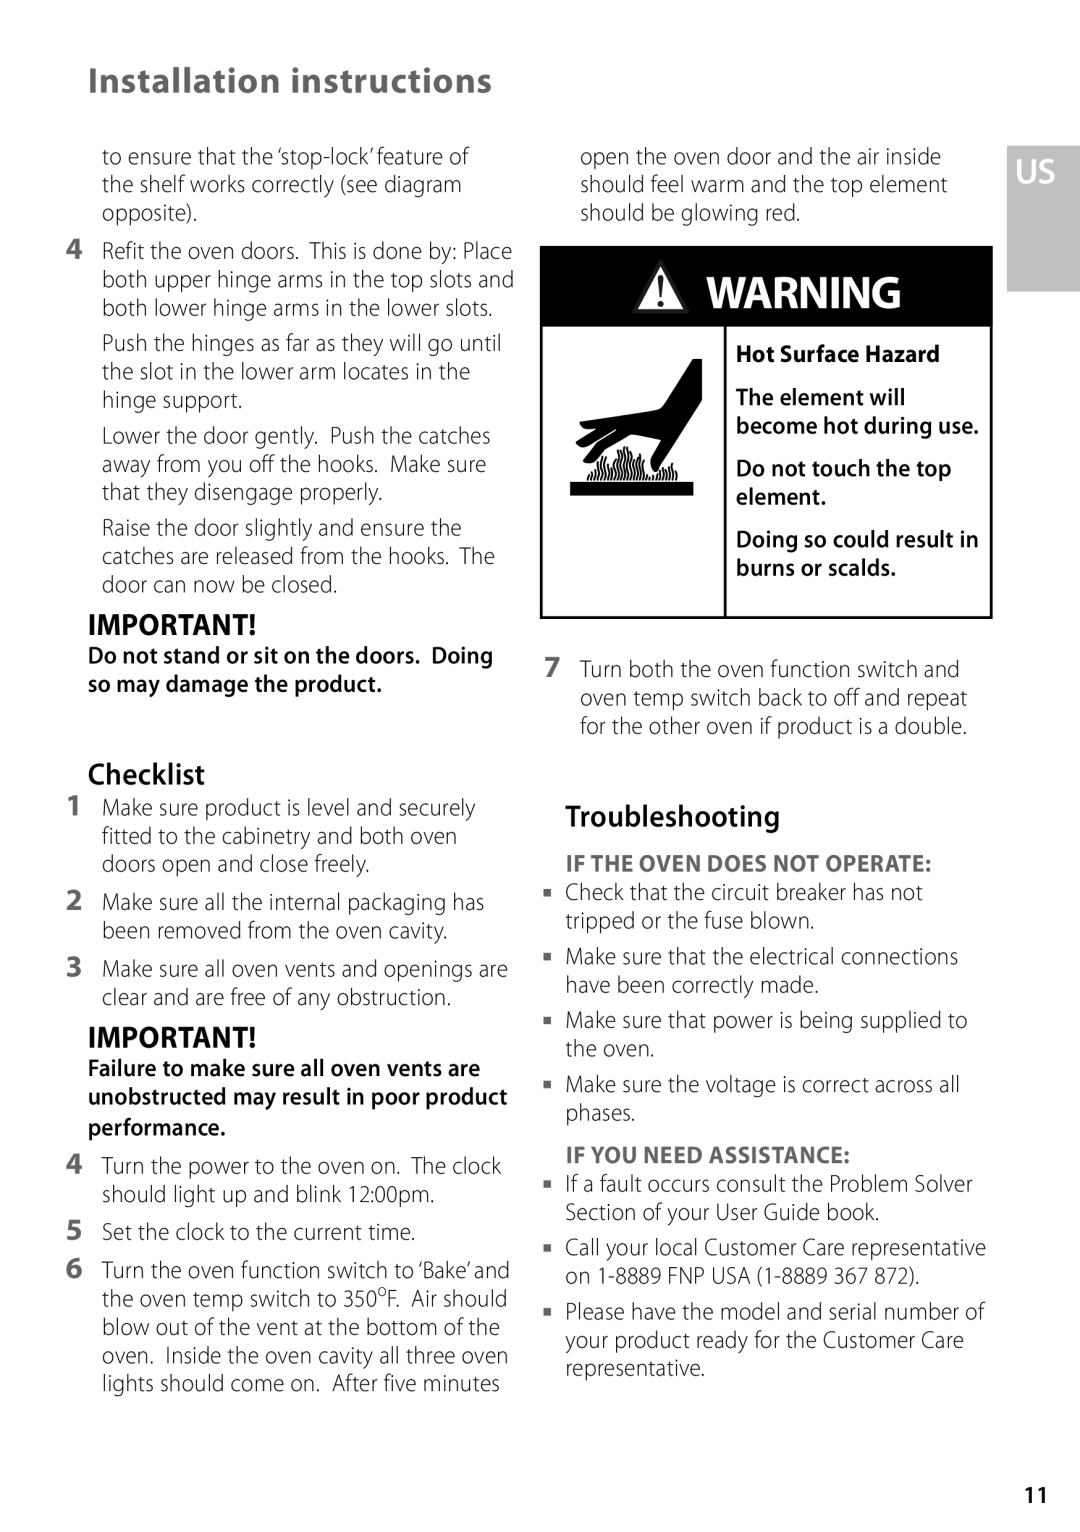
Safety is a crucial aspect of these models. They come equipped with features such as cool-touch ovens and triple-glazed glass doors that keep exterior surfaces cool, safeguarding against burns and accidents.
Another highlight is the Wi-Fi capability found in the OS302M and OD302M models, which allows users to monitor cooking progress remotely via a smartphone app. This feature enables cooking with confidence, ensuring perfect results every time.
Fisher & Paykel's OD302, OS302, OS302M, and OD302M ovens are perfect for home chefs looking for reliability, efficiency, and style, making them a valuable addition to any contemporary kitchen. Their blend of advanced technology, exceptional design, and user-friendly features underscores Fisher & Paykel's commitment to quality and innovation in kitchen appliances.