F
Adjusting the Brakes
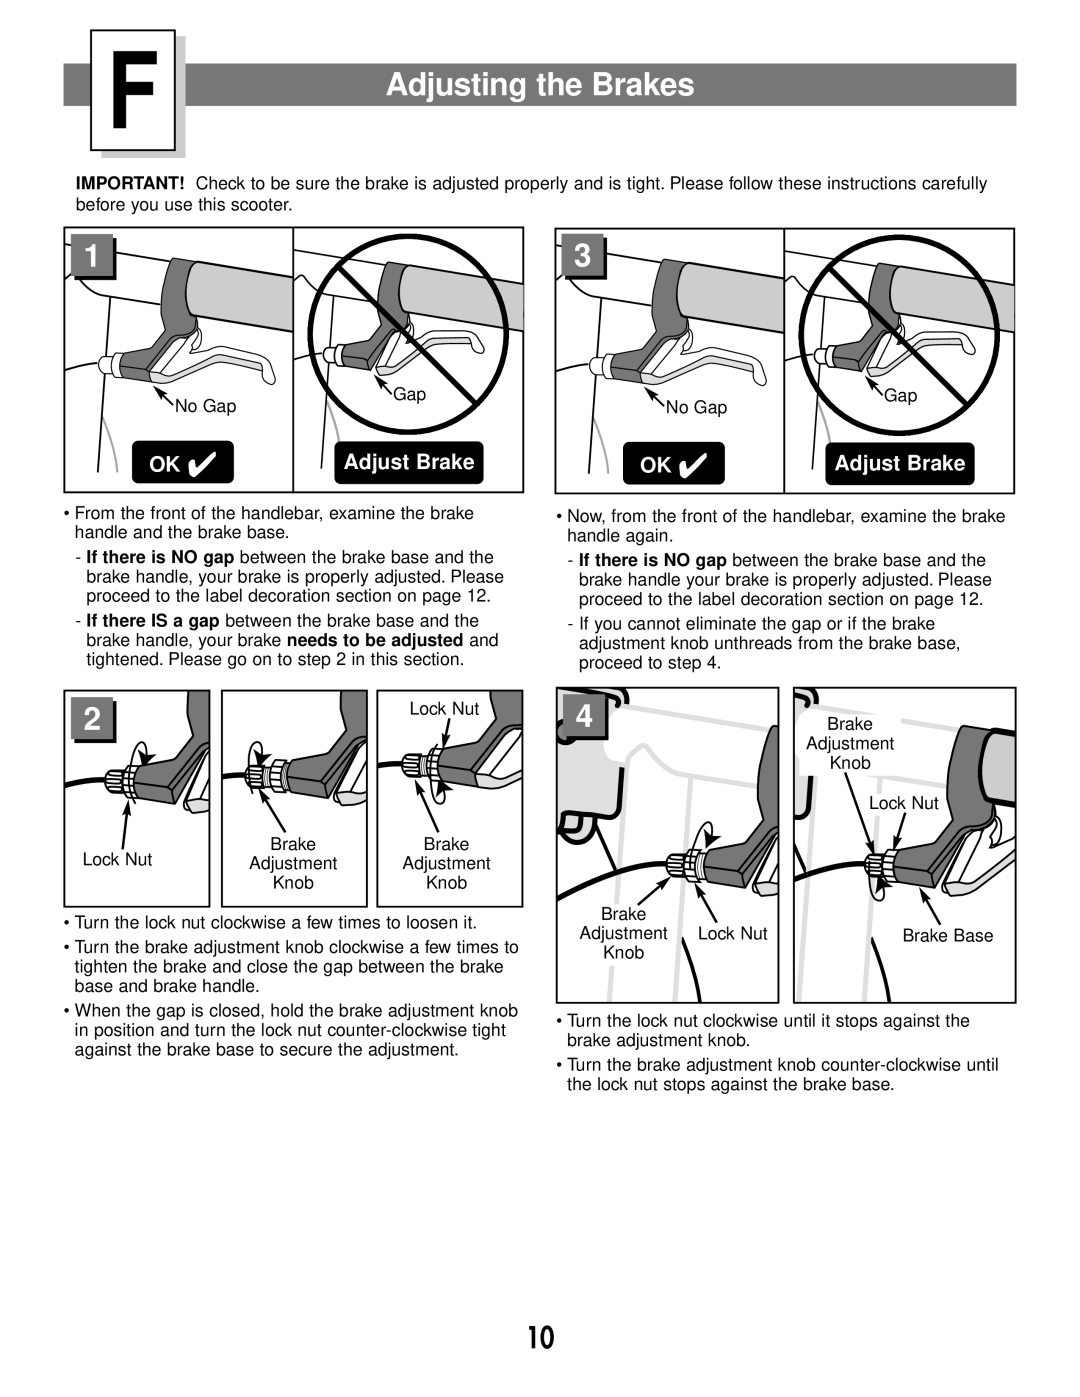
IMPORTANT! Check to be sure the brake is adjusted properly and is tight. Please follow these instructions carefully before you use this scooter.
1 |
|
No Gap | Gap |
| |
OK ✔ | Adjust Brake |
3 |
|
No Gap | Gap |
| |
OK ✔ | Adjust Brake |
•From the front of the handlebar, examine the brake handle and the brake base.
-If there is NO gap between the brake base and the brake handle, your brake is properly adjusted. Please proceed to the label decoration section on page 12.
-If there IS a gap between the brake base and the brake handle, your brake needs to be adjusted and tightened. Please go on to step 2 in this section.
•Now, from the front of the handlebar, examine the brake handle again.
-If there is NO gap between the brake base and the brake handle your brake is properly adjusted. Please proceed to the label decoration section on page 12.
-If you cannot eliminate the gap or if the brake adjustment knob unthreads from the brake base, proceed to step 4.
2
Lock Nut
Brake |
Adjustment |
Knob |
Lock Nut |
Brake |
Adjustment |
Knob |
4 |
Brake |
Brake |
Adjustment |
Knob |
Lock Nut |
• Turn the lock nut clockwise a few times to loosen it. |
• Turn the brake adjustment knob clockwise a few times to |
tighten the brake and close the gap between the brake |
base and brake handle. |
• When the gap is closed, hold the brake adjustment knob |
Adjustment Lock Nut |
Knob |
Brake Base |
in position and turn the lock nut |
against the brake base to secure the adjustment. |
•Turn the lock nut clockwise until it stops against the brake adjustment knob.
•Turn the brake adjustment knob
10